Showing posts with label MFT Card Challenge. Show all posts

Thursday, 14 March 2019

My Favorite Things "Bitty Bears" Wednesday Sketch Challenge


Hi everyone, thank you for stopping by. I hope you're having a great day.

So remember back in June when my part-time job went full-time? One of the other part-time people got a full-time job so we've had to hire a replacement for her. So far, I gotta say she's pretty awesome. Anyway, because she also has a full-time job, her training has to happen after hours, so on Tuesdays and Thursdays I'm at work until 9:00pm, but it kinda works out because I get to start later so I have some extra crafty time during the week! YAY!!!

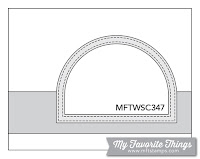
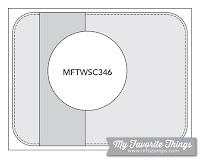
For today's card I'm working off the MFT Wednesday Sketch Challenge; each week they provide you with an inspiration sketch and you use your stuff to make a card, then enter it in the challenge. If you click on over to the Recognition page, or have been following my blog for a while, you'll know that I used to participate in challenges all the time, like dozens a month. But since going full-time I haven't really done as many because there just doesn't seem to be any time left in my day. This morning, I put together this card and will be submitting it to the challenge.

Hopefully this productivity continues.


To begin, I used Mermaid Lagoon, Peacock Feathers and Cracked Pistachio Distress inks along with my Lori blending brushes to create an ombre background.

I set that aside to dry then stamped the greeting and three of these adorable little bears from MFT's "Bitty Bears" stamp set with Memento Tuxedo Black ink on 110lb Copic-friendly cardstock and coloured them with Copic Markers.

I then used a stitched square die to cut out the little guys and one of the banner dies from MFT's Die-namics Blueprint #27 to cut my banner.

Once the background panel was completely dry, I adhered it to the front of my standard A2 sized card base and used foam tape to pop up the squares. The banner was adhered with 1/4" Scor tape to lay flat.

To finish off the card, I added a bit of sparkle to their noses and used a black gel pen over the eyes of each bear to make them stand out.

I hope you like today's card and are inspired to create something of your own. If you haven't already, please follow me on the right side bar, over on Facebook and on YouTube. Drop me a line in the comments section below and let me know what you think!


This card is for:

Friday, 16 March 2018

Have a Blast! Action Wobbler Card | ft MFT Stamps


Hi everyone, thank you for stopping by. I hope you're having a great day.

Today I have a cute card and video tutorial on how to make this action wobbler card using the "Space Explorer" set from My Favorite Things.


Or watch in HD on YouTube!!

Please check out the video above to see how I put this card together and to watch the action wobbler at work! I also talk about all the Distress Inks and Copic markers I used to create this card.


To begin, I created the galaxy background using Distress Inks. I then splattered it with clean water from my Distress Sprayer then again with Copic Opaque White for the stars.

I stamped the images from MFT "Space Explorer" set with Memento Tuxedo Black ink on 110lb Copic-friendly cardstock and cut them out using the Brother 2 Scan N Cut - you can see a video of the Scan N Cut in action here.

I coloured the images with Copic markers then put my card together. I used an action wobbler to put my little spaceman in place.

I stamped the greeting using Memento Tuxedo Black ink so that my blacks would match throughout the card.

To finish off this card, I added clear Wink of Stella over the window of the ship and on the spacesuit, then covered the window and the buttons with Glossy Accents by Ranger.

I hope you like today's card and are inspired to create something of your own. If you haven't already, please follow me on the right side bar, over on Facebook and now on YouTube! Drop me a line in the comments section below and let me know what you think.

This card is for:


Saturday, 26 August 2017

Happy Birthday Dragon | ft. MFT's "Magical Dragons"


Hi everyone, thank you for stopping by. I hope you are having a great day.

Not surprisingly, I was playing around with my MFT "Magical Dragons" set when the idea for this card came about. I wanted the dragon to appear in the cave and the knight to be approaching and then the dragon to be all like "Huh? what's going on?".  I think the expression on this guy's face really just says it all.


To begin, I trimmed down two strips of green cardstock and then used the Lawn Fawn "Grassy Border" die to make my grass. I then cut a large grey circle and a smaller black circle and trimmed their bottoms to create a cave.

I used some Broken China distress ink to add a bit of colour to the background sky.

I stamped the dragon and the knight from MFT's "Magical Dragons" stamp set with Memento Tuxedo Black ink on 110lb Copic-friendly cardstock and used my Brother 2 Scan N Cut machine to cut them out (click here for a first impressions review of the machine). I then coloured them with Copic markers.

I covered the knight with Spectrum Noir Sparkling Clear Overlay to make his armor shine. I love this pen, it sparkles so much in real life and it's even picked up by the camera!

To add some shading to the grass I used some Forest Moss Distress ink to darken it up some and some Hickory Smoke for around the grey of the cave.

I then used some regular tape runner to adhere everything together. I stamped the sentiment directly on the front of my standard A2 sized card base with Memento ink as well.

I hope you like today's card and are inspired to create something of your own. If you haven't already, please follow me over on the right sidebar so you don't miss any future posts, if you are viewing this on a mobile device, scroll to the bottom and click "View web version" first, you can also follow me over on Facebook. Toss me a line in the comments section below and let me know what you think.

This card is for:
MFT Sketch Challenge
Sketch Challenge 347 #mftstamps
Update: This card was selected as Winner of Sketch Challenge #347!! Can't seem to find a winner badge though

Saturday, 19 August 2017

Birthday Bear | ft. MFT's "Beary Special Birthday"


Hi everyone, thank you for stopping by. I hope you are having a great day.

Today I have a super sweet little bear who's just waiting for the party to start. While I've mentioned before that it was Lawn Fawn that got me going, MFT very quickly rose in the rankings for favourite stamp companies.

Their sweet little images are perfect for nearly any type of card and it is impossible to resist using them! It took a me a little bit to get my hands on this particular stamp set, but I started seeing these impossibly amazing cards and I couldn't hold out any longer.


To begin, I stamped the bear image with Memento Tuxedo Black ink on a piece of 110lb Copic-friendly cardstock. I ran that through my Brother 2 Scan N Cut machine (no more fussy cutting more me!!!) and coloured him in with Copics.

I used the Spectrum Noir Clear Sparkle Overlay on the balloon and covered that with Glossy Accents by Ranger.

While he was drying I stamped the party hat and the pile of gifts on a narrow strip of the same paper. I used Twisted Citron Distress ink to shade the background and then coloured the images in with Copics.

I trimmed down another piece of cardstock and used my half inch corner rounder to soften those edges. I then used Milled Lavender Distress ink to add a bit of colour and then my Gelly Roll black glaze pen to add some stitching detail.

I adhered down the strip, and stamped my greeting. Then I popped the little bear up on some foam tape and placed him down.

Finally I adhered the whole piece to the front of a standard A2 sized card base.

I hope you like today's card and are inspired to create something of your own. If you haven't all ready, please follow me over on the right side bar so you don't miss any future projects. If you are viewing this via mobile device, scroll to the bottom and click "View web version" first. You can also follow me on Facebook. Toss me a line in the comments section below and let me know what you think.

This card is for:
My Favorite Things
Sketch Challenge 346 #mftstamps

Crafty Animals

Thursday, 10 August 2017

Pastel Paradise | ft. MFT "Polynesian Paradise"


Hi everyone, thank you for stopping by. I hope you are having a great day.

When I get a new set, I'm typically after the big piece. The main stamp and my scene will be built around it; but those little stamps, that sit back and mind their own business can really come into their own light when you 'forget' about the big one. I've been challenging myself to use some of the littler pieces in a set to create something without the fanfare of the main image.


To begin, I cut a grey frame using two of my nested circle dies. I then cut a circle using 110lb Copic-friendly cardstock and the larger die to create my window piece. I had considered doing an acetate overlay here, but I discarded the idea later.

For all the stamping I used CTMH Whisper ink. This is a dye based ink, so as long as you are careful you can use your Copic markers with it. This was a new discovery for me and it opens up so many doors of opportunity. I am no longer tied to a black outline. I literally have dozens of the CTMH inks and since I use Copics more than anything else, there are few cards I'd like to recreate with a softer edge.

For the flowers I stamped the small hibiscus flower from MFT's "Polynesian Paradise" and masked a couple off so that they would look like a bouquet. I also stamped the little lizard from the same set, but I used the mirror stamping technique so he would face the other way and work with what I had in mind.

Because this is also for a color challenge, I had a very limited palette to work with. Their colours this week were Aqua, Light Pink, Lavender and white - and you can pick a neutral so I chose the grey.

After coloring all the images, I covered the blossoms with clear Wink of Stella because it has to sparkle! (I used my BV markers for the Lavender, BG markers for the Aqua and my lightest R markers for the Light Pink.)

I masked the right side of the panel off except for just over an inch and used Glacier CTMH ink, when looking at my swatches, it was the closest to an Aqua colour that I have.

To put the piece together, I adhered the panel to an A2 sized card base, then I used Tombow Mono Multi Glue to put the circle in place and foam tape for my little chameleon. I used the same Whisper ink to stamp the Birthday greeting (from MFT's "The Whole Herd").

I hope you like today's card and are inspired to create something of your own. If you haven't all ready, please follow me over on the right side bar so you don't miss any future posts. If you are viewing this via mobile device, scroll to the bottom and click "View web Version" first. You can also follow me over on Facebook. Toss me a line in the comments section below and let me know what you think.

This card is for:
Sketch Challenge 345 #mftstamps


and 

My inspiration came from the colours in the picture.

Monday, 7 August 2017

Bubble Birthday | ft. MFT's "PI - I Pick You"


Hi everyone, thank you for stopping by. I hope you are having a great day.

I personally find sketch challenges very difficult. I'm not entirely sure why. Maybe because I'm such a fan of one layer cards (as you may have noticed) and when it comes to a sketch I feel a need to multiple layers and pattern paper and all sorts of things that I'm not usually comfortable with.

But isn't that really the point of these challenges? To challenge us? I hope so, 'cause that's what's happening for me. And it's a good thing. It breaks me out of my comfort zone and forces me to try new things.

And sometimes, just sometimes, new things are wonderful.


To begin, I used the largest of Lawn Fawn's Stitched Scallop Border Dies to cut down the right edge of my panel.

I then stamped the image and greeting from MFT's Pure Innocence - I Pick You stamp set using Memento Tuxedo Black ink on 110lb Copic-friendly cardstock. I then coloured the image in with Copics and coordinate with the bubbles on the patterned paper.

The patterned paper comes from a stack in my stash that has long since lost it's cover, so I'm not sure what brand it is.

I then adhered a 1/2" and a 1/4" strip of the patterned paper directly on to the panel, and popped the panel up on foam tape. For the right side, I put a piece of the same patterned paper down directly on the A2 sized card base, and then put the panel down on top of that.

I hope you like today's card and are inspired to create something of your own. If you haven't all ready, please follow me over on the right side bar, if you are viewing this via mobile device, scroll to the bottom and click "View Web Version" first. You can also follow me over on Facebook. Toss me a line in the comments section below and let me know what you think.

This card is for:

and

Simon Says Stamp

Saturday, 29 July 2017

Mermazing Day | ft. MFT's "Mermazing" Stamp Set


Hi everyone, thank you for stopping by. I hope you are having a great day.

Today I wanted to create something that was clean and simple, but still had depth. When I got the Mermazing set I couldn't stop thinking of ideas that I could do with these stamps. Each of the three mermaids seem to have a life of their own. So here she is, maybe showing you out her window to her view or maybe standing (floating?) near a piece of art that she had created. Either way, she looks pretty proud of it. LOL


To begin, I used my two largest nesting oval dies and cut out a few frames from regular cardstock and then one from a shimmering purple cardstock.

I stamped the mermaid from MFT's "Mermazing" set with Memento Tuxedo Black ink on 110lb Copic-friendly cardstock and coloured her in with Copic markers. I went over her tail several times with my clear Wink of Stella glitter brush pen. I really wanted her tail to shine. And while the camera certainly picked it up, let me tell you, this girl sparkles! in real life.

With one of the inner ovals, I stamped the rock and masked it off. I then used Salty Ocean and Tumbled Glass Distress inks to create a watery background. Once that was completely dry, I used the solid scene builder elements from the set to stamp the fishes, kelp and coral.

I did these in the MISTI because I was afraid I would have to restamp them multiple times and I can't line up a stamp to save myself. I don't know why. I have tried and tried and tried, so TG for the MISTI. I used CTMH Whisper ink for the fishes, Olive ink for the Kelp, Sorbet and Goldenrod for the coral.

I then removed the mask and used Copics to colour the rock.

To put the piece together, I placed the oval with the image first, then I built up my frame around it, making sure that each of the four layers had an opportunity to dry before adding the next one. I then adhered the mermaid with Tombow Mono Multi glue where she touches the frame and foam tape where she hangs off.

I then adhered that panel on to a piece of the same shimmering purple cardstock for a frame (just to tie the whole thing together) and then to a standard A2 sized card base. I added some Glossy Accents by Ranger to her starfish hair clip and went over her tail one more time with the clear Wink of Stella. Because I can never have anything too sparkly!

I hope you like today's card and are inspired to create something of your own. If you haven't all ready, please follow my blog over on the right sidebar so you don't miss out on any future posts, if you are viewing this via mobile device, scroll down and tap "View Web Version" first. You can also follow me over on Facebook. Toss me a line in the comments section below and let me know what you think.

This card is for:
Sketch Challenge 343 #mftstamps

Thursday, 27 July 2017

Bunch of Thanks | ft. Lawn Fawn "Critters in the Jungle"


Hi everyone, thank you for stopping by. I hope you are having a great day.

If you have been following me for any time at all, you'll know that I love to do a single layer card. For me it is simply magic to pull away the masks and watch a piece come together. That being said, I can do other stuff. I don't typically buy the coordinating dies when it comes to stamp sets, so because I do have the matching die set, I figured I should probably use it.


To begin, I stamped all of the images from Lawn Fawn's "Critters in the Jungle" stamp set using Memento Tuxedo Black ink on 110lb Copic-friendly cardstock. I coloured them all in using Copic markers and die cut them out with the coordinating dies.

For the background panel, I cut down a piece of Strathmore Bristol Smooth cardstock, and dry embossed an oval using my largest oval die. While the die was still in place, I used Shabby Shutters Distress ink to create a light wash of colour over the background. I used a 1/2" corner rounder to round all the edges.

I then used Tombow Mono Multi glue to adhere all my little pieces into place. For the greeting I prepped a piece of black cardstock with my powder tool and stamped the "Thanks a Bunch" sentiment with VersaMark ink and heat embossed it with detail white powder.

I cut fishtail banner ends and adhered it down. I then used the same corner rounder to round out the ends of an A2 sized card base and adhered the panel down.

I hope you like today's card and are inspired to create something of your own. If you haven't all ready, please follow me over on the right side bar so you don't miss any future posts. If you are viewing on a mobile device, scroll to the bottom and tap View Web Version, first. Toss me a line in the comments section below and let me know what you think.

This card is for:

Wednesday, 20 April 2016

Thinking of You | Wreaths and Flowers


Hi everyone, thank you for stopping by. I hope you are having a great day.

As soon as I saw this sketch, I knew exactly what I wanted to do. I had to dig down deep in the ol' stamp stash to find the wreath, but I knew it was there. (Who says hoarding is bad, c'mon people!)

I had originally planned to cover the wreaths with flowers, but after setting them out it really didn't look as awesome as I had thought it would. Soooo, I went with a less is more, (but not too much less).


To create today's card, I began by stamping the wreath in three shades of green. I then stamped the flowers on Copic friendly paper and colouring them in. I didn't want the black outlines, so I used CTMH Whisper ink for the stamping. (Be very careful when stamping an image you plan to use Copic markers with as the ink may smear, so practice or use an incredibly light hand.)

I fussy cut the images out, and scattered them across the card, adhering them with Ranger's Multi Matte Medium. Once they were set, I used clear Wink of Stella to add some shine. Unfortunately, the photo doesn't pick it up all that well.

The greeting is stamped with Memento Tuxedo Black ink. To finish the card I used a few sparkling enamel dots, and a stripe of glitter along the left boarder.

I hope you like today's card and are inspired to create something of your own.

This card is for:

Tuesday, 23 February 2016

Happy Day - Happy Birthday


Hi everyone, thank you for stopping by. I hope you are all having a great day.

Isn't it funny how you think you're ahead of the game, then all of a sudden you need so many cards, none of which you've been stocking up on? That's what is happening to me right now.

I have been working so hard to replenish my "Thank You" card stash, and somewhere along the way, I ran out of birthday cards. Oops!


To create this card, I used an old technique that is new to me. I stamped the flowers on medium weight cardstock, then used ink pads and a blender pen to colour them in. At first it looked terrible, but once the blending solution dries, the flowers took on a soft look that I was super pleased with.

I heat embossed the greeting using white embossing powder on a piece of vellum. I adhered it down across my panel, and then used foam dots to pop up the flowers.

I thought the card needed a little something extra (shocking, right?) and added a scattering of yellow sequins.

I hope you all like the card for today and are inspired to create something of your own.


Today's card is for:
The My Favorite Things Sketch Challenge 268.

Friday, 12 February 2016

Valentine's Day 2016 Series - Card 16


Hi everyone, thank you for stopping by. I hope you are all having a great day.

As it turns out, I was far more inspired by the sketch challenge than I expected. So here is a second sketch card and the sixteenth in the 2016 Valentine's Day series!


To create this card I die cut two tags out of regular layering weight cardstock. I then adhered them together to give them a bit more stability. I wanted to make sure that this tag would hold up when I added layers of ink. 

I used three shades of distress ink to create an ombre look. After the tag was completely dried I stamped the little "I love you" greeting.

I stamped the elephant on heavy weight cardstock with Memento Tuxedo Black ink, and coloured him with copics. I don't have coordinating dies for this set, (are there coordinating dies for these guys?) so I fussy cut him out, and popped him up on foam tape.

The heart is from a previous project, I covered it with clear Wink of Stella and then with glossy accents. The string is a bit of sparkly thread that I tied around the bottom part of the balloon and wound loosely behind the elephant.

I hope you all like the card for today, and are inspired to create something of your own.


This card is for:

Thursday, 11 February 2016

Valentine's Day 2016 Series - Card 14


Hi everyone, thank you for stopping by. I hope you are all having a great day.

When I saw the sketch inspiration for this week's MFT Sketch Challenge, I instantly knew what I wanted to do. This card came together incredibly quickly, which was fabulous because generally I have to mull over a challenge for at least a day.

While most of my cards have stamping and colouring, glitter, gloss and shine, I really loved how clean this card turned out.  And really, you can't go wrong with black, red and white.


To create this card I die cut a tag from deep red cardstock. From that I cut out a heart piece and set that aside for another project.

I die cut the butterflies from black cardstock and adhered them down to appear as though they were flying away.

For the greeting, I used a CTMH stamp and then cut down the white piece. I then layered the strip on the same red and black cardstock to give it a bit of dimension.

I hope you all like today's card and are inspired to create something of your own.


This card is for:
MFT Sketch Challenge #267

Monday, 8 February 2016

Little Birthday Shaker


Hi everyone, thank you for stopping by. I hope you are all having a great day.

When I began this card, I had originally planned to make a Valentine's Day card. However, things don't always work out the way we planned. Which is one of the things I like best about art and card making. I enjoy when a project seems to take on a life of its own.

It doesn't mean that the original plan was a bad one, it just means that the creative gears took it in a different direction. The plan is still there in the back of my head and perhaps I will still make a Valentine's Day card that is similar, but for now I have this lovely birthday card.


To create this card, I began by using the stitched cloud boarder as a mask and sponging upward to create the clouds. I worked from the top of the panel downward. I then used the grassy boarder die to create another mask, and sponging with green to create a grassy area. 

I used Mowed Lawn and Bundled Sage to give the illusion of depth, unfortunately I think there was a bit too much of a difference in the colours. 

After the panel was dry, I used the heart balloon die to create the area for my shaker, I saved the cut out piece so I could put it behind the window to make the balloon look clear. I used the fuse tool to create the shaker pocket. 

I stamped the girl with Memento Tuxedo Black ink and coloured her with copics. 

The balloon string is a piece of black baker's twine.

I hope you all like the card and are inspired to create something of your own.

This card is for:


Friday, 22 January 2016

Birthday Critters

Hi everyone, thank you so much for stopping by, I hope you are all having a great day!

It doesn't really matter what time of year it is, there is always a need for birthday cards. I wanted to create a card that could be suitable for almost anyone!


The critters are coloured with copics on 110lb cardstock, I stamped them with memento tuxedo black ink, then masked them off. I then masked off the top and the bottom of the card so I could sponge on the background strip. After colouring the critters I used wink of stella clear on the balloons and the party hats and then used glossy accents on the balloons and the little beaks.

I just love the way the glossy accents really makes the shimmer come through. By far one of my favourite things to do!


This card is for the following challenges:


Hope you all like this card, and that it inspires you to create your own.

Don't forget to follow this blog using the blue button on the right sidebar!


Friday, 15 January 2016

All About You Birthday


Hi everyone, thanks so much for stopping by today. 

Today's card is for the MFT Sketch #263 Challenge. This is the first of their challenges that I have participated in, and to be honest, I'm not entirely sure why I haven't played along before.


The challenge group provides you with a sketch to draw inspiration from. This week the sketch is pretty clean and simple.

At first I was terribly intimidated by these sketch challenges, for whatever reason I thought I would have to come up with something completely unique but use the sketch EXACTLY AS SHOWN.

It was only once I realized that the sketch is there to provide guidance and inspiration for me to create something unique.

I can't even tell you how much the designers and guest designers have helped to inspire me and make me feel more comfortable with my particular type of card making.


To create this card, I cut the front panel down to 5 x 3 3/4", I then stamped the flowers and masked them off. I then masked off the top and the bottom portion of the panel. The background was created with distress inks and the flowers are coloured with copics.

Thank you all for stopping by, and I hope you like my take on sketch #263!