Showing posts with label SSS Monday Challenge. Show all posts

Tuesday, 24 October 2017

Rustic Thanks | ft. Lawn Fawn "Stitched Leaves" Dies


Hi everyone, thank you for stopping by. I hope you're having a great day.

Remember when we all first started out and punches were like the coolest thing? Punches and stickers and those scissors with the funky cutting edges. Today I wanted to share a card that doesn't have any image stamps or colouring.

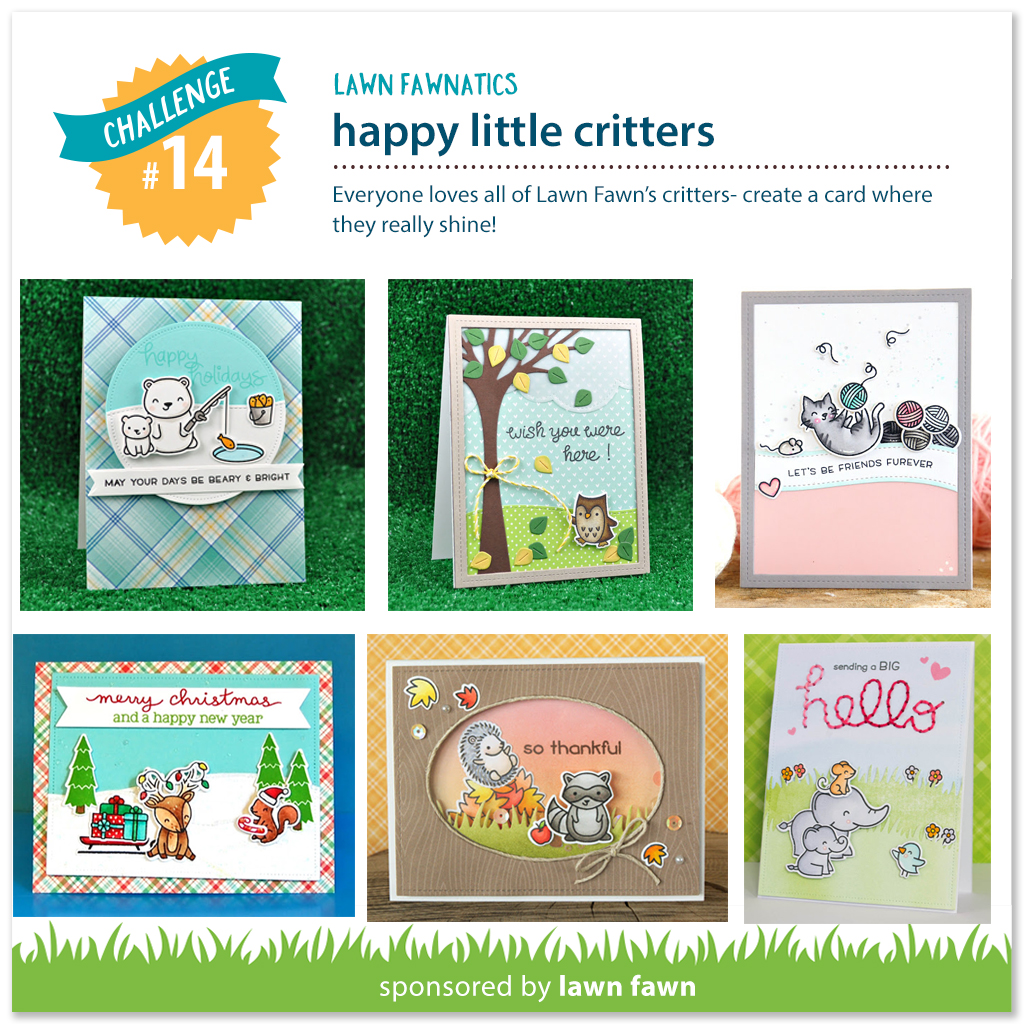
Today's card features the "stitched leaves" dies from Lawn Fawn and two paper punches. One from Martha Stewart and the other from Recollections. Sometimes it's fun to take a step back from everything we do right now and try something that we would have done years ago.


To begin, I die cut all of the leaves using Lawn Fawn's "Stitched Leaves" dies out of Kraft cardstock by Recollections. I also punched out four of the daisies (Recollections) and three of the leafy fronds (Martha Stewart) out of the same cardstock.

I then used Distress inks and CTMH pigment inks to add some colour to the leaves. For the pigment inks I used a finger dobber as I wanted a more stippled look instead of the smooth blend that I get from the sponging tool and the Distress inks.

I set those aside to dry, and used the finger dobber and CTMH pigment inks on the front of the card base to add some additional colour and make the background look a little out of focus.

Once that was dry I arranged my leaf pieces the way I wanted them and adhered them in place using liquid adhesive.

I then stamped the greeting from an old Recollections set using Gathered Twigs Distress ink in my MISTI (just to ensure that I got a good image).

To finish it off, I added a bow with natural twine.

I hope you like today's card and are inspired to create something of your own. If you haven't already, please follow me on the right side bar or over on Facebook, so you don't miss out on any future posts. Drop me a line in the comments section below and let me know what you think.

This card is for:
Muse Card Challenge
Inspiration card by Stephanie Lanzalotto


Simon Says Stamp Monday Challenge
 Thank you all so much for your votes and support!

Wednesday, 4 October 2017

Hello Halloween Series | Wiggly Ghosts ft. Lawn Fawn "Booyah"


Hi everyone, thank you for stopping by. I hope you're having a great day.

A while back I did a review of the Crayola Washable Watercolours, as part of that review I did a super fun galaxy background and I promised that I would create a card with it. Today is that card! The 10th in this year's Hello Halloween Series! We're winding down now, and every time I post one I just want to make more!!

I've made a few galaxy backgrounds now and this is by far the brightest. I just love the way the black muted the insanely vibrant colours but didn't really obscure them.

This is also my first "wiggly" card and I'm pretty pleased with how it turned out. The ghosts shake just enough and don't smack into each other, so I'll call it a win.


To begin, I stamped the costumes from Lawn Fawn's "Booyah" stamp set with Memento Tuxedo Black ink on 110lb Copic-friendly cardstock. I then masked those off and stamped the ghosts and their treat bags. I removed the masks and cut the images using the Brother 2 Scan N Cut.

I don't have the coordinating dies for this set so I was able to use the Brother machine to cut the costumed, bag carrying ghosts as one piece instead of having to cut all the pieces individually and piece them together. This machine is sooooo amazing!

I then coloured the images with Copic markers and attached a length of "Unique Ultra Fine Invisible Thread" to the backs of each ghost. This is a super thin nylon thread that I was able to get at my local fabric store, for about $3.00. It's super strong and nearly invisible. I'm not sure what it would be used for in the sewing world; but in my little corner of the crafting universe it works wonderfully for suspending an image to make spinner cards, or today to make wiggly ghosts.

I trimmed the galaxy background piece down a bit, then used the largest of my Spellbinder Scalloped Rectangles to cut a window from the centre.

To put the card together, I mounted the middle part of the galaxy directly to a piece of 65lb black cardstock. I adhered the ends of the strings to the top and bottom of the frame portion of the galaxy using Skor tape (my go-to when I don't want anything to get away). Because I wanted the ghosts to wiggle when you shake the card, I made sure there was a bit of slack in the string. If this were a spinner card, I would have pulled the string as tight.

I then popped the frame portion up on foam tape and stuck that to the panel. I then mounted the entire piece to the front of a standard A2 sized card base.

I hope you like today's card and are inspired to create something of your own. If you haven't already, please follow me on the right side bar or over on Facebook so you don't miss any future posts. Drop me a line in the comments section below and let me know what you think.

This card is for:
Simon Says Stamp Monday Challenge
Lawn Fawnatics Challenge


Monday, 4 September 2017

Pumpkin Spiced Love | ft. Lawn Fawn "Pumpkin Spice"


Hi everyone, thank you for stopping by. I hope you are having a great day.

As summer winds down and we are all getting excited for back to school, I thought I would start off the week with a fall favourite. Pumpkin spice. It's in the air, it's in the food, it's in the coffee.

Coffee, coffee, coffee! As we say good bye to sleeping in, we can say hello to pumpkin spice lattes!


To begin, I stamped the little shaker, then masked it off, then stamped the latte mug and masked that off from Lawn Fawn's "Pumpkin Spice" set using Memento Tuxedo Black ink on 110lb Copic-friendly cardstock.

I then stamped the two pumpkins (masking them as well) from Lawn Fawn's "So Thankful" set. I then removed all the masks and stamped the little shaker sparkle from Pumpkin spice to make the scene magical, because really pumpkin spice is magical.

I coloured all the images in with Copic markers. I added some Spectrum Noir Clear overlay to the shaker bottle and the whip cream and covered those with Glossy Accents by Ranger.

I stamped the first and last part of the greeting using Lawn Fawn Black Licorice ink and the "Pumpkin Spice" using CTMH Autumn Terracotta ink - which turned out to be the perfect pumpkin spice colour.

I wanted a coordinating border, but didn't have quite the right shade of cardstock, so I used some Rusty Hinge Distress ink to make it close. Then I adhered the whole lot to a standard A2 sized card base.

I didn't want random brown sparkles, so instead of colouring in those little specks, I added a mini diamond from CTMH Bitty Sparkles to each of them.

I hope you like today's card and are inspired to create something of your own. If you haven't already, please follow me over on the right side bar, if you are viewing this via mobile device, scroll to the bottom and click "View web version" first. You can also follow me over on Facebook. Toss me a line in the comments section below and let me know what you think.

This card is for:
Simon Says Stamp Monday Challenge
Dream Valley Challenge

Friday, 11 August 2017

Smashin' Birthday | ft. Lawn Fawn "Year Seven"


Hi everyone, thank you for stopping by. I hope you are having a great day.

Once again, I cannot say enough good things about Lawn Fawn. Their consistently cute stamps that are pretty interchangeable make unlimited possibilities when it comes to cards and layouts. Now that they have interactive dies, the fun never stops.

Today I have an interactive birthday card. The second I saw this set I knew exactly what I wanted to do.

We are having a fiesta!


To begin, I used Dried Marigold and Mermaid Lagoon Distress ink, to make a fun background, I then used some clean water to create a splatter and then patted it off with some paper towel. As this isn't watercolour paper I didn't want the water to sit too long, so the splatter isn't as defined as I would have liked.

Once the panel was dry, I used the small curved die from Lawn Fawn "Slide on Over" die set to make the groove where he could swing. I also used my Crop-a-Dile to punch a 1/8" hole and a colourful eyelet. I knew he would be swinging from a string and I didn't want that friction to damage the card.

I stamped the pinata and the candy on 110lb Copic-friendly cardstock with Memento Tuxedo Black ink and coloured them all in with Copic markers. I also used my white gel pen to add some dot detail to all the pieces. I then used the coordinating dies to cut out all the images. (Yep, got the dies for this one. I know, right?)

I used some micro dots to adhere the candies in place. I created a penny slider for the back of my little pinata and sandwiched in some green twine for him to swing from. I don't know why he's a him, but he is. I used the greeting from the set, curving it along the edge of the die so he wouldn't obstruct it as he swung by.

After everything was in place, I doubled up the foam tape (important!!) and adhered it to a standard A2 sized card base.

I hope you like today's card and are inspired to create something of your own. If you haven't all ready, please follow me over on the right side bar so you don't miss any future posts, if you are viewing this via mobile device, scroll to the bottom and click "View web version" first. You can also follow me over on Facebook. Toss me a line in the comments section below and let me know what you think.

This card is for:
Simon Says Stamp Monday Challenge

and

Simon Says Stamp Wednesday Challenge

Tuesday, 8 August 2017

Watercolour Florals | ft. Hero Arts and Zig Clean Color Markers


Hi everyone, thank you for stopping by. I hope you are having a great day.

If you're like me, you see these super pretty cards online and then get a million ideas on how to use that stamp; so you rush out and buy it only to forget about it completely.

No? Just me? Huh.

I got this stamp a while back because I saw all these super pretty cards online and I had to just rush out and buy it, only to forget why I wanted it in the first place. So when I saw the inspiration by Anita Bowden in the Muse challenge, along with a Happy Birthday Challenge and an Anything Goes challenge I knew exactly what I wanted to do.

I'm not going to lie, the execution of my idea took a wee bit longer than I wanted, but now that I have the hang of this one, I'll probably make a couple more with different colour palettes for my friends.


To begin, I prepped a piece of Strathmore Bristol Smooth 100lb cardstock with my powder tool. I then positioned it in my MISTI and stamped this Hero Arts "Large Blossom" using VersaMark ink. I actually did it twice so that I was certain the black embossing powder would stick where I wanted it when I heat embossed it.

I then used my Zig Clean Color Real Brush Markers in Carmine, Light Carmine and Bright Yellow for the flowers; and May Green and Mid Green for the leaves and stems. To get a nice blend I put only a bit of each colour at opposite ends of each section and used my Prisma watercolour brush to bring the two together.

Because Bristol isn't actually watercolour paper, it is best to use a very light hand when it comes to adding the water. You can always, always add more, but once you have too much the paper will warp and pill -- no one wants that.

Once that was completely dry, I heat embossed the sentiment using the same black embossing powder.

I then added a bit of twine to the left and bottom of the panel, and adhered the whole piece to a standard A2 sized card base.

I hope you like today's card and are inspired to create something of your own. If you haven't all ready, please follow me over on the right side bar. If you are viewing this via mobile device, scroll to the bottom and click "View web version" first. You can also follow me over on Facebook. Toss me a line in the comments section below and let me know what you think.

This card is for:
Inspired by Anita Bowden

and

Simon Says Stamp Monday Challenge

and 

Stamping Sensations August Challenge

Monday, 7 August 2017

Bubble Birthday | ft. MFT's "PI - I Pick You"


Hi everyone, thank you for stopping by. I hope you are having a great day.

I personally find sketch challenges very difficult. I'm not entirely sure why. Maybe because I'm such a fan of one layer cards (as you may have noticed) and when it comes to a sketch I feel a need to multiple layers and pattern paper and all sorts of things that I'm not usually comfortable with.

But isn't that really the point of these challenges? To challenge us? I hope so, 'cause that's what's happening for me. And it's a good thing. It breaks me out of my comfort zone and forces me to try new things.

And sometimes, just sometimes, new things are wonderful.


To begin, I used the largest of Lawn Fawn's Stitched Scallop Border Dies to cut down the right edge of my panel.

I then stamped the image and greeting from MFT's Pure Innocence - I Pick You stamp set using Memento Tuxedo Black ink on 110lb Copic-friendly cardstock. I then coloured the image in with Copics and coordinate with the bubbles on the patterned paper.

The patterned paper comes from a stack in my stash that has long since lost it's cover, so I'm not sure what brand it is.

I then adhered a 1/2" and a 1/4" strip of the patterned paper directly on to the panel, and popped the panel up on foam tape. For the right side, I put a piece of the same patterned paper down directly on the A2 sized card base, and then put the panel down on top of that.

I hope you like today's card and are inspired to create something of your own. If you haven't all ready, please follow me over on the right side bar, if you are viewing this via mobile device, scroll to the bottom and click "View Web Version" first. You can also follow me over on Facebook. Toss me a line in the comments section below and let me know what you think.

This card is for:

and

Simon Says Stamp

Monday, 31 July 2017

Eat All Cake | ft. Lawn Fawn "Year Three" and "Party Animal"


Hi everyone, thank you for stopping by. I hope you are having a great day.

I have been on this incredible birthday card kick. Usually by now, I have Halloween cards well underway and have completed at least a couple Christmas sketches. But not this year. Looks like this year I'm behind the game - again. I know we always feel like we're behind, when really we're always living a season a head of everyone else.

I'm living in Canada in the longest and hottest heat wave (with weather warnings and everything) and here I am trying to justify not starting my fall and even my holiday cards?! No wonder by the time the day actually rolls around that I'm all holidayed out. Anyway, this year I'm still in full on birthday mode. So the holidays are going to have to wait just a touch longer.


I started by stamping the cake from Lawn Fawn's "Year Three" stamp set, using Memento Tuxedo Black ink on 110lb Copic-friendly cardstock. I wanted to create the look of my own patterned paper, so I stamped the cake randomly, then I filled in the emptier spaces with the little candle image.

I also stamped the bear from the "Party Animal" set on a scrap piece. I coloured all the images in with Copic markers. And I fussy cut the bear out. I had to do a bit of masking before colouring him because I wanted him to be wearing a hat and holding a fork.

I trimmed the cake piece down to about 2 inches wide, then I covered the icing parts with Glossy Accents by Ranger and dunked it into Ranger's Clear Rock Candy glitter. Once that was completely dry I adhered it to the left portion of the card about 1/2" away from the fold. I then used foam tape to pop up my hungry little bear and placed him down.

I used the "Let's Party" greeting from the "Party Animal" set in the same Memento ink.

The sentiment on the inside says "Eat all the cake!" and it didn't even occur to me until editing that I should maybe take a picture of that. Sorry!!

I hope you like today's card and are inspired to create something of your own. If you haven't all ready, please follow me over on the right side bar. If you are viewing this via mobile device, scroll to the bottom and click "View Web Version" first. You can also follow me over on Facebook. Toss me a line in the comments section below and let me know what you think.

This card is for:
Simon Says Stamp Monday Challenge

Monday, 24 July 2017

#HappyBirthday | ft. Clearly Besotted "Once Upon a Time"


Hi everyone, thank you for stopping by. I hope you are having a great day.

You ever get inspired and remember that you have that EXACT thing in your stash.... somewhere? Only to then discover that in the course of not using that exact thing for the past couple years, you realize you actually got rid of it. I do that. And invariably, the week after I get rid of something, no matter how long it has been inactive I'll need it.

So I used to have this Polaroid die, and after not using it for a couple years I recently got rid of it. Guess what I need. Guess what I looked for, for hours. Guess what I didn't find, because it went out with a destash a couple weeks ago.

So we improvise. Because at the end of the day, that's what we do.


To begin, I used one of my rectangle dies along with one of my square dies to cut out a basic Polaroid frame. I did have to trim the bottom a bit because it looked a little out of proportion. I then used just the rectangle die to cut a piece of cardstock and a piece of acetate to the same size.

I stamped the Goldilocks and the Three Bears image from Clearly Besotted's "Once Upon a Time" stamp set onto the die cut rectangle with Memento Tuxedo Black ink. I masked them off and used Twisted Citron, Mowed Lawn, Tumbled Glass and Salty Ocean Distress Ink to create a very simple background.

I removed the mask and coloured the image in with Copic markers. The greeting is from Clearly Besotted's "Go Wild" set and the hashtag is from the "Once Upon a Time" set. I just love that I can mix and match the images to go together.

I used 1/8" double sided tape to build my little picture. I then adhered the whole thing down on a craft panel - my idea here was to make it look like it was taped up to a bulletin board. To further that, I double up some washi tape and tore the pieces to look as though it were just a photo taped in place.

Finally, I adhered the entire panel to a standard A2 sized card base.

I hope you like today's card and are inspired to create something of your own. If you haven't all ready, please follow me over on the right sidebar so you don't miss any future posts. Toss me a line in the comments section below and let me know what you think.

This card is for:
Simon Says Stamp Monday Challenge

Monday, 12 December 2016

Christmas Series 2016 | Card 2 Spinning Snowflake


Hi everyone, thank you for stopping by. I hope you are having a great day.

Believe it or not, I've never made a spinner card. Last year there were some beautiful cards with spinning reindeer and spinning snowmen and I was blown away. So this year, I thought I would give it a go, and while there are a couple things I would do differently, I think my first attempt turned out pretty well.


Took the above picture at an angle, while it didn't pick up the shine as well as I would have liked, I love shadows that the snowflake made on the inside panel.


To begin, I placed my circle die on the panel where I wanted the opening to be and ran that through my die cut machine. I then prepped the panel with my powder tool and heat embossed the greeting using silver embossing powder.

I then cut two snowflakes from some glitter paper. I used a length of stretch bracelet thread and adhered the two snowflakes together.

I lined up the front panel with a top folding A2 sized card base and ran it through the die cut machine a second time to cut the hole in the base itself.

I used Skor tape on the back of the front panel to secure the ends of the bracelet thread in place. I used 1/4" sparkle ribbon for the bow at the top. I then lined up the panel with the base and adhered the two together.

Unfortunately my camera just didn't pick up the amount of shine this card has. Everything shines. The ribbon catches the light, the panel is a shimmering cardstock, the snowflake glitters and the embossed greeting is metallic.

I tried to take the picture from a couple angles to try and catch it, but they just don't do justice to the card.

I hope you like today's card and are inspired to create something of your own. Don't forget to follow me over on the right side bar so you don't miss out on future posts. Toss me a line in the comments section below and let me know what you think. I love hearing from you!

This card is for:
Simon Says Stamp Monday Challenge
and

Simon Says Stamp Wednesday Challenge

Tuesday, 15 November 2016

I {heart} Autumn Series 2016 | ft. Lawn Fawn


Hi everyone, thank you for stopping by. I hope you are having a great day.

Today I have a super sweet card featuring Lawn Fawn. When I first started stamping and card making a few years ago, Lawn Fawn was the reason. These little critters and just so sweet and they really work well together so mixing and matching sets is always easy.


To begin I die cut my focus piece using a Spellbinders set, then I positioned the two little mice and the greeting on my MISTI and stamped them with Memento Tuxedo Black ink. Next I masked off the mice and stamped the two pumpkins, also from a Lawn Fawn set.

I coloured the images with Copic Markers and then sponged Antique Linen Distress ink around the piece to make it look old.

I used the Lawn Fawn wood-grain background stamp with Chocolate ink from CTMH, on brown cardstock to create the background panel. I adhered that down using my regular tape runner. I then adhered the focus piece.

To finish it off, I added just a touch of Wink of Stella clear glitter to the buckle on the hat.

I hope you like today's card and are inspired to create something of your own. Don't forget to follow me over on the right sidebar so you don't miss out on any future posts! And toss me a line in the comments section below and let me know what you think, I love to hear from you!

This card is for:
Simon Says Stamp Monday Challenge:

Friday, 7 October 2016

Hello Halloween 2016 | card 1 ft. Simon Says Stamp


Hi everyone, thank you for stopping by. I hope you are having a great day.

This is by far my favourite time of year! I love fall and I love Halloween and I love everything about it. Yay SPLs!! I live in an area where we don't typically get an actual fall, though we have been lucky the past two years, and fingers crossed for this one that we get a real Autumn.

So though this is a Halloween Series, I may also include some Fall/Thanksgiving posts. I'm in Canada so our Thanksgiving happens in October before Halloween but the rest of the crafting world is going to celebrate in November. So I'm just going to mash it all together based on what I feel like posting. Deal? Deal!

Here is the first card in the Hello Halloween 2016 series.


To begin I stamped the cat image from SSS "Trick or Treat" set on to 110lb Copic friendly paper and coloured the image in with Copics.

The greeting from Lawn Fawn, is heat embossed in black to give a bit of texture and dimension. I cut that panel down at an angle, and matted it with black cut at the same angle. I used a piece of patterned paper and mounted the entire thing on a standard A2 sized card base.

I used a couple of red and black enamel dots just to add some interest to the card and pull the red together.

Originally the patterned paper was going to be orange, and while it looked cute, it just didn't really work with the black cat in the red cape. Weird, right? I know. In the end, I'm glad I switched it out for the black with white dots.

I hope you like today's card and are inspired to create something of your own. Don't forget to follow me over on the right sidebar so you don't miss out on any future posts, and toss me a line in the comments section below and let me know what you think, I love hearing from you!

This card is for:
Simon Says Stamp Monday Challenge:
Simon Monday Challenge Blog

Friday, 19 August 2016

Summer Fun | ft. MFT Stamps "Every Day is a Picnic"


Hi everyone, thank you for stopping by. I hope you are having a great day.

This morning I was all ready with a second Back to School card for you, then I saw the SSS Monday challenge and my brain just leaped into creative mode overdrive (I assure you, that's a thing), resulting in this card.

You'll get a new Back to School card tomorrow. Probably.


To begin, I stamped the girl from MFT's "Every day is a Picnic" stamp set, using Memento Tuxedo Black ink on copic friendly paper. I stamped the sunshine from the same set in a repeating pattern on my panel and coloured all the images in with my Copics.

I used clear Wink of Stella and Glossy Accents on her sandles to give them that sparkly plastic look that I remember from when I was little. I never had a pair, but my friends did and I thought they were the best thing ever.

I covered the background panel with a scrap of vellum to mute out the sunshines because they were super vibrant. The greeting banner was cut from a piece of teal cardstock that matches the boarder layer and a pretty close match to her outfit. The greeting is heat embossed with white.

To finish off the piece I added a scattering of sequins and enamel dots, then adhered the whole lot onto a standard A2 sized card base.

As a special bonus I even did the INSIDE of the card. Wh-aa-tt? Actually, it happens more often than not. I just usually forget to include it in the post.


I hope you like today's card and are inspired to create something of your own. Don't forget to follow me over on the right so you don't miss out! Toss me a line in the comments section below and let me know what you think. I'd love to hear from you.

This card is for:
Simon Says Stamp Monday Challenge:
Simon Monday Challenge Blog

Tuesday, 8 March 2016

Raised Birthday Greetings


Hi everyone, thank you so much for stopping by.

I swear, every time I turn around I'm out of Birthday Cards, and to be honest I don't even know where they go.

My oldest daughter's 10th birthday is coming up right quick and I wanted to create something that was fun, but a little more mature because she isn't so little anymore. I loved the design so much (Thanks to Michele for the inspiration!) that I ended up creating two cards.

I really do need to create more backgrounds, I love to do it and I always end up wondering why I don't do it more often. Funny how that goes.

In Cracked Pistachio

In Tattered Rose

To create these cards, I masked at a diagonal an inch and a half away from the corners. I created both backgrounds by sponging on the colour (Cracked Pistachio for the first, and Tattered Rose for the second), then used the same colours to stamp the fern in a repeating pattern.

I then die cut Lawn Fawn's Happy Birthday to You die, four times for each and stacked them up. I masked halfway through and used the same colours to sponge the bottom half.

I adhered the die cuts down with Ranger's Multi Medium Matte and used a long block to hold it in place while it dried.

I added three gems to the top of the card for a bit of balance, using colours as close as possible to the inks.

I hope you like today's cards and are inspired to create something of your own.


This card is for:
Simon Says Stamp Monday Challenge:

and

Inspired by Michele Ferguson's Card
http://icardeveryone.blogspot.com/2016/03/muse-card-club-challenge-156.html

Thursday, 11 February 2016

Valentine's Day Series 2016 - Card 15


Hi everyone, thank you for stopping by. I hope you are all having a great day.


To create this card, I die cut a bunch of different size hearts from some scrap papers to use as masks. I arranged the first layer how I wanted them and adhered them with some removable adhesive.

I then gently sprayed the paper with Worn Lipstick spray and allowed the sheet to completely dry.

Then I removed the masks and arranged the next layer and sprayed again.

I repeated this process a couple of times, allowing the panel to dry completely between every layer. The greeting and heart were die cut from a deep red cardstock that was also used as the matting layer.

If I were to create this card again, I would definitely use a watercolour paper or a much heavier weight of cardstock. The paper didn't really like all that water very much and the panel itself is now very delicate. I also noticed that by the time the final layer was dry, it looked more like sponging than spraying, which was kind of disappointing because the spraying looked awesome for the first two layers. Live and learn, I suppose.

I hope you all like the card for today and are inspired to create something of your own.

This card is for:

Simon Says Stamp Monday Challenge: Spritz and Spray

Thursday, 28 January 2016

Valentine's Day 2016 Series - Card 9


Hi everyone, thank you for stopping by, I hope you are having a great day.

For today's card, I wanted to step away from the way I usually make my cards. Since I got into stamping and colouring I generally use them on everything I do. Why wouldn't I? It really is the best way to practice; and the more you practice something the better you get.

But sometimes it's really nice to step away from your current comfort zone and do something you have done in a while. So when I saw Jenni's card over at the Muse Challenge, I knew exactly what I wanted to do. I had been looking for an opportunity to use this stamp and up until now, I didn't have one.

So thank you Jenni, for inspiring me!


For this card, I began by heat embossing the Definition of Love stamp in black. I then trimmed the panel and matted with a deep red cardstock.

For the bottom white panel I used a swirly stamp with clear heat embossing and used a light pink distress ink for a resist technique. I also matted that with the same red cardstock.

The flower is die cut from the same red as well, I die cut two extra blossoms and stacked the petals for more dimension. I used micro pearls for a cluster in the centre.

I finished this card off with three small pearls just to add a bit of shine (since there really was nowhere to put any glitter).


I'd like to submit this card to the following challenges:

1. Simon Says Stamp Monday Challenge - Love is in the Air, (using red)

2. Muse Challenge 150 - where Jenni's beautiful card is the muse of the week

3. Simon Says Stamp Monday Challenge - Anything Goes

I hope you all liked my card for today and are inspired to create something of your own.


Don't forget to follow this blog by using the blue button in the right sidebar. 

Monday, 18 January 2016

Forever Friends


Hi everyone, thanks so much for stopping by today. It's wonderful to have you here.

Today's card is for the Simon Says Stamp Monday Challenge: Best Friends. As they said, there are so many ways to interpret this theme, and I had originally thought of pets. The whole "Man's best friend" and all, but then I thought with Valentine's Day right around the corner a more romantic card would be just as fitting. More of a "Today I married my best friend" theme.

I hope you all like this card, and I truly hope that this card inspires you to create something of your own.


For this card, I first cut a landscape boarder for the grass and masked off the upper portion of the panel. I applied the distress ink very generously until the hillside looked the way I wanted it to. 

I then used the other side of the scrap I had cut to mask off the bottom. I used an extra die cut oval to mask off where I wanted the sun to be. I then worked from the top and darkest area and gradually made my way towards the centre and lighter area of the panel.

I then removed the oval portion of the mask and created the setting sun.

Given the properties of distress ink and how much of it was applied to the panel, I had to hit it with my heat gun to ensure it was completely dry.

I then used my MISTI to ink and reink (and reink) the silhouette stamps. Drying with my heat gun as well. 

The greeting is heat embossed with silver. I wanted to keep it small and simple, so as to not take away from the card itself.