Showing posts with label Hello Halloween Series. Show all posts

Tuesday, 31 October 2017

Happy Halloween 2017!!


Happy Halloween everyone!!! I hope you're in for a spooky day.

It is my favourite holiday and the best time of year to get new decor for the house. LOL

I know that I have started my Christmas series and that I said I was done Halloween, buuuut it's actually Halloween and I couldn't possibly post a Christmas card. That would be insanity.

So today, I have a super cute jack-o-lantern card to bring in the spooky day.


To begin, I cut a piece of 110lb white cardstock with the second largest of Lawn Fawn's "Stitched Rectangles" and a piece of black 65lb cardstock with the largest.

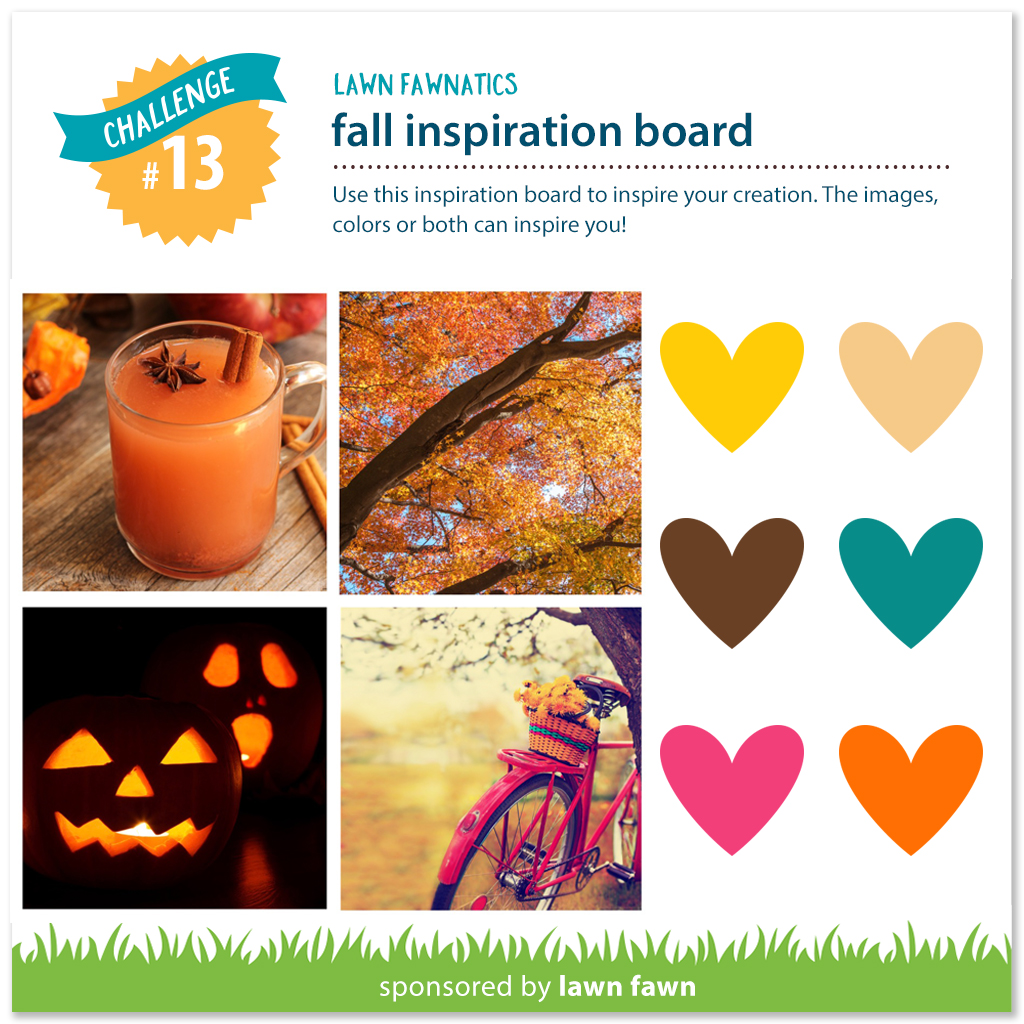
I then stamped the background words with CTMH Whisper ink. To create the face, I cut out the masks from 2" Post-It tape and placed them where I wanted them. I then sponged on Dried Marigold, Spiced Marmalade and finally Carved Pumpkin on the very edges.

I then removed the masks and tied a piece of natural twine around the top of the front panel. I adhered that to my black panel then the whole piece to the front of a standard A2 sized card base.

To finish off the card I used two large enamel dots and adhered them as eyes, I used a sharpie to make the middle part.

I think if I were to make this card again, I would have left the eyes out. But it's me, and we all know that I just can't leave well enough alone. The card actually ended up being a touch scarier than I had originally wanted it to be.

I hope you like today's card and are inspired to create something of your own. If you haven't already, please follow me on the right side bar or over on Facebook, so you don't miss any future posts. Drop me line in the comments section below and let me know what you think.

Tuesday, 17 October 2017

Hello Halloween Series | Watercolour Pumpkin Patch ft. MFT's "Witch Way is the Candy?"


Hi everyone, thank you for stopping by. I hope you're having a great day.

Today is the last (official) card for this year's Hello Halloween Series! Part of me is glad that it's over, it's been a long road, and another part of me is sad because I keep getting inspired by all the amazing work I'm seeing this year. So don't be too surprised if another couple cards pop up over the weeks to come.


To begin, I stamped the two pumpkins from MFT's "Witch Way is the Candy?" set with Antique Linen Distress ink on Strathmore 140lb cold press watercolour paper. If I were to redo this card, I probably would mask off the front pumpkins - I had thought that the water and other inks would lift the lines out completely but they didn't. But the more I look at it, the more "artsy and rustic" it felt and I really fell in love with it.

I then used Dried Marigold, Spiced Marmalade and Carved Pumpkin Distress inks to paint the pumpkins. I used just a bit of Scattered Straw to pull out the highlights. For the stems I used Forest Moss and Gathered Twigs.

After that was completely dry, I used very watered down Gathered Twigs for the ground and then added more pigment to create the shadows. The darkest shadows are made with Ground Espresso.

Once that was completely dry, I wet the area above the pumpkins with clean water and dropped in Weathered Wood and a bit of Faded Jeans to create the rest of the background, letting the water pull the ink away from the pumpkins and fade out.

The greeting is stamped from Verve's "Autumn Splendor using Forest Moss Distress ink, using the MISTI so I could ensure a good impression.

To finish off the card, I mounted the watercolour panel to a piece of dark green cardstock then adhered the whole lot to a standard A2 sized card base.

I hope you like today's card and are inspired to create something of your own. If you haven't already, please follow me on the right side bar or over on Facebook, so you don't miss out on any future posts. Drop me a line in the comments section below and let me know what you think.

This card is for:
MFT Color Challenge

Inspired by Kim Heggins
I pulled my inspiration from her colours and the crisp clean greeting at the top. And Halloween. YAY!


 Thank you all so much for your votes and support!

Friday, 13 October 2017

Hello Halloween Series | Stamping Mashup


Hi everyone, thank you for stopping by. I hope you're having a great day.

Typically when I create a card - as well as many other card makers out there - we tend to stay within a brand. Not to say we don't own many brands, but I see very few cards that are a mashup of various companies all in the same card.

It makes sense for design teams or people working for a particular company, but for the solitary card maker in his or her own craft room? Not so much. And yet, I find myself doing just that; all the time.

Today, I wanted to share my stamping mashup. This card includes images from Close To My Heart, Simon Says Stamp, My Favorite Things and Recollections.


To begin, I stamped the cloth jar lid from Recollections using CTMH Goldrush ink on 110lb Copic-friendly cardstock, then masked that off; I stamped the larger jar using Memento Tuxedo Black ink and masked that, then stamped the smaller jar. Both the jars have a ring at the bottom of them (like under the frog) but I had done some stamp surgery long ago to take those out.

In the smaller jar, I stamped the toad from MFT's "Witch Way is the Candy?" set and used a 0.3 Staedtler pigment liner to draw the ring back in and some glass highlights.

I stamped the skulls in the larger jar from CTMH's "Frightfully Fun" set, and used the same pigment liner to draw twine around the top of the fabric lid.

I stamped the green ooze at the top from Simon Says Stamp's "Trick or Treat" set with CTMH Pear ink.

After all the stamping was done, I added the masks back to all the images and sponged on Hickory Smoke, Seedless Preserves and Dusty Concord Distress inks to the background.

Once that was dry, I removed all the masks and coloured the images with Copic marker. The greeting is from the CTMH set as well, stamped in Archival ink.

Finally I adhered the panel to a piece of black cardstock, then mounted the entire lot to the front of a standard A2 sized card base.

I hope you like today's card and are inspired to create something of your own. If you haven't already, please follow me on the right side bar or over on Facebook, so you don't miss out on any future posts. Drop me a line in the comments section below and let me know what you think.

Thursday, 12 October 2017

Hello Halloween Series | ft. MFT's "Witch Way is the Candy?"


Hi everyone, thank you for stopping by. I hope you're having a great day.

Today I wanted to share a card that uses one of the smaller stamps in the set. I've been challenging myself to step away from that big main awesome stamp that is always there and use the smaller "scene builder" stamps as my focus.

Today, I chose the bat from MFT's "Witch Way is the Candy?". This is an older set, that due to popular demand was brought back this year! I got mine when it originally came out, so I don't have all the new sentiments and greetings that were included in the new release; "witch" kind of makes me sad, because MFT has some amazing sayings that can fit in almost any card for any occasion.


To begin, I trimmed a piece of 110lb Copic-friendly cardstock down to 5 1/2" x 3 3/4" and stamped the Bat from MFT's "Witch Way is the Candy?" stamp set with Memento Tuxedo Black ink, masking to allow overlap and coloured them with Copic markers.

I then stamped the greeting from the same set with Memento ink as well. I used the Spectrum Noir Clear Overlay glitter pen to make all the bats shine and used Glossy Accents by Ranger on their eyes. I then sent the panel aside to dry completely.

On the right side of my standard A2 sized card base, I used the stripe border stamp and the MISTI to create a fun border. This could also be done with a spooky fun washi tape.

Once the top panel was dry, I popped it up on some foam tape and adhered it to the left side of my card base.

I hope you like today's card and are inspired to create something of your own. If you haven't already, please follow me on the right side bar or over on Facebook, so you don't miss out on any future posts. Drop me a line in the comments section below and let me know what you think.

This card is for:
For your blog

CAS(E) this Sketch!

Wednesday, 11 October 2017

Hello Halloween Series | ft. Lawn Fawn "Tiny Wreath" Die Set


Hi everyone, thank you for stopping by. I hope you're having a great day!

Today's card is inspired by one of my upcoming Christmas cards - I had some time before heading to my Mom's house for our Thanksgiving dinner (Canada) and I had picked up a potted chrysanthemum in these beautiful fall colours and I wanted a card that went with it.

I hesitated a lot before getting the Tiny Wreath die because I like to get as much use as possible from a set and something that is only used at Christmas makes the decision a little harder. Since making this card I have a million ideas for all year long, and I cannot wait to get started on them.


To begin, I used the "Tiny Wreath" die set from Lawn Fawn to cut out to pieces of deep yellow and two pieces of orange cardstock. I then used the bow die to cut two sparkling bows. I offset the wreaths and used some liquid glue to keep them together, then set those aside to dry.

I stamped the smaller sunflower from Lawn Fawn's "Our Friendship Grows" stamp set using Memento Tuxedo Black ink on 110lb Copic-friendly cardstock and then coloured them with Copic markers. I chose the smaller of the sunflowers because they are about the same size as the tiny wreath. Coincidence? I think not. Great job Lawn Fawn!!

I didn't have a rusty red piece of cardstock handy so I trimmed down a piece of the white and used Rusty Hinge Distress ink to get the colour I wanted. I adhered that piece to a moss green piece of cardstock and mounted those to the front of a 4x4" top fold card base.

I then used some liquid adhesive to add my wreaths and sunflowers. To finish it off, I used the Spectrum Noir clear overlay to add some shimmer to my flowers.

I hope you like today's card and are inspired to create something of your own. If you haven't already, please follow me on the right side bar or over on Facebook, so you don't miss any future posts. Drop me a line in the comments section below and let me know what you think.

This card is for:
Addicted to Stamps and More Challenge
Even though I have this in my Hello Halloween Series; this is more of a Thanksgiving Card


Tuesday, 10 October 2017

Hello Halloween Series | Shaker Tag ft. Clearly Besotted "Good to be Bad"


Hi everyone, thank you for stopping by. I hope you're having a great day.

As I wind down the Hello Halloween Series for this year (there's only a couple left!) I wanted to share a tag I created using Clearly Besotted's "Good to be Bad" stamp set. Tags are a fantastic way to use the smaller stamp images that would usually feel lost on a card. It can still be used for a card, just the tag would be the focus and more of the patterned paper we've all been hoarding can be seen on the front.


To begin, I stamped this witch from Clearly Besotted's "Good to be Bad" stamp set with Memento Tuxedo Black ink on 85lb Toner Grey paper. A while back I did a paper comparison that included this paper and I was surprised to see that despite how thin this paper is I can still use Copic markers. You can see that comparison here.

I then fussy cut her out, with no border. I die cut two tags using Lawn Fawn's "Tag You're It" die set and then used a small scalloped rectangle to cut a window out of one of them.

I stamped the greeting from the same set and used Skor Tape to attach my acetate for the front of the window. I went around the edges with Candied Apple Distress Ink and added my witch to the front.

Normally when I make shakers I double up on the foam tape so that all the little bits have a lot of room to shake, but for this one I used some chunky glitter from Recollections that didn't need as much room, so I only used a single layer of foam tape; this worked out well as I didn't want as much bulk for such a small piece.

If you find that your shaker bits are sticking to the edges of your foam tape you can use your powder tool to un-stick the sides before you remove the paper backing. If you don't have a powder tool, you can use a soft paintbrush and some regular kitchen flour and it works just as well.

I hope you like today's tag and are inspired to create something of your own. If you haven't already, please follow me on the right side bar or over on Facebook, so you don't miss any future posts. Drop me a line in the comments section below and let me know what you think.

This tag is for:
Simon Says Stamp Monday Challenge

Friday, 6 October 2017

Hello Halloween Series | Mini Shaker ft. Mama Elephant


Hi everyone, thank you for stopping by. I hope you're having a great day.

I cannot believe we're already ending the first week of October. I love fall and I'm always aghast at how fast the season goes. I'm nearing the end of my Hello Halloween series and working like crazy on Christmas designs.

When you really think about it, crafters are living in the future. The kids weren't even back to school yet and I had already been putting in a couple weeks of Halloween designs, by the time Halloween hits I'm hoping to have my Christmas cards done so I can start working on Valentine's Day.

LOL by the time Christmas arrives I'll be all Christmas'd out and working on Easter. It never seems to stop and the more we do this, the more time we feel we need for each season. Maybe after Easter, I'll start next year's Halloween cards. The cycle never stops!

And I love every minute of it.


To begin, I stamped the three little mice from Mama Elephant's "Meowlloween Extras" with Memento Tuxedo Black ink on 110lb Copic-friendly cardstock and cut them using the Brother 2 Scan N Cut. Then coloured them with Copic markers.

For my panel I sponged on Shabby Shutters Distress ink using a light hand in the middle and making it darker in the corners. I used clean water to create the splatter look, then when that was dry splattered again with Copic Opaque White and again with black ink.

Once that was completely dry, I used a small square die to cut three windows; and stamped the greeting from an older stamp set (long since lost the packaging, but I want to say it's an Inkadinkado set, not entirely sure). I popped the panel up on foam tape and created a mini shaker behind each window. I mounted that piece on some Recollections Halloween cardstock.

I ran the three mice through my little Xyron "X" sticker maker and adhered them straight to the panel, and mounted the whole thing to a standard A2 sized card base.

I hope you like today's card and are inspired to create something of your own. If you haven't already, please follow me on the right side bar or over on Facebook, so you don't miss any future posts. Drop me a line in the comments section below and let me know what you think.

Wednesday, 4 October 2017

Hello Halloween Series | Wiggly Ghosts ft. Lawn Fawn "Booyah"


Hi everyone, thank you for stopping by. I hope you're having a great day.

A while back I did a review of the Crayola Washable Watercolours, as part of that review I did a super fun galaxy background and I promised that I would create a card with it. Today is that card! The 10th in this year's Hello Halloween Series! We're winding down now, and every time I post one I just want to make more!!

I've made a few galaxy backgrounds now and this is by far the brightest. I just love the way the black muted the insanely vibrant colours but didn't really obscure them.

This is also my first "wiggly" card and I'm pretty pleased with how it turned out. The ghosts shake just enough and don't smack into each other, so I'll call it a win.


To begin, I stamped the costumes from Lawn Fawn's "Booyah" stamp set with Memento Tuxedo Black ink on 110lb Copic-friendly cardstock. I then masked those off and stamped the ghosts and their treat bags. I removed the masks and cut the images using the Brother 2 Scan N Cut.

I don't have the coordinating dies for this set so I was able to use the Brother machine to cut the costumed, bag carrying ghosts as one piece instead of having to cut all the pieces individually and piece them together. This machine is sooooo amazing!

I then coloured the images with Copic markers and attached a length of "Unique Ultra Fine Invisible Thread" to the backs of each ghost. This is a super thin nylon thread that I was able to get at my local fabric store, for about $3.00. It's super strong and nearly invisible. I'm not sure what it would be used for in the sewing world; but in my little corner of the crafting universe it works wonderfully for suspending an image to make spinner cards, or today to make wiggly ghosts.

I trimmed the galaxy background piece down a bit, then used the largest of my Spellbinder Scalloped Rectangles to cut a window from the centre.

To put the card together, I mounted the middle part of the galaxy directly to a piece of 65lb black cardstock. I adhered the ends of the strings to the top and bottom of the frame portion of the galaxy using Skor tape (my go-to when I don't want anything to get away). Because I wanted the ghosts to wiggle when you shake the card, I made sure there was a bit of slack in the string. If this were a spinner card, I would have pulled the string as tight.

I then popped the frame portion up on foam tape and stuck that to the panel. I then mounted the entire piece to the front of a standard A2 sized card base.

I hope you like today's card and are inspired to create something of your own. If you haven't already, please follow me on the right side bar or over on Facebook so you don't miss any future posts. Drop me a line in the comments section below and let me know what you think.

This card is for:
Simon Says Stamp Monday Challenge
Lawn Fawnatics Challenge


Tuesday, 3 October 2017

Hello Halloween Series | ft. Newton's Nook "Boo-tiful Night"


Hi everyone, thank you for stopping by. I hope you're having a great day.

So our winter weather has let up a bit, and while the thermometer outside says that it is colder than yesterday, it certainly doesn't feel like it. Without the crazy winds it feels rather nice. Oh, don't get me wrong - those kids were still bundled right up we just weren't as sad about it.

Today is the 9th(!!) in the Hello Halloween Series for 2017 and today, I'm using a stamp set that took forever to get my hands on. I've ordered from Simon Says so many times and I've never had issues. Not with their pick times or items being out of stock or shipping or anything. And they are by far the best site I have found for any card making supplies.

But isn't it just the way it is that when I order something I reeeeeallllllyyyy can't wait to get my hands on, THAT'S when the post moves so slow. By no fault of the site it took three extra weeks to get here. I was done the vast majority of my Halloween designs before customs decided to let this one through. Now, in all fairness I did order a stamp cleaner so maybe it was the bottle of chemicals that held it up? Who knows?

Either way, it took forever and the second it arrived I literally dropped everything to sit down and play!!


To begin, I stamped the large jack-o-lantern and kitty image and the greeting from Newton's Nook "Boo-tiful Night" with Memento Tuxedo Black ink on 110lb Copic-friendly cardstock and coloured it with Copic markers.

I then masked off the image and sponged Gathered Twigs Distress ink for the ground and Dusty Concord with a bit of Chipped Sapphire for the sky. Once that was completely dry I splattered with Copic Opaque White to create some stars.

Once that was dry I stamped the bats with CTMH Archival Black ink. I chose this particular ink because I didn't want the images to run or reactivate the Distress inks, just in case they weren't completely dry.

I then matted the top panel with a piece of 65lb black cardstock and then adhered the whole piece to the front of a standard A2 sized card base.

I hope you like today's card and are inspired to create something of your own. If you haven't already, please follow me on the right side bar or over on Facebook so you don't miss any future posts. Drop me a line in the comments section below and let me know what you think.

This card is for:
Image may contain: text

Selected as favourite by Design Team Member Diane! Thank you so much!!

Monday, 2 October 2017

Hello Halloween Series | Fall Shaker ft. Lawn Fawn "Pumpkin Spice"


Hi everyone, thank you for stopping by. I hope you're having a great day.

It's the first wintery day here in Calgary. The snow is blowing and falling and it really feels like a regular fall for this area. Of course it will be summery again by Friday but that's the sort of thing that happens out here on the prairies.

In an effort to spread warmth, I thought I would share a fun shaker. Yep! More pumpkin spice! YAY!!


To begin, I used my outside stitched rectangle to remove my window from a piece of 110lb Copic-friendly cardstock. From that piece I stamped the mug from Lawn Fawn's "Pumpkin Spice" stamp set with Memento Tuxedo Black ink; then coloured it with Copic markers.

I also stamped a bunch of the little shakers and cut them out using the Brother 2 Scan N Cut. I cannot tell you how much I love this machine.

For the front panel I sponged Dried Marigold and Rusty Hinge Distress inks to colour the panel, when it comes to creating that fall red this is my favourite combination. I splattered that with clean water and blotted it dry with some paper towel. Then I set it aside to dry completely.

I then stamped my greeting using Lawn Fawn's Black Licorice ink for the first and last part, and CTMH Autumn Terracotta ink for the "Pumpkin Spice".

Once that was done, I put together my shaker card. Instead of having all the shakers at the bottom, I glued a couple of the to the back panel of the window. So now, even when the card is upright there's still something there.

Finally I adhered my mug directly to the front of the window, then mounted the whole piece to the front of a standard A2 sized card base.

I hope you like today's card and are inspired to create something of your own. If you haven't already, please follow me on the right side bar or over on Facebook. Drop me a line in the comments section below and let me know what you think.

This card is for:
Simon Says Stamp Wednesday Challenge

Addicted to Stamps and More

Saturday, 30 September 2017

Halloween Throwback | ft. Mama Elephant "Meowlloween"


Hi everyone, thank you for stopping by. I hope you're having a great day.

Today I thought I'd do a throwback from last year to a Halloween card that is still one of my favourites. I'm still using this set from Mama Elephant and while I was going through my card stash, I came across this one and I had to share it again.


This card was done using my Distress ink pads as watercolours. It really doesn't seem to matter how many new watercolour palettes I get, I'm most comfortable working with the Distress inks.

For the kitty, I stamped her using and the broom using CTMH Archival Black ink on Strathmore 140lb cold press watercolour paper. I wet each area, dropped the colour in and let the water do the work.

For the background, I just wet the paper and added the colour, let that dry and then did it again. As long as you let the paper dry completely between each layer you can reduce the risk of pilling and damage to the paper. You can speed the process along using your heat tool, but I find that there's a different look if you let it air dry. Needless to say, this can take a lot of patience.

Once each area is dry, you can add additional colour to create finer details. It's a long process but I think it is worth the time.

I hope you like today's card and are inspired to create something of your own. If you haven't already, please follow me on the right side bar, or you can follow me over on Facebook, so you don't miss any future posts. Toss me a line in the comments section below and let me know what you think.

Saturday, 23 September 2017

Hello Halloween Series| ft Lawn Fawn Magic Color Slider


Hi everyone, thank you for stopping by. I hope you're having a great day.

For today's Hello Halloween card I thought I would use some awesome pattern papers, one of my all time favourite stamp sets and the Magic Color Slider Die set.

When this "Happy Harvest" stamp set came out, I almost died. I'm not kidding, I couldn't have been more excited. This was the perfect scene building set.

Don't get me wrong, their Christmas scene builders are amazing, but I'm a prairie fall girl and there is nothing more exciting than that crisp autumn air and the harvest and for me, this was the set.

This was also the first time I used the Magic Slider as a component to my card instead of the ONLY part of the card.


To begin, I created my Magic Color Slider using some Recollections Halloween paper. I stamped the wagon from Lawn Fawn's "Happy Harvest" on my acetate using Staz-On Black ink.

I stamped the scarecrow with his little crow on a piece of 110lb Copic-friendly cardstock using Memento Tuxedo Black ink. I then used my Brother 2 Scan N Cut to cut him out. While I do have the coordinating dies for this set, I added the crow directly to his arm and the dies can't cut that. I then coloured him with Copics.


For the "Magic" piece, I stamped that same wagon, masked that off and stamped the corn stalks with CTMH Honey Ink, then I stamped the crow and coloured them all with Copics.

I used a piece of my favourite Halloween cardstock for the background of the card, sadly I have no idea of the brand as the packaging didn't make it. And I can't find any more of it, so it's officially a paper that I'm hoarding now. LOL, I want to say Imaginisce, but that may not be right.

I adhered the slider to the front, slightly off centre and added my scarecrow to the left.

I hope you like today's card and are inspired to create something of your own. If you haven't already, please follow me over on the right side bar; you can also follow me over on Facebook. Toss me a line in the comments section below and let me know what you think.

This card is for:
Lawn Fawnatics Challenge

Friday, 15 September 2017

Hello Halloween Series | Treat Bag ft Lawn Fawn and Clearly Besotted


Hi everyone, thank you for stopping by. I hope you are having a great day.

I thought today I would mix things up a bit, instead of doing a card I would show you a little treat bag. These little bags are super handy for class treats or for handing out little gifts at almost any holiday.


To begin, I used the Lawn Fawn Goody Bag Die to cut two pieces from 65lb Kraft cardstock. I then used the Grassy Border die and Stitched Cloud dies (also from Lawn Fawn) to get the pieces for my scene.

I used Pumice Stone and Hickory Smoke Distress inks to shade the clouds and Forest Moss with just a touch of Gathered Twigs Distress ink for the grass. Then set those aside to dry completely.

I stamped this adorable little ogre from Clearly Besotted's "Good to be Bad" with Memento Tuxedo Black ink on 110lb Copic-friendly cardstock. I coloured him in with Copic markers and fussy cut him out.

Then I put my scene together. I then stamped the greeting, also from Clearly Besotted with Memento ink.

I used super strong 1/4" Scor Tape to put the treat bag together and used a couple pieces of twine to tie the bow at the top.

I hope you like today's treat bag and are inspired to create something of your own. If you haven't already, please follow me on the right side bar. You can also follow me over on Facebook. Toss me a line in the comments section below and let me know what you think.

Thursday, 14 September 2017

Hello Halloween Series | Clear the Cobwebs


Hi everyone, thank you for stopping by. I hope you are having a great day.

It has been one *heck* of a morning. It has literally taken me 3 hours to get my computer working. Needless to say, I was not impressed. I don't even know what the problem was or if it still has a problem but I was ready to toss it out a window.

Anyway, I thought today I would share a super quick CAS card in the spirit of my mood and for the Wednesday challenge over at Simon Says as well as the CAS challenge at Addicted to Stamps and More. If this broom came with magic powers I would have zapped this computer. I tell ya.


To begin, I stamped the broom from Lawn Fawn's "Critters in Costume" with Memento Tuxedo Black ink on 110lb Copic-friendly cardstock. I then masked that off, and stamped a spider web from an older set in CTMH Whisper ink.

I used a black fine point marker to draw in a corner. And stamped the greeting using a Hero Arts (CL141) alphabet set.

I then coloured in my broom with Copic markers. I mounted the panel on a piece of Recollections spider patterned paper and adhered the whole piece to a standard A2 sized card base.

I hope you like today's card and are inspired to create something of your own. If you haven't already, please follow me on the right side bar. You can also follow me over on Facebook. Toss me a line in the comments section below and let me know what you think.

This card is for:
Simon Says Stamp Wednesday Challenge
Clean and Simple

Addicted to Stamps and More
#259 Clean and Simple

Wednesday, 13 September 2017

Hello Halloween Series | ft. Lawn Fawn "Trick or Treat"


Hi everyone, thank you for stopping by. I hope you are having a great day.

Today's card was inspired by Tracey McNeely, over on the Muse Challenge. The ladies over there are so fantastic with their designs and always provide excellent inspiration for the challenges. As you'll see at the bottom, Tracey went with a Christmas themed card, and while I love the CAS style of it, I'm not ready for Christmas just yet. Well, not ready to post the Christmas stuff just yet, anyway.

So here is my more Autumn twist on her inspiration card.


To begin, I used the smallest and forth smallest of my Spellbinder nested circle dies to cut a doughnut shape in 110lb Copic-friendly cardstock. I then stamped the small candy corn from Lawn Fawn's "Trick or Treat" stamp set, using Memento Tuxedo Black ink, in a circle around it. I felt that my wreath was too sparse, so I flipped the stamp and made another loop with the candies facing the opposite way.

I stamped the little bat from the same set on a scrap of 110lb cardstock. I coloured all the images in with Copic markers. I used Spectrum Noir Sparkling clear overly to give the bat some shimmer, then fussy cut him out and popped him up on foam tape.

I covered my candy corns with Glossy Accents by Ranger, so they would have that shiny look. Once that was dry I popped the wreath up on foam tape and adhered it to my panel, and added the bat.

I stamped the greeting from Lawn Fawn's "Booyah" stamp set, using Lawn Fawn Black Licorice ink. Finally, I added a black mat to the panel to coordinate with my bat and then adhered the whole thing to a standard A2 sized card base.

I hope you like today's card and are inspired to create something of your own. If you haven't already, please follow me over on the right side bar. You can also follow me on Facebook. Toss me a line in the comments section below and let me know what you think.

This card is for:
Inspired by Tracey McNeely's card


  Thank you all so much for your votes!

Friday, 8 September 2017

Hello Halloween Series | ft. Simon Says Stamp "Trick or Treat"


Hi everyone, thank you for stopping by. I hope you are having a great day.

I hadn't intended to make today's card a Halloween card, I wanted to wait a few days, but something things just don't work out like that. Today's card was made specifically for the Muse Challenge (of which you know I am a HUGE fan). When I saw Anita's card, I wasn't sure exactly what I wanted to do at first, so I sat on it for a few days.

So when it came to me yesterday, I knew what I had to do. And I knew that I couldn't wait to post it.


To begin, I masked off the bottom left and the top right edges, and used a light hand to apply Dried Marigold Distress ink in the middle.

Once that was dry, I removed the masks and set them aside and prepped the panel with my powder tool. I then stamped the large greeting from Simon Says Stamp's "Trick or Treat" set with VersaMark ink and heat embossed it with black detail powder. I also stamped the smaller greeting on a different sheet and heat embossed that with black as well.

I then used the large and the small bats from the same set and stamped them randomly in the light orange area and heat embossed them with clear.

I then replaced the masks and sponged on Wild Honey and Carved Pumpkin Distress inks to create an ombre look getting darker as it went down the card.

I removed the masks again, and raised the panel up on foam tape and adhered it to a standard A2 sized card base. Then I cut around the mini greeting and used a black marker to finish off the sides. I then popped that up on a piece of foam tape and placed it just below the big greeting.

I hope you like today's card and are inspired to create something of your own. If you haven't already, please follow me over on the right side bar. You can also follow me over on Facebook. Toss me a line in the comments section below and let me know what you think.

This card is for:
With inspiration by Anita Bowden

 Thank you all for your votes once again!

Thursday, 7 September 2017

Hello Halloween Series | Clearly Besotted "It's Good to be Bad"


Hi everyone, thank you for stopping by. I hope you are having a great day.

Though it may seem early, and the weather is still very warm (where I am, it's been a crazy hot summer. Like gross hot) I thought I would kick off my Halloween Series this year a bit early, because really, it's never too early for Halloween! It's like the perfect holiday. The warm, cozy smells, and the crisp air, the coloured leaves, the monsters peeking out of their summertime hiding places. It's just a wonderful time of year.


To begin, I stamped the cauldron from Clearly Besotted's "It's Good to be Bad" stamp set in Memento Tuxedo Black ink on 110lb Copic-friendly cardstock. I then masked that off and stamped the greeting and the old witch also masking her off.

I then took some Twisted Citron Distress ink and sponged a halo around the images. Once that was dry, I removed the masks and coloured the images in with Copic markers. I wanted everything to be black, but not the same black.

 I was able to use all of my different grays for this one. I used the cool grays for her skin, hair and the cauldron; warm grays for the shadows so it didn't look like they were just floating in the middle of nothing, and my neutral grays for her cloak.

I coloured the ooze with a single orange and then used Glossy Accents by Ranger over top to give it a liquid look. I had to get some sparkle so I used my Clear Wink of Stella pen over the metal of the cauldron.

I mounted the panel on a piece of coordinating orange cardstock and adhered it all to the front of a standard A2 sized card base. Finally, I added a scattering of purple sequins just to make sure that all of the Halloween colours were there!

I hope you like today's card and are inspired to create something of your own. If you haven't already, please follow me over on the right side bar. You can also follow me over on Facebook. Toss me a line in the comments section below and let me know what you think.

This card is for:
Addicted to Stamps and More

Crafting from the Heart
Crafting from the Heart Badge


Monday, 17 July 2017

Not Quite Halloween Shaker | ft. Clearly Besotted "Good to be Bad"


Hi everyone, thank you for stopping by. I hope you are having a great day.

I know it's not quite Halloween, but really, when has that ever stopped me? Sometimes the set that's calling isn't right for the season, but that doesn't mean you can't do it. When I got the "Good to be Bad" set from Clearly Besotted, I couldn't possibly resist!


To begin, I stamped and masked these three ladies, starting with the centre. I then used CTMH Whisper ink to create a smokey background.

I used the smoke clouds from MFT's "Magical Dragons" in the same ink to create a tone on tone pattern.

I then used the second largest of my oval dies to partially cut the oval and fussy cut around the three villains. I used the same oval and the largest oval die to create a black frame to go around the shaker opening.

I removed the masks and coloured the images in with Copic markers.

To create the shaker, I used various confetti and sequins in yellows, oranges and red to make it look like fire. As with any shaker card you have to double up the foam tape to get a really good shake.

As this is the first time using the chunky glitter and small shaker material, I used my powder tool around the edges of the foam tape to make sure that nothing sticks.

I mounted the entire piece on a standard A2 sized card base. Finally I used a glitter pen on the crystal ball and on her broach and covered those with Glossy Accents by Ranger.

I hope you like today's card and are inspired to create something of you own. If you haven't all ready, please follow me over on the right sidebar so you don't miss any future posts. Toss me a line in the comments section below and let me know what you think.

Tuesday, 8 November 2016

Hello Halloween 2016 | card 5 ft. My Favorite Things


Hi everyone, thanks for stopping by. I hope you are having a great day.

I know Halloween is over, but I have more cards and it's still fall and I love Halloween and if it were up to me it would be this spooky season every season forever, hahahahaha!!!

Also, my blog and I don't have Christmas stuff ready yet. But I'm please with the direction the yuletide season is taking my work this year.

Anyway, today's card is one of my favourite of the year, and while it is late I'm hoping you'll think it was worth it.


To begin, I cut a piece of 110lb Copic-friendly paper down to 4 1/8 x 5 3/8" and stamped the bat from #MFTstamps "Witch Way is the Candy?" three times in Memento Tuxedo Black ink and again on Post-It tape to create masks. I masked them off and then sponged Chipped Sapphire, Faded Jeans and Seedless Preserves Distress Ink to create a night sky look. I would normally have used Dusty Concord, but I wanted something a bit brighter because the bats would be dark, and I didn't have it with me at the crop, so there was that.

I then used a #8 round watercolour brush to splatter on clean water and pressed it dry with some clean paper towel to create the splatter star look. If you have never done that technique on regular paper, I highly recommend you practice a couple times before doing it on your project. Otherwise you may be disappointed with the results of too much water on paper that isn't actually meant to handle it.

Once that was completely dry (and don't forget Distress ink takes a bit longer than other inks to dry), I prepped the piece with my powder tool and heat embossed the greeting from a Recollections (Michael's store brand) set in silver.

I then coloured the bats using the warm grey family. I never actually use my black Copic marker to make black, I typically use W5, 7, 9 to make it look as though it is black. I use a tiny bit of C1 or C0 to give a touch of shading to the eyes. I then used my black gel pen to brighten up the eye dot and my white gel pen for his little teeth.

To finish it off, I used glossy accents over the eyes and mounted the panel on a standard A2 sized card base.

I hope you like today's card and are inspired to create something of your own. Don't forget to follow me over on the right sidebar and leave me a comment in the comments section below, I love to hear from you.

Wednesday, 19 October 2016

Hello Halloween 2016 | card 4 ft. Mama Elephant


Hi everyone, thank you for stopping by. I hope you are having a great day.

I am having a crazy hard time staying on topic this season, and that is super weird for me. I love Halloween and I think it's pretty clear that I love creating cards, but something about the fall and the cooler weather just makes me want to cook, cook, cook and cook.

In some ways I think that the reprieve helps. It gives me an opportunity to recharge and when I do sit down in my art room, it's almost like sitting down for the first time with all my new things.


To begin, I cut down a piece of 140lb watercolour paper to 4x5 1/4" and prepped it with my powder tool. I then used VersaMark ink to heat emboss this super sweet witch kitty image from Mama Elephant's "Meowlloween" stamp set.

I smooshed Distress Inks onto a laminated sheet of paper (that's my palette) and a damp size 2 round watercolour brush, I then fussy cut the images out and set them aside.

On another piece of watercolour paper I created a black and gray water splotch also using distress inks. Once my stamped images were dry, I adhered them down with a strong two way tape.

The greeting is stamped using CTMH Archival ink to get a good crisp image. When stamping on watercolour paper, I prefer to use the MISTI to ensure a thorough stamp. Honestly if you have the opportunity to get your hands on it, take it. It is literally my most used tool.

I hope you like today's card and are inspired to create something of your own. Don't forget to follow me over on the right side bar and toss me a line in the comments section below, I love to hear from you.