Showing posts with label Delicata. Show all posts

Monday, 12 February 2018

Happy Heart Day Series | Stamping Mash Up ft. Clearly Besotted and Lawn Fawn


Hi everyone, thank you for stopping by. I hope you're having a great day.

I've found the more I create cards, the bigger my stash gets, the more videos I watch and the more blogs I follow, that I tend to try to stay within one brand for my cards. Each card, from start to finish is either all Lawn Fawn, or all MFT or all Clearly Besotted etc. And that's all well and good, and maybe if I'm lucky enough to be a guest designer or (dare I dream) on one of the design teams that habit will serve me well.

As of right now, though, I'm not. I remember way back when I first started it didn't even occur to me to stay in the same brand for a whole card. First off, I didn't know that was a thing, and second I certainly didn't have the supplies to do that. LOL We've all been there, right?

Today's card is a mash up of two of my favourite companies; Lawn Fawn and Clearly Besotted.


To begin, I stamped the rose from Clearly Besotted's "Merci Beaucoup" set with Memento Tuxedo Black ink on 110lb Copic-friendly cardstock. I then stamped the top of the dome from Lawn Fawn's "Ready, Set, Snow" set, masking the bottom. I repeated the process, stamping the bottom of the dome and used a Copic-safe liner and a straight edge to pull the lines together.

I coloured the rose and the base of the dome with Copic markers. I then used some of the little snowflakes from the Lawn Fawn set with Delicata silver ink to add the sparkles around the flower. Once that was dry, I prepped the base of the dome with my powder tool and stamped the "Valentine" with VersaMark ink and heat embossed with silver detail embossing powder.

To make the dome look a little more like glass and a little less flat, I took my lightest blue Copic marker (B000) and drew a few streaks to create the illusion of reflection. This is a relatively new technique for me and I definitely need some practice, but I think it turned out well for a first try.

Finally, to finish off the panel and because I just can't really help myself, I used the Spectrum Noir clear glitter brush pen over the petals. This time I was very careful not to add too many layers (like we saw here, I guess I learned from that mistake!).

I had to trim down the left edge of the panel as my images weren't centered, I adhered my panel to a piece of red glitter paper then mounted the whole lot to the front of a standard A2 sized card base.

I hope you like today's card and are inspired to create something of your own. If you haven't already, please follow me on the right side bar or over on Facebook, so you don't miss any future posts. Drop me a line in the comments section below and let me know what you think.

This card is for:
Muse Challenge #253

Simon Says Stamp Wednesday Challenge

Monday, 11 September 2017

Layered Floral Birthday | ft. CTMH " Beloved Bouquet"


Hi everyone, thank you for stopping by. I hope you're having a great day.

First off, I just want to thank you all so much for the support. The responses to the Distress Showdown I posted yesterday have been overwhelming. I cannot tell you how much each click and like and view mean to me. You guys are awesome.

Today I thought I would do something a little different. It's a relatively new (to me) technique that has been gaining popularity in the crafting circles. Layered stamping. I'm always surprised at how lovely these turn out, which is silly because they work exactly the way they are designed to.


To begin, using the MISTI, I stamped the solid flower from Close to my Heart's "Beloved Bouquet" Tulip ink. To get full coverage, I stamped this a couple times. This is where the MISTI becomes invaluable. I can't line up a clear stamp to save my life, so the MISTI has become one of my most used tools in the craft room.

Next I stamped the detailed flower over top in CTMH Barn Red ink. Then I masked the flower. I stamped the solid leaves using Pear ink, then stamped the detailed leaves using New England Ivy. Once everything was dry, I removed the mask.

I stamped the Birthday greeting from Stampendous "Happy Messages" using Golden Glitz Delicata ink and again let everything dry.

Then I drew a frame using an ultra-fine Sharpie. For the dots I used Opal White Liquid Pearls by Ranger. As you can see, I need some more practice with these. I found them to be thick and they kind of had a mind of their own. They didn't really want to do what I wanted to do, but I was very happy with the card thus far, so I went with it.

Once the panel was completely dry, I adhered it directly to a standard A2 sized card base.

On a side note, I cannot stress enough the importance of letting this dry between each step. Use your heat tool if you have to, but you don't want to add a layer of water-based ink on top of a layer of water-based ink that has not dried. It will run and it will wick out, and if that is the look you are going for - fantastic. It wasn't the look I was going for, and I had to learn that lesson the hard way.

I hope you like today's card and are inspired to create something of your own. If you haven't already, please follow me on the right side bar. You can also follow me over on Facebook. Toss me a line in the comments section below and let me know what you think.

This card is for:
Crafting from the Heart
Crafting from the Heart Badge

Crafting with an Attitude

Friday, 21 July 2017

Beeping Birthday | ft. Lawn Fawn "Beep Boop Birthday"


Hi everyone, thank you for stopping by. I hope you are having a great day.

Today I have a super sweet card that can be used for either a boy or a girl's birthday. I was asked to create this card for a friend's nephew, but wasn't given any direction on what he might like. So I had to wing it.


To begin, I stamped the two robots from Lawn Fawn's "Beep Boop Birthday" stamp set, using Memento Tuxedo Black ink on 110lb Copic-friendly Card stock. I then cut the panel down at angles to add some interest to the card.

I then stamped the greeting and balloon string from the same set, I used the solid balloon image with silver Delicata ink.

I coloured the two robots in with the cool grey Copic markers. I like to use the cool greys for metallic images as opposed to the warm greys that I typically reserve for critters and shadows. Before I started with Copics and colouring images I would never have imagined the need for more than one set of grey markers; now, I cannot get enough.

After the balloon was dry, I used my clear Wink of Stella pen to give it some shine and covered it with Glossy Accents by Ranger. Then I set the top piece aside.

For the silver background panel, I prepped it with my powder tool and used the little gear and key pieces from the Beep Boop Birthday set. I wanted some to be darker and some to be lighter and some to barely show up at all. I used CTMH Slate, Whisper and Steel Wool inks for some and VersaMark ink with clear embossing powder for others.

To finish off the card, I raised the white piece up on foam tape to add some dimension then adhered the entire thing to a standard A2 sized card base.

I hope you like today's card and are inspired to create something of your own. If you haven't all ready, please follow me over on the right sidebar so you don't miss any future posts. Toss me a line in the comments section below and let me know what you think.

This card is for:
Fusion Challenge
For the challenge, I went with just the sketch for inspiration, I had considered doing some foiling, but turns out I don't have a foil that worked well with this card. Maybe next time.

and

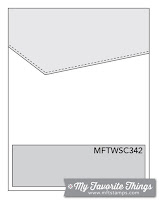
Sketch Challenge 342 #mftstamps

Wednesday, 19 July 2017

Enchanted Birthday | ft. Clearly Besotted "Once Upon A Time"


Hi everyone, thank you for stopping by. I hope you are having a great day.

Today's card was an absolute joy to create. I got to use a few new items, a new stamp set from Clearly Besotted, new Bling from Recollections and a new bottle of Ranger's Multi Medium Matte Adhesive, which isn't really a new thing, but it was a new bottle, and that's kind of the same thing.


To begin, I stamped the princess and the carriage images from Clearly Besotted's "Once Upon A Time" stamp set using Memento Tuxedo Black ink on 110lb Copic-friendly cardstock. I coloured both images in using Copic markers then I masked them off.

I also cut a round mask, because I wanted a moon in the background without the defining lines of a stamped image. I then used Twisted Citron and Mowed Lawn Distress inks for the grassy areas, Gathered Twigs for the road, Faded Jeans, Chipped Sapphire and just a touch of Seedless Preserves for the Sky. I then removed the moon mask, and used Scattered Straw and Mustard Seed for the Moon.

I then removed all the masks and used my clear Wink of Stella glitter brush pen over the carriage and her outfit to make them sparkle. It's a brand new Wink of Stella, so when the light catches it, it looks amazing. I so wish my camera would pick it up better than it does.

To create the stars I mixed some of the White Gold Tansai Gambi watercolour with my Copic Optic White on my acrylic block and splatter it across the sky. I then used the white stars from Recollections' Metallic Iridescent Glitter Shapes with Ranger's Multi Medium Matte adhesive.

The Happy Birthday greeting is from Clearly Besotted's "Beautiful Friends" stamp set; stamped in Delicata Silvery Shimmer ink.

To finish it off, I mounted the panel on a blue sparkly piece of cardstock to give it a coordinating boarder and then adhered the entire piece to a standard A2 sized card base.


This card is for:
Simon Says Stamp Wednesday Challenge:

I hope you like today's card and are inspired to create something of your own. If you haven't all ready, please follow me over on the right sidebar so you don't miss out on any future posts. Toss me a line in the comments section below and let me know what you think.

Saturday, 8 July 2017

Micro-Dimensional Scene | Ft. Lawn Fawn "Octopi My Heart" and "Ahoy, Matey"


Hi everyone, thank you for stopping by, I hope you are having a great day.

Today I have a super cute card that features a couple sets from Lawn Fawn (surprise!!!) as well as some masking, distress ink blending, and micro-dimensions.

To clarify, Micro-Dimensions is something I just came up with between sips of coffee this morning. So bear with me if this is all ready a thing and I just don't know about it. Started a new binge on the Netflix last night and I am tired. This is a long post, so hang in there (hahahahaha) but I promise it will be worth it.


To begin, I used two nesting stitched square dies to create a frame and a base layer for my focus point. I ended up cutting 3 frames, and using the largest die to cut 2 squares of blue vellum for the waves.

For the "wave" look, I used the other side of the smallest stitched cloud border dies from Lawn Fawn.

I first stamped the ship from the Ahoy, Matey stamp set, masked it off and then stamped the octopus from the Octopi My Heart set. I had to mask out his face during stamping because he looks all cute and sweet and I wanted him to look grumpy. I then coloured the images using Copic markers and redrew his face in using my black glaze pen.

I masked both the images again and used Distress Ink to create a basic blue for the sea and the Starry night sky in the background. I used the silver Delicata ink for the stars.

Now comes the assembly and the micro dimension. I adhered the tallest and farthest back wave piece to the back of the first frame piece. I then adhered the second or middle wave piece to the front of that same frame. So there is only one piece of paper width between the two waves. I then adhered two frames together and added the foremost wave so it was on the outside of the frames.

Starting from the card base the layers go: Wave piece - frame - wave piece - frame - frame - wave piece. If that makes sense.

I adhered the frames over top of the panel to create the entire framed image. I couldn't believe how much dimension this gave to the image with only a little bit of space between the pieces.

I had considered leaving it like that, but I wanted something clever for the greeting, like "Don't worry, things could be worse" or "Hope your day gets better". In the end I settled on "Hang In There" Which is stamped using CTMH "Etched Alphabet" stamps, heat embossed on a black piece of cardstock.

I hope you like today's card and are inspired to create something of your own. Don't forget to follow me over on the right sidebar so you don't miss out on any future posts. Toss me a line in the comments section below and let me know what you think.

Friday, 22 April 2016

Splattered Butterflies


Hi everyone, thank you for stopping by. I hope you are having a great day.

I've been having a lot of trouble sleeping lately, and when that happens I turn to pinterest. I mean if I'm going to be awake anyway, why not spend my time looking at stuff to inspire me? Now that I think about it, that may not be the best way to help me sleep, but I still think it's a great way to spend some quiet time.

There has been a whole lot of splattering going on on the boards lately. So I figured, why fight it?


To create today's card I began by die cutting the butterflies out of 140lb cold press watercolour paper. I then used a couple shades of blue to create a splattered paint look on them.

I stamped the greeting with Golden Glitz Delicata ink, and covered it with a strip of paper to protect the area. I then used the same colours from the butterflies, though more concentrated to create splatters on the panel.

Once that was completely dry, I adhered the butterflies in place using Ranger's Multi Medium Matte.

I hope you like today's card and are inspired to create something of your own.

This card is for:
Simon Wednesday Challenge Blog

Thursday, 14 April 2016

Mother's Day 2016 Series - Card 6


Hi everyone, thank you for stopping by. I hope you are having a great day.

Welcome to the sixth installment of the Mother's Day 2016 Series.

As a child living on a farm, I was always so amazed by how many stars were in the sky at night. Being away from the lights of the city really lets you see how expansive the sky is, and I think it something everyone should experience at least once in their lifetime.

I remember asking my father how many stars there were, and he told me that if I could count every night for the rest of my life, I would never even come close to counting all the stars in the sky. That is the inspiration for this card.


To create this card, I began by sponging Chipped Sapphire and Seedless Preserves Distress ink onto regular cardstock. I then used the splatter technique and a medium sized paintbrush to create the smaller stars in the background. Because this is not watercolour cardstock, you must use a very light hand when splattering so that the paper doesn't warp too much.

Once that was completely dry, I used my powder tool to prep the panel for heat embossing. I used white powder to heat emboss the greeting.

The stars were added last using the silver Delicata pigment ink. I adhered the panel using strong double sided tape, to ensure that it would lay flat on the card base.

The sentiment on the inside reads: "Count the stars in the sky."

I hope you like today's card and are inspired to create something of your own.