Saturday 31 March 2018

Celebrate .... "Everyday"? | ft Distress Oxide Inks and Gansai Tambi Starry Night Watercolours


Hi everyone, thank you for stopping by. I hope you're having a great day.

Today I have a card that I thought would be a lovely encouragement card. I was planning to send this card to someone I know that has been dealing with a cruddy deal for quite a while now and I just wanted to let this person know I was thinking of them, and that every day (that was a hint) is an accomplishment.

However, if you watch this video I will explain why I cannot send this card, and why this card had me so frustrated!!


I recommend watching in HD on YouTube (Seriously, it's way shinier!!)

Check out the video for the full tutorial, the list of Distress Oxide Inks I used to create this background and where the inspiration came from.


This is also the first card where I got to use my new Iridescent Crystals from Studio Katia, and let me tell you I LOOOOOVE them!!


I'm so stoked I was able to capture the shine on this card in a picture. I'm definitely going to be doing this technique again!

I hope you like today's card (and video tutorial) and are inspired to create something of your own. If you haven't already, please follow me on the right side bar, over on Facebook and on YouTube. Drop me a line in the comments section below and let me know what you think.

Friday 30 March 2018

Mixed Haul | It's a Long One; There's So Much FUN Stuff


Hi everyone, thank you for stopping by. I hope you're having a great day!

Today I have a mixed haul video with a bunch of different stuff! Let me tell you, I cannot wait to start playing with all these new and fun things. This is a scheduled post, as I'm actually at work while this is going up! YAY for technology!!


Watch in HD on YouTube!

Check out the video above to see all the fun new goodies, as well as a few "first tries" for: 
  • Tombow Dual Brush Markers (there will be a review coming soon!)
  • My first try and reaction to Ken Oliver Colour Burst Watercolours - OMG!! When you see the video, I think you'll be just as excited as I am!
  • Opening and first try of the Nuvo Glimmer Paste
There are so many new things here, you'll just have to watch the video on YouTube, to see what's coming!!

I hope you enjoyed today's haul video! If you haven't already, please follow me on the right side bar, over on Facebook and on my YouTube Channel! Drop me a line in the comments section below and let me know what you think! And don't forget to subscribe!!!

Thursday 29 March 2018

Cheer Up, Bunny | Single Layer Card ft. Lawn Fawn's "Some Bunny"


Hi everyone, thank you for stopping by. I hope you're having a great day.

Today I have a card (and video) featuring Lawn Fawn's "Some Bunny" stamp set, as well as a couple of their older sets. I decided to do a single layer card because I haven't done one of those in a while and I felt it was time. I had this idea in my head since I saw the set and while it didn't become a "cheer up" card until I actually made it, the concept was the same.


I recommend watching in HD over on YouTube!

Check out the video above to see how this card came together, how I create and store my masks as well as a complete list of the Copic markers I used to create this card.


I hope you like today's card and video (if you haven't watched it, please do so! It means the world to me) and are inspired to create something of your own. If you haven't already, please follow me on the right side bar, over on Facebook and on YouTube! Drop me a line in the comments section below and let me know what you think!

This card was featured!! April 20, 2018
Fawny Flickr Friday!

Wednesday 28 March 2018

Happy Hoppy Day Series | Easter Tag Card, ft. Lawn Fawn "Easter Party"


Hi everyone, thank you for stopping by. I hope you're having a great day.

Today I have an Easter Tag card featuring Lawn Fawn's "Easter Party" stamp set as well as some of their dies. No surprise, right? I swear I have other brands, but I'm just really on this Lawn Fawn kick and I can't seem to get off the wagon. I think they do it on purpose. I mean, how cute are these sets? No wonder I can't get enough!


I recommend watching in HD over on YouTube!

Check out the video above to see how I put this card together, as well as the complete list of Copic markers I used and which embellishments made it to this card!


I used patterned paper from their Perfectly Plaid "Rainbow" and "Spring" collections - because I'm trying really, really hard to actually use the patterned paper I have been hoarding. I decided to put them out where I can see them which helps me remember to use them! And so far it's working out. I haven't gone all crazy yet, because the patterned paper still scares me. Coordination issues, I don't know.


I didn't really do anything for the inside of the card because what can I say on the inside that I haven't said on the outside?

I hope you like today's card (and video) and are inspired to create something of your own. If you haven't already, please follow me on the right side bar, over on Facebook and on YouTube! Drop me a line in the comments section below and let me know what you think.

This card is for:
Simon Says Stamp Wednesday Challenge

Tuesday 27 March 2018

Monochromatic Monday - Except it's a Day Late | ft. Lawn Fawn "Toadally Awesome" and Bayou Backdrop


Hi everyone, thank you for stopping by. I hope you're having a great day.

So remember a couple months ago when I said that I was going to do Monochromatic Mondays, because I like having a series to work on, and the ones I had just weren't enough? And then I posted one, and haven't done another.

Today I have one for you and it's only one day (and a couple months) late! This one has a video to go with it - and it's a good video.


I recommend watching it in HD over on YouTube!

Check out the video above to see how I put this card together and my awesome commentary about paper-piecing (and how I never do it ... until now) as well as watch me talk myself OUT of adding a million embellishments at the end.

The patterned paper I completely forgot the name of that I use in the card is called Coastal Village. So not colour anything. HAHAHA


I have a full listing of the Distress Oxide inks as well as the Copic markers I used to create this card!

I hope you like today's card (and video!) and are inspired to create something of your own. If you haven't already, please follow me on the right side bar, over on Facebook and now on YouTube. Drop me a line in the comments section below and let me know what you think.

Monday 26 March 2018

Gilded Butterfly Encouragement Card | ft. Urban Stamps, Nuvo Gilding Flakes and Zig Clean Color Real Brush Markers


Hi everyone, thank you for stopping by. I hope you're having a great day.

A while back I created a gilded butterfly card (which you can see here), I loved the card so much that I decided to create a tutorial video to go along with it.

The card today is a little different, as it is a 9"x 4" card. It fits nicely in a legal size envelope so it won't require additional postage; and that is always a good thing!


Or you can watch in HD over on YouTube!

The images are stamped with VersaMark ink on Bristol Smooth paper, then embossed with Ranger's Sticky Embossing Powder. The gilding flakes I used are the Radiant Gold Gilding Flakes by Nuvo. Please watch the video above for the full tutorial on how I created this card. And see just how crazy these flakes are. I'll be cleaning up these flakes for days. LOL they are everywhere!


In real life, the butterflies are super shimmery, unfortunately it doesn't really pick it up all that well on camera.


I don't often finish the insides of my cards, or if I do they are an after thought depending on who I am giving them to. But here is a shot of the inside that has been embossed with gold embossing powder. 

I hope you like today's card (and video!) and are inspired to create something of your own. If you haven't already, please follow me on the right side bar, over on Facebook and now on YouTube! Drop me a line in the comments section below and let me know what you think.

Friday 23 March 2018

Pawfect Birthday | ft. MFT "New Best Friend"


Hi everyone, thank you for stopping by. I hope you're having a great day.

Today I have a card I created for my older daughter's birthday coming up. She's going to be 12 and I can't even believe it. It's crazy to think of how fast the time goes, especially when you're watching your kids grow up. It's just insane.


Or you can watch in HD on YouTube!

Please check out the video above for the full tutorial on how I put this card together, as well as all the Copic markers I used to colour the images.


Finally a card that isn't Lawn Fawn! hahaha, I have another little card coming and it IS Lawn Fawn, I don't really think any of us should be surprised at this point. LOL!!


I hope you like today's card (and video) and are inspired to create something of your own. If you haven't already, please follow me on the right side bar, over on Facebook and on YouTube! Drop me a line in the comments section below and let me know what you think.

This card is for:
My Favorite Things

Thursday 22 March 2018

Fairy Shaker Birthday | ft. Lawn Fawn "Fairy Friends"


Hi everyone, thank you for stopping by. I hope you're having a great day.

Today I have a fun shaker card that I made for my little daughter's friend's birthday. I wanted this card to be bright and fun because once again it's cold and yucky here in Calgary. We get these waves of nice weather and then it goes back to dreary and lemme tell ya, I'm pretty done with this. The warm weather is nice and it starts to melt then it freezes completely and everything is just an ice rink. Not fun.


Or you can watch in HD over on YouTube!

Check out the video above for the full tutorial on how I made this shaker, as well as all the Copics used and how I just couldn't stop embellishing it at the end. Honestly, I just couldn't stop myself!


I hope you like today's card and are inspired to create something of your own. If you haven't already, please follow me on the right side bar, over on Facebook and now on YouTube! Drop me a line in the comments section below and let me know what you think!


Tuesday 20 March 2018

Toadally Hoppy Day | ft. Lawn Fawn "Toadally Awesome"


Hi everyone, thank you for stopping by. I hope you're having a great day.

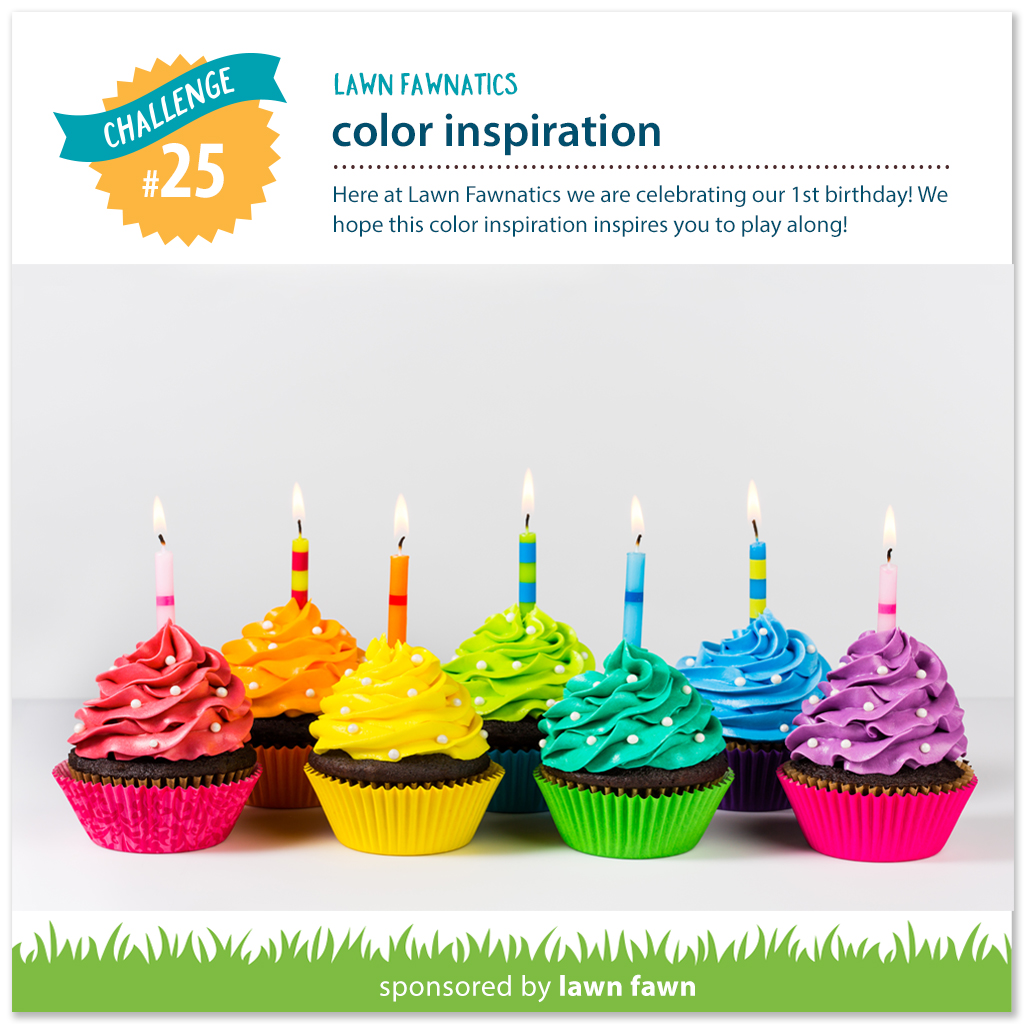
Today I have a super cute rainbow frog card in honour of both International Frog day (Which is a real thing. You can toadally google it!) as well as for the Lawn Fawnatics Color Inspiration challenge. Click the YouTube link below for the tutorial video!


Or you can watch it in HD on YouTube!


This card was so fun to make. Watch the video above to see the tutorial as well as the list of Copic colours I used on these little guys.


I had some extra pieces from some other projects so I put them together to add a little something to the inside of the card.

I hope you like today's card and are inspired to create something of your own. If you haven't already, please follow me on the right side bar, over on Facebook and now on YouTube! Drop me a line in the comments section below and let me know what you think.

This card is for:
Lawn Fawnatics Challenge


 YAY!!! Thank you all so much for your encouragement and support!

Monday 19 March 2018

It's a Mixed Bag Today!


Hi everyone, thank you for stopping by. I hope you're having a great day!

Today I have a mixed haul video, showing some Lawn Fawn (of course), MFT, new Distress Oxide inks, a failed project as well as the unboxing of the Chibi Lights Starter kit!!


Or you can watch it in HD over on YouTube!


I hope you enjoyed today's video. If you haven't already, please follow me on the right side bar, over on Facebook and now on YouTube! Drop me a line in the comments section below and let me know what you think!

Friday 16 March 2018

Have a Blast! Action Wobbler Card | ft MFT Stamps


Hi everyone, thank you for stopping by. I hope you're having a great day.

Today I have a cute card and video tutorial on how to make this action wobbler card using the "Space Explorer" set from My Favorite Things.


Or watch in HD on YouTube!!

Please check out the video above to see how I put this card together and to watch the action wobbler at work! I also talk about all the Distress Inks and Copic markers I used to create this card.


To begin, I created the galaxy background using Distress Inks. I then splattered it with clean water from my Distress Sprayer then again with Copic Opaque White for the stars.

I stamped the images from MFT "Space Explorer" set with Memento Tuxedo Black ink on 110lb Copic-friendly cardstock and cut them out using the Brother 2 Scan N Cut - you can see a video of the Scan N Cut in action here.

I coloured the images with Copic markers then put my card together. I used an action wobbler to put my little spaceman in place.

I stamped the greeting using Memento Tuxedo Black ink so that my blacks would match throughout the card.

To finish off this card, I added clear Wink of Stella over the window of the ship and on the spacesuit, then covered the window and the buttons with Glossy Accents by Ranger.

I hope you like today's card and are inspired to create something of your own. If you haven't already, please follow me on the right side bar, over on Facebook and now on YouTube! Drop me a line in the comments section below and let me know what you think.

This card is for:


Wednesday 14 March 2018

Lucky Duck Pivot Pop-Up | ft. Lawn Fawn Stamps and Dies


Hi everyone, thank you for stopping by. I hope you're having a great day.

Today I am super excited to share with you a tutorial video and card using the new Lawn Fawn Pivot Pop-Up Die set, as well as a couple of their new stamp sets from the spring 2018 release.

I know I've been sharing a lot of Lawn Fawn lately, and I really do try to mix it up with other brands, but I'm in Lawn Fawn mode right now. Their images just make me so happy and we can use some happy here in Calgary; it is so snowy and yuck! I'm soooo done with winter, but Mother Nature seems to have other plans - most of which include record levels of snowfall. UGH!


Check out the video for the complete tutorial on how to put this card together, as well as how I coloured all the images.


For the outside of the card, I stamped this little duck from "Lucky Duck", the flight trail and the dragonfly from "Toadally Awesome" with Memento Tuxedo Black ink on 110lb Copic-friendly cardstock then coloured them with Copic markers.

I adhered the panel to a piece of soft blue cardstock and mounted that to the front of my top folding standard A2 sized card base.


For the inside of the card, I stamped all the images with Memento ink on the same paper and used the Brother 2 Scan N Cut to cut them all out. I coloured each of them with Copic markers and ran them through my sticker maker to get adhesive on the back.

For the top background of the card base I used a piece of blue paper and adhered some die cut stitched clouds and the sun so it wouldn't look so plain.

For the pop-up I used Broken China and Tumbled Glass Distress ink to create my sky, and Twisted Citron and Mowed Lawn Distress ink for the grass.

Once I had the mechanism put together (see the video on how I did that) I mounted all my images in place.

For the sentiment I used part from the "Lucky Duck" stamp set and "teacher" from the "A Good Apple" set.

This card is going to my daughter's kindergarten teacher - who is super awesome.

I hope you like today's card and are inspired to create something of your own. If you haven't already, please follow me on the right side bar, over on Facebook, and now on YouTube! Drop me a line in the comments section below and let me know what you think!

Tuesday 13 March 2018

Happy Hoppy Day Series | Easter Pop-Up ft. Lawn Fawn Stamps and Dies


Hi everyone, thank you for stopping by. I hope you're having a great day.

Today I have a super fun pop-up card using Lawn Fawn stamps and dies. If you're like me you see the Lawn Fawn releases and you just have to have it all. Exercising restraint when it comes to Lawn Fawn is sooo hard. I legit have sets that I haven't even opened. Shhh don't tell. I will use them at some point.

I love using the pop-up die because it's always such a surprise when you open the card. It's so exciting to see such a plain looking card and then you open it and SURPRISE!!! there's something super fun on the inside.


For the outside of the card I stamped this bunny image from Lawn Fawn's "Eggstra Special Easter" with Memento Tuxedo Black ink on 110lb Copic-friendly cardstock. I coloured it with Copics and used the Scan N Cut to cut it out.

I wanted to keep it all simple and used some of the pieces of cardstock from the inside to create an accent bar across the front.


For the inside, I stamped all my images with Memento Tuxedo Black ink on 110lb Copic-friendly cardstock and cut them all out with the Scan N Cut (I actually cut these out at the same time as the one on the front). I coloured all the images with Copic markers.

 The thing I love the most about the Scan N Cut is that I can stamp and mask images to make single layers and cut them out as a single piece. Just one more reason to pass on the die sets!

I used Lawn Fawn's "Stitched Hillside Pop-Up" die to cut the base and sponged it with Twisted Citron and Mowed Lawn Distress Ink to create the grassy look. I sponged the inside top of the card with Spun Sugar and Worn Lipstick to create a soft pink sky.

I had some stitched clouds left over from another project and adhered them in place. I used some super sticky two-way to put all images in place.

To finish off the card added a couple butterflies that I had laying around placed them in the sky to fill up some of empty spaces.

I hope you like today's card and are inspired to create something of your own. If you haven't already, please follow me on the right side bar, over on Facebook, and now on YouTube! Drop me a line in  the comments section below and let me know what you think.

Sunday 11 March 2018

Out of This World Birthday | ft. Lawn Fawn "Beam Me Up"


Hi everyone, thank you for stopping by. I hope you're having a great day.

Today I have a birthday card using stamps from the new Lawn Fawn set "Beam Me Up". I showed this set in my recent Haul Video and I couldn't wait to get started playing with it. I have so many more ideas - and not just for Birthdays, but for Mother's Day and Father's Day and Just Because. It's going to be great; so stay tuned!!


To begin, I created a galaxy background using Distress Oxide Inks, I started by randomly sponging on Broken China, Lucky Clover and Wilted Violet, then going over them with slightly darker colours and finally going over the whole panel with Black Soot. I applied an additional layer of the Black Soot around the edges to make it appear darker.

I used my Distress Sprayer to spritz clean water and patted that dry with a paper towel. Once the panel was completely dry, I used some Copic Opaque White to splatter some brighter stars, then set the panel aside to dry again.

I then stamped the ship with the alien, the cake and a couple presents with Memento Tuxedo Black ink on 110lb Copic-friendly cardstock, coloured the images with Copic markers and used my Scan N Cut to cut out all the images.

To create the beam I prepped a piece of vellum with my powder tool and stamped the image with VersaMark Ink and heat embossed with white detail embossing powder, then fussy cut it out.

Once I decided where I wanted the images to go, I prepped the bottom of the panel with my powder tool and heat embossed the greeting with the same white embossing powder.

I then adhered the gifts and the cake down to the panel and the beam over top, being careful to hide the adhesive behind the embossed lines. I popped the spaceship up on some foam tape and placed him over the beam.

I adhered the panel to a piece of black 65lb cardstock, then mounted the entire lot to the front of a standard A2 sized card base.

Finally, I added glossy accents by Ranger over the dome of the ship and over the lights.

I hope you like today's card and are inspired to create something of your own. If you haven't already, please follow me on the right side bar, over on Facebook and now on YouTube! Drop me a line in the comments section below and let me know what you think.

Friday 9 March 2018

New Die Prep and Storage


Hi everyone, thank you for stopping by. I hope you're having a great day.

A while back I posted about how I take care of new dies, you can see that post here. Today, I have a quick video to go along with that post, showing step by step how I separate, clean and store my dies. Click the video below and have a look!


The video goes through how I separate my dies using metal snippers and a jewelry file. As well as cleaning off the adhesive from the packaging, then finally how I store all of my metal dies. I hope you enjoy.

I hope you like today's video. If you haven't already, please follow me on the right side bar, over on Facebook and now on YouTube! Drop me a line in the comments section below and let me know what you think.

Wednesday 7 March 2018

Lawn Fawn Haul part 2 | March 2018


Hi everyone, thank you for stopping by. I hope you're having a great day.

Today I have a second haul video for Lawn Fawn. After I got yesterday's video posted I received an email saying that the rest of the stuff I wanted was in, so now we have a second video.


I cannot wait to start playing with all these new things. I did make a little sloth bookmark yesterday and I'll have a post about that soon.

I hope you like today's video. If you haven't already, please follow me on the right side bar, over on Facebook and now on YouTube! Drop me a line in the comments section below and let me know what you think.

Tuesday 6 March 2018

(Mostly) Lawn Fawn Haul | March 2018


Hi everyone, thank you for stopping by. I hope you're having a great day!

Today I have a (mostly) Lawn Fawn Haul that I would like to share with you. Check out the video below to see all the new and super sweet things from the latest release.

Some of my order wasn't in yet, so there will be a shorter haul video coming really soon (I hope) with the rest of the stuff that I purchased!


I hope you like today's haul video, I'm looking forward to making more, as well as a few fun projects I have in the works with using these products.

If you haven't already, please follow me on the right side bar, over on Facebook and now on YouTube! Drop me a line in the comments section below and let me know what you think.