Showing posts with label die cutting. Show all posts

Tuesday, 4 December 2018

Happy Holidays 2018 | Cascading Snowflakes | ft. Lawn Fawn Dies and Stamps


Hi everyone, thank you for stopping by. I hope you're having a great day.

I know I promised this post on Sunday, but other things happened and it didn't work out for me. But it's here today, and I'm feeling lucky I've gotten this far. My computer is being rather uncooperative and I'm starting to feel rather hostile towards it.

So today's card (and video) are a little different. There's only a little bit of stamping for the greeting and zero colouring. I wanted to share a card that has been in my head for a little while and maybe appeal to some of the people who aren't into stamping and colouring as much as I am.

I recommend watching in HD over on YouTube!


In the video you'll get to hear how this card didn't go according to plan as well as my thoughts on the Nuvo liquid glue.

I hope you like today's card (and video) and are inspired to create something of your own. If you haven't already, please follow me on the right side bar, over on Facebook and on YouTube! Drop me a line in the comments section below and let me know what you think.

All of your support and encouragement mean the world to me and I cannot thank you enough for every comment, like/thumbs up and follow you guys have given me. You are all awesome.

Wednesday, 26 September 2018

2018 Sporadic Fall Series | ft. Lawn Fawn Reveal Wheel and Pick of the Patch


Hi everyone, thank you for stopping by. I hope you're having a great day.

It's been a crazy couple of weeks. The cold I mentioned in the last post lingered for-ev-er!! I actually had to take sick time off work, and that is not something I like to do. Today, however, I took a couple days off - just because. It's quiet at work, so the timing was optimal.

Anyway, today I thought I would share a fun fall card using the Reveal Wheel die set, the Pick of the Patch pumpkin add-on die and the Pick of the Patch stamp set.


I stamped all my images with Memento Tuxedo Black ink on 110lb Copic-friendly cardstock and coloured them with Copic markers.

I wanted to do something a little different, so instead of setting the add-on die in the reveal wheel set using the little puzzle piece notch, I eyed out the distance and turned the die upside down. This allowed me to have the pumpkin right side up, but at the bottom of the card so it could still be in the patch.

To create my background, I used some Distress Inks to create my night sky. I mixed up some Perfect Pearls in the perfect pearl colour with water and splattered that on the panel to get some shimmery stars. I also splattered some clean water on the panel for some variance.

I used one of the grassy borders to cut some of the Knit Picky paper down to make my base.

Once the panel was completely dry, I stamped my greeting with VersaMark ink and heat embossed with detail white embossing powder. I assembled my Reveal Wheel mechanism and added my critters and grass.


I adhered another piece of the Knit Picky paper to my standard A2 sized card base, then adhered my Reveal Wheel piece on top.

I hope you like today's card and are inspired to create something of your own. If you haven't already, please follow me on the right side bar, over on Facebook and on YouTube. Drop me a line in the comments section below and let me know what you think.

Tuesday, 20 March 2018

Toadally Hoppy Day | ft. Lawn Fawn "Toadally Awesome"


Hi everyone, thank you for stopping by. I hope you're having a great day.

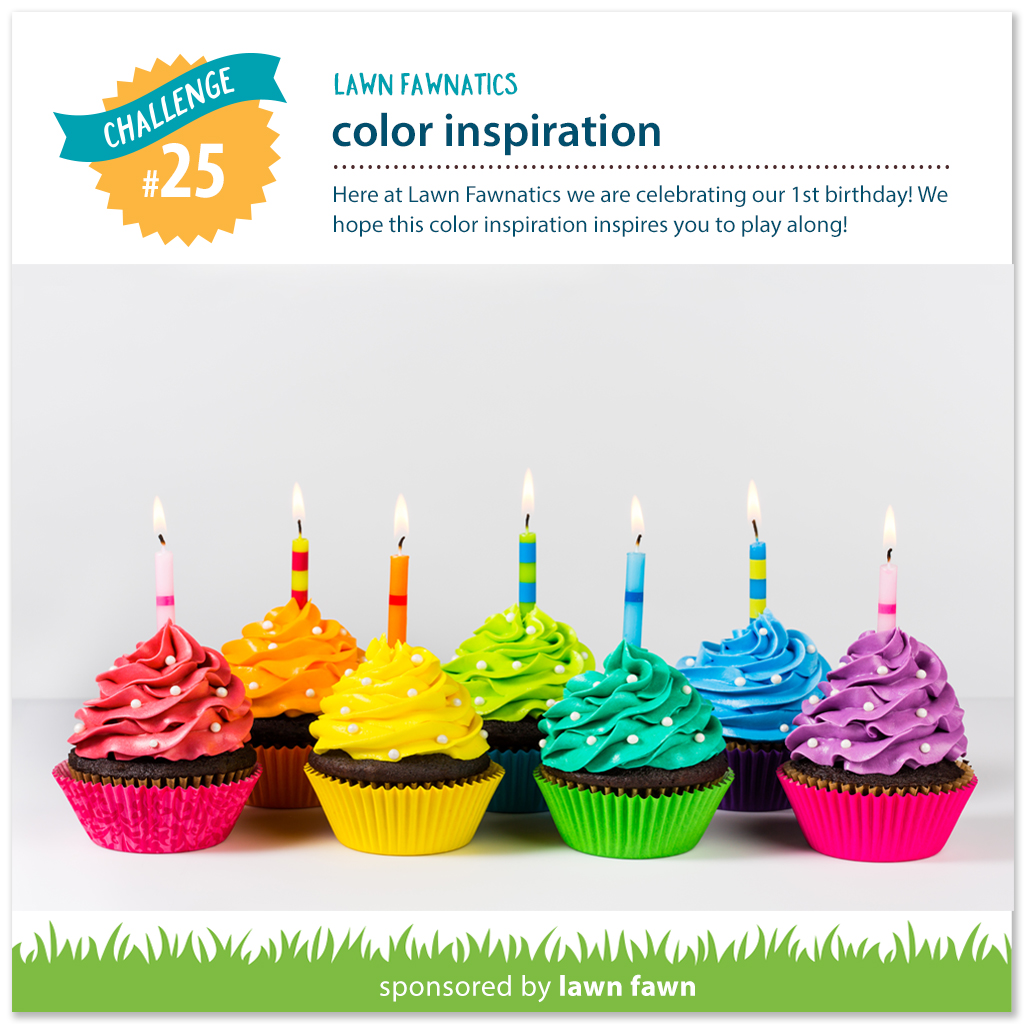
Today I have a super cute rainbow frog card in honour of both International Frog day (Which is a real thing. You can toadally google it!) as well as for the Lawn Fawnatics Color Inspiration challenge. Click the YouTube link below for the tutorial video!


Or you can watch it in HD on YouTube!


This card was so fun to make. Watch the video above to see the tutorial as well as the list of Copic colours I used on these little guys.


I had some extra pieces from some other projects so I put them together to add a little something to the inside of the card.

I hope you like today's card and are inspired to create something of your own. If you haven't already, please follow me on the right side bar, over on Facebook and now on YouTube! Drop me a line in the comments section below and let me know what you think.

This card is for:
Lawn Fawnatics Challenge


 YAY!!! Thank you all so much for your encouragement and support!

Friday, 9 March 2018

New Die Prep and Storage


Hi everyone, thank you for stopping by. I hope you're having a great day.

A while back I posted about how I take care of new dies, you can see that post here. Today, I have a quick video to go along with that post, showing step by step how I separate, clean and store my dies. Click the video below and have a look!


The video goes through how I separate my dies using metal snippers and a jewelry file. As well as cleaning off the adhesive from the packaging, then finally how I store all of my metal dies. I hope you enjoy.

I hope you like today's video. If you haven't already, please follow me on the right side bar, over on Facebook and now on YouTube! Drop me a line in the comments section below and let me know what you think.

Saturday, 17 February 2018

Happy Hoppy Day Series | ft. Gerda Steiner Designs and a Video!


Hi everyone, thank you for stopping by. I hope you're having a great day.

Today is the first card in my Happy Hoppy Day Series for 2018, today's card features the "Happy Hoppy" stamp set by Gerda Steiner Designs as well as a tutorial video - because I figured out more editing! YAY!!


Moving forward, if there is a video with a card, it'll be at the top of the post, then I'll post the picture and do my written "how I did it" part, just like always. I truly hope you enjoy!


To begin, I cut down a piece of 110lb Copic-friendly cardstock and used Distress Oxide Inks to make it look like grass. Once that was dry, I used this Happy Easter die from Memory Box to cut my front-most layer.

I stamped this bunny from Gerda Steiner Designs with Memento Tuxedo Black ink on the back of the scrap that was cut away from the green base, and coloured him in with Copic markers. I wasn't sure if his tongue was sticking out or if that was his teeth, so I opted for the tongue because it was just too cute. I then fussy cut him out.

I used a piece of patterned paper from Lawn Fawn's Perfectly Plaid Rainbow collection to work as my background, but when I measured it out, I found that there was much more sky than I had originally intended.

To solve this, I used the medium Stitched Puffy Clouds Border die from Lawn Fawn to cut some clouds out of vellum. I adhered them down, to the sky ensuring that all the adhesive would be hidden by the green panel.

I then added the green panel and finally popped my bunny up on some foam tape to give him a bit of dimension. It also helps to keep the vellum down and avoid curling.

My panel was mounted to the front of a standard A2 sized card base and that is it for this card.

I hope you like today's card and are inspired to create something of your own. If you haven't already, please follow me on the right side bar, over on Facebook and now on YouTube! Drop me a line in the comments section below and let me know what you think.

Wednesday, 29 November 2017

Inlaid Anniversary | ft. Stampin' Up "Rose Wonder" Dies


Hi everyone, thank you for stopping by. I hope you're having a great day.

Today I thought I would share a super fun technique where you use both the positive and the negative space of the die cuts to create a beautiful inlay design. I chose this die set because of all the pieces to work with, it's very much like a puzzle and I found it to be quite soothing to put together.

While I created this card with Anniversary in mind, it can easily be used as a shower card, a birthday card, a love card; and it doesn't have to be glitter paper, but really who doesn't want a card that sparkles like crazy in the light??


To begin, I used the large rose die cut from Stampin' Up's "Rose Wonder" set and die cut the flower from three different pieces of glitter cardstock.

I first cut down my panel from the medium pink then die cut the rose to get my base and I adhered the positive panel to a piece of cardstock that was cut down to be the same size.

I then cut the flower again from the darkest piece of glitter cardstock to get my outline. Finally I cut the flower from my lightest piece of glitter cardstock to get all the little pieces to inlay. If you have a package of Stick-It, this would be the time to use it. I did not have any so I went old school and used glue.

Much like a puzzle, I found it most efficient to work with the pieces that were obvious first, then made my way down through the smaller pieces. If you are lucky enough to have the paper stick in your die, it is even easier. I was not so lucky.

Because I didn't have Stick-It at the time, I covered my hidden background panel with wide two-way tape and worked slowly and carefully. The tape is quite strong so once it's down, it's down.

I prepped a strip of vellum with my powder tool and heat embossed the greeting from CTMH "Finding the Words" with white embossing powder and wrapped it around my panel to hide all of the adhesive.

I then mounted the completed panel to the front of a standard A2 sized card base. To finish off the card (because three types of glitter paper just doesn't sparkle enough) I adhered a few sequins across the panel using Aleene's Glass and Bead Adhesive.

Also, because I created this piece from three different card stocks, I can ultimately create three different cards! YAY!!

I hope you like today's card and are inspired to create something of your own. If you haven't already, please follow me on the right side bar or over on Facebook, so you don't miss any future posts. Drop me a line in the comments section below and let me know what you think.

Sunday, 5 November 2017

Masculine In Green | ft. Inkadinkado


Hi everyone, thank you for stopping by. I hope you're having a great day.

Sadly, the last few days have been rather off for me, so I don't have a product review for you today. I am hoping to put one up in the next couple of days to make up for it.

I do, however, have a masculine (or autumn) card to share today. This card is quite simple to make, and if you use a stamping tool like the MISTI you could easily mass produce a card like this.


To begin, I cut a piece of 110lb Copic-friendly cardstock to a standard A2 size, then stamped the maple leaf image in the middle with Memento Tuxedo Black ink, masked that, then stamped the one above and below it, masked those then stamped the top and the bottom.

I removed the masks and coloured the images with Copic markers.

I used a Happy Birthday Die from Spellbinders to cut out three or four layers of cardstock. I used liquid adhesive to hold them together then used the same shades of green to colour the top layer.

I ran the words through my Xyron "X" sticker maker and adhered them to the panel. I then mounted the panel on the front of a standard A2 sized card base.

I hope you like today's card and are inspired to create something of your own. If you haven't already, please follow me over on the right side bar or over on Facebook, so you don't miss any future posts. Drop me a line in the comments section below and let me know what you think.

Saturday, 28 October 2017

Happy Holidays Series | Peek-a-Boo Santa ft. Clearly Besotted & Lawn Fawn


Hi everyone, thank you for stopping by. I hope you're having a great day.

I've put it off as long as I can. I had hoped to start next week, but I just can't wait any longer! I'm so excited to begin this year's Happy Holidays Series.

I'm going to start the year with a fun interactive card featuring Lawn Fawn Dies and Clearly Besotted Stamps.


To begin, I used the largest of my "Stitched Rectangle" dies by Lawn Fawn to cut out my front panel, from 110lb Copic-friendly cardstock. I then used the smallest of the "Lift the Flap" dies to cut three flaps that will make up the interactive part of the card.

I used Tumbled Glass Distress ink to shade at the top and fade out to white as it moves down the card. Once that was dry, I put the panel in my MISTI and stamped the tree and the main greeting from Clearly Besotted's "Santa Baby" set, using Memento Tuxedo Black ink. I stamped the three little instructions from Lawn Fawn's "Push Here" stamp set.

I coloured the tree with Copic markers and added Glossy Accents by Ranger over the star and the ornaments.


I lined up the top panel with another of the same size and stamped three of the Santa images from Clearly Besotted, then coloured each of them with Copic markers.

I adhered the two panels together, being careful not to put adhesive behind the flaps that are to lift up. I then used a tiny bit of Tombow Mono Adhesive at the bottom of each flap and let that dry. This liquid adhesive is fantastic, as it can be made permanent if applied when wet, but if you let it dry it becomes a repositionable sticky tab, allowing the flaps to be open and closed multiple times.

The adhesive will wear out over time, but I've opened and closed these tabs at least a dozen times because these images are just so stinking cute that I couldn't resist and the tab is still going strong.

I hope you like today's card and are inspired to create something of your own. If you haven't already, please follow me on the right side bar or over on Facebook, so you don't miss any future posts. Drop me a line in the comments section below and let me know what you think.

This card is for:
Christmas Card Challenge

Crafting from the Heart 

Sunday, 17 September 2017

New Die Prepping and Storage


Hi everyone, thank you for stopping by. I hope you are having a great day.\

As I've mentioned my kids are back to school (yay!) and that means that they have brought home all sorts of nasty germses (Gollum voice) and all those nasty germses have manifested in the mama. I have had the worst cold since I don't even know when. I slept for 13 hours last night. 13. Hours. In one night!! Craziness!

So in light of my inability to move, I don't have a product review for you today. But fear not! I do have a fun post lined up that I think you'll find very helpful. I've had a few PMs about how I deal with my dies; cleaning, storage and whatnot so I thought it may be time to share.


So here we have some brand new dies. As you can see I was so excited about them that I forgot to take the picture while they were still together. So we're just going to pretend that these are all still attached and just removed from the sticky backing and packaging they came with. (The dies here are from the Lawn Fawn "For You, Deer" set - guess what's coming for the holidays!)

Most dies are pretty easy to deal with, you just bend them apart and the little tabs break and you're done, easy peasy. But if you're like me (and let's be honest if you've been reading along this far, you just might be) those little ends are going to drive you insane.

And probably poke you. Which is not cool.


I like to use a pair of wire snips - these ones were super cheap in the wire and beading section at my local craft store, like $7? Once I get the dies apart as you can see in the picture, I lay down a damp baby wipe and snip off as much of that pokey piece as I can. The baby wipe stops it from flying away and inevitably ending up in your foot when you least expect it.

Once I have snipped off as much as I can, I use the flat metal file (also from the wire and beading section) to file down the sharp little edge as close as I can to the edge of the die.

When I get in the zone, I don't notice those sharp little bits and I've cut myself. And I've bled. On my tools, on my clothes and worst - on my projects. Again, I do the filing over a damp baby cloth because you don't need metal shaving laying around the craft room either.


Next, I deal with the sticky stuff that is on the backs of the dies. While it is wonderful that the stamping/die companies package the dies so that we can actually see them before we purchase and they aren't in a tangle at the bottom corner of the package; that adhesive, without fail is going to be stuck to the back of your dies.

Does this change the way the die works? Nope. Does it change the way the die is stored? Nope. Does it drive me as insane as the the pokey little pieces we just got rid of? Yep.

So once I've wrapped up my metal pieces and shavings, and wiped down my whole work surface, I lay out some paper towel and grab this stuff.

Un-Du. This stuff can usually be found in the sticker or stamp section of your local craft store. If not there, you can probably find it at your hardware store. It comes with a scraper attachment, I didn't like it so I took it off.

I put the dies on the paper towel and put a couple drops of this over the back and let it sit for 30-45 seconds. It has a strong odor and a slick feeling, I think it's based on turpentine or paint thinner. I have no idea but for some reason it makes me think of my Dad's workshop when I was a kid. No particular memory, just the feeling of being there.

After a time, gently roll a Q-Tip or cotton ball or a dry cloth over the goopy stuff and poof! It's gone. If it isn't all gone on the first pass, repeat the process. Then wipe with a baby wipe to get the residue off. You'll get the hang of this real quick.

This stuff is also super great for scissors or craft knives that have been gunked up by adhesive. And the bottle lasts forever. I'm going into year 2? with it and I still have about half a bottle.


Now that my dies are all apart and gunk-free, I store them in a binder. I get these adhesive magnetic sheets from the dollar store and centre them on a piece of cardstock. I slide that inside a regular school page protector and into the binder.

I write the brand and name of the die somewhere on the cardstock as well, just so I know what is where and if anything has gone missing (kids). And so I can reference it when I'm doing posts for you guys.

As my die collection has grown, this isn't the most ideal storage for them. Sooner or later the weight of the dies is going to do a number on the rings or rip the plastic from the page protectors, but so far it has worked out for me.

Side note:
This whole process can take a while, especially if you've never done it or just got a bunch of brand new dies. I like to set up my iPad and watch Netflix or Youtube while I do this. Once you have your current collection done, upkeep is easy if you get into the habit of doing it as soon as you get new dies.

I hope you found today's post helpful. If you haven't already please follow me on the right side bar, you can also follow me over on Facebook. If you have any questions about this or suggestions for a future post, please toss me a line in the comments section below. I love to hear from you.

*disclaimer: all the information above is based upon my experiences through trial and error and what works best for me. I am not sent products to review and I receive no payment, reward or incentive to do so. All the information here is my experience and opinion only.

Thursday, 3 August 2017

Technique Tip - Partial Die Cutting


Hi everyone, thank you for stopping by. I hope you are having a great day.

Today I wanted to share a super fun technique that will allow you to get a bit more out of your dies. We typically use our dies to simply cut out the image. Whether it be a greeting or sentiment or an image that we colour. But you can also use you dies to create a whole new look for your card.


For this card, I have the love die as well as the decorative square. I wanted to create a fun window, where the word would be in the middle. There are some super awesome dies out there that do this, but I don't happen to have them. That being said, I didn't want to not be able to create the look.

To begin, I took the decorative square and used some low tack tape to hold it in place. I put the Love die over top of it, and used a pencil to mark where I wanted the words to attach to the sides of the window.

I lined up my top cutting plate with those marks so that the only piece that was actually between the plates was the upper portion of the window, and ran that through my Big Kick (which is just like the Big Shot, but blue). I then repeated the process on the bottom half. At this point I have two cut edges that do not meet.

The Love die only cuts the smaller love in this picture, so I removed the decorative square and put the word die back in place, lining it up with the marks I had made previously. I then used a pencil to very lightly trace around the die, this will show me where the "shadow" of the word die will be. I used my X-acto knife to cut those lines, being extremely careful to not cut through where I wanted the word to be attached.

Once that cutting was done, I was left with the basic window you see above. I then cut a piece of foiled paper with the word die, and set that in place over the shadow I had created.

For the rest of the card, I used some Tumbled Glass and Salty Ocean Distress ink to colour the panel, and adhered some foiled hearts I had sitting on my desk. Behind the window, I adhered a piece of white Tulle to create a frosty look to my window.

I adhered a piece of yellow cross-hatched paper directly to my A2 sized card base to show through the window. I mounted the panel with foam tape, to give it some dimension.

I hope you like today's card and are inspired to create something of your own. If you haven't all ready, please follow me over on the right side bar. If you are viewing this via mobile device, scroll to the bottom and click "View Web Version" first. You can also follow me over on Facebook. Toss me a line in the comments section below and let me know what you think.

Tuesday, 11 July 2017

Penny Slider Card | ft. Clearly Besotted's "Hip Hip Hooray" and Lawn Fawn Dies


Hi everyone, thank you for stopping by. I hope you are having a great day.

I gotta say, I think I'm a little bit obsessed with the interactive cards. It literally doubles the possibilities for nearly any card design. Flat, dimensional or interactive there is no end to the possibilities and it is an excellent way to add just a little bit more to a card that lets your recipient know how much you care.

Today's card features Clearly Besotted's "Hip Hip Hooray" stamp set and Lawn Fawn's "Duh-Nuh" as well as their Stitched Cloud borders, Slide on Over dies and Stitched Scallop border dies.

Yeah, there's a lot going on in this one.


I'm going to apologize now, this is a long one. But I promise it will be worth it.

To begin, I used Lawn Fawn's "Stitched Scallop" Border dies with blue vellum and some soft blue cardstock to make layered waves. I then used the "Stitched Cloud" Border dies on white vellum to create two layers of clouds.

I used Distress ink - Pumice Stone and Hickory Smoke - to darken up the clouds, on the waves and paper I used Salty Ocean to create some variance in the waves.

I then took the wave that I wanted behind my scene and my panel and used the waviest of the "Slide on Over" dies to cut my sliding channel.

I stamped the ship from Clearly Besotted's "Hip Hip Hooray" set and the fin from Lawn Fawn's "Duh-Nuh" set with Memento Tuxedo Black ink on 110lb Copic-friendly cardstock. I coloured them with Copic markers and fussy cut them out. I added some clear Wink of Stella to the sail, not because sails are sparkly, but because I have to put glitter somewhere on the paper.

For the sliding, I used the penny method so that when you tip the card it will slide over on it's own and there is no additional pull tab.


The waves and the greeting are stamped with Salty Ocean Distress ink. I put the greeting together using CTMH's "Etched Alphabet" - This is my go-to alphabet, though I do wish it came in lower case as well.

The secret here is double up the foam tape, and check the slide at every step. Not only is it fun, but the sooner you realize there is something that needs to be adjusted the happier you'll be.

I hope you like today's card and are inspired to create something of your own. If you haven't all ready, don't forget to follow me over on the right sidebar. Toss me a line in the comments section below and let me know what you think.

Monday, 12 December 2016

Christmas Series 2016 | Card 2 Spinning Snowflake


Hi everyone, thank you for stopping by. I hope you are having a great day.

Believe it or not, I've never made a spinner card. Last year there were some beautiful cards with spinning reindeer and spinning snowmen and I was blown away. So this year, I thought I would give it a go, and while there are a couple things I would do differently, I think my first attempt turned out pretty well.


Took the above picture at an angle, while it didn't pick up the shine as well as I would have liked, I love shadows that the snowflake made on the inside panel.


To begin, I placed my circle die on the panel where I wanted the opening to be and ran that through my die cut machine. I then prepped the panel with my powder tool and heat embossed the greeting using silver embossing powder.

I then cut two snowflakes from some glitter paper. I used a length of stretch bracelet thread and adhered the two snowflakes together.

I lined up the front panel with a top folding A2 sized card base and ran it through the die cut machine a second time to cut the hole in the base itself.

I used Skor tape on the back of the front panel to secure the ends of the bracelet thread in place. I used 1/4" sparkle ribbon for the bow at the top. I then lined up the panel with the base and adhered the two together.

Unfortunately my camera just didn't pick up the amount of shine this card has. Everything shines. The ribbon catches the light, the panel is a shimmering cardstock, the snowflake glitters and the embossed greeting is metallic.

I tried to take the picture from a couple angles to try and catch it, but they just don't do justice to the card.

I hope you like today's card and are inspired to create something of your own. Don't forget to follow me over on the right side bar so you don't miss out on future posts. Toss me a line in the comments section below and let me know what you think. I love hearing from you!

This card is for:
Simon Says Stamp Monday Challenge
and

Simon Says Stamp Wednesday Challenge

Wednesday, 7 December 2016

I {heart} Autumn Series 2016 | ft. Lawn Fawn and the Positive Die Cut


Hi everyone, thank you for stopping by. I hope you are having a great day.

Today is one of those weird days where I'm all alone. The older kids are at school, the little one is at Grandma's house and the hubby is at work. So I have the whole house to my very own self. All by my self. I don't even know what to do with my time.

LOL.

Yes, I do.

So a couple posts ago, I showed you all a use for the negative space when die cutting. You can see that post here. As promised, today I have a piece that uses the positive space, or the pieces that were actually cut using the dies. Not only that but the pieces I used today are the same ones that I had set aside in that post.

And while Autumn is technically over, a promise is a promise and I would be remiss if I didn't keep my word to you guys.


To begin, I used the tattered die cut for the panel, and then stamped the greeting using Lawn Fawn Black Licorice ink.

I then used Forest Moss, Gathered Twigs and Rusty Hinge Distress Inks to give the leaves the look of fall. Once those where dry, I ran them through the Xyron X (1.5") sticker maker. I adhered the leaves down the way I wanted and used some plain twine to tie the piece together, (see what I did there?).

I then cut a piece of dark brown cardstock to fit the front of a standard A2 sized card and used foam tape to mount the front panel.

I hope you like today's card and are inspired to create something of your own. Don't forget to follow me over on the right sidebar so you don't miss out on any new posts, and toss me a line in the comments section below and let me know what you think. I love to hear from you!