Showing posts with label sequins. Show all posts

Friday, 13 July 2018

Toot Your Own Horn | ft. Lawn Fawn Stamps and Dies


Hi everyone, thank you for stopping by. I hope you're having a great day.

Today I have card and video showing you how to get more out of your dies. For this card I'm using the Lawn Fawn "Shadow Box Theatre Add-On" die. This is made to go with the Shadow Box card die, but I'm going to be using it to set my stage (hehehe) for this encouragement/congratulations card.

I love sets that can be used in more than one way, it makes me feel like I'm really getting all that I can out of my die.

I recommend watching in HD over on YouTube!!

While I'm not typically one for paper piecing, I just couldn't even resist this set. How many awesome scenes can you make with this set? Lawn Fawn is AH-MAZ-ING for making sets that all work together!


Check out the video to see how this card came together and my thoughts on a new liquid adhesive!

I hope you like today's card (and video) and are inspired to create something of your own. If you haven't already, please follow me on the right side bar, over on Facebook and on YouTube! Drop me a line in the comments section below and let me know what you think.

Friday, 27 April 2018

Using Up the Scraps | ft. Simon Says Stamp "Beautiful Day"


Hi everyone, thank you for stopping by. I hope you're having a great day.

Today I have one more card for my little Using Up the Scraps train. Is it just me, or when you get a new stamp set do you just stamp all the things then have no idea what to do with them? This is the third card this week where I have just used the ever-growing pile of bits and pieces that end up on my desk to make a card.

It's a lot harder than you'd think. I get a new set and I have a million ideas and they don't just all come out neat and orderly, so I have pieces - everywhere. Pieces that had a destiny, but then real life takes over or I find that the idea in my head just doesn't translate to paper very well.

Patterned paper is like that for me too. It's sooo pretty when I see it so of course I have to have it, then it kind of just sits there; sad and forgotten.


For today's card I cut down a piece of that (oh so pretty) patterned paper I had laying around to fit the front of a standard A2 sized card base.

I then used the three butterflies and the leaves that had also just been sitting around from Simon Says Stamp "Beautiful Day" set. They had been stamped with Memento Tuxedo Black ink on 110lb Copic-friendly cardstock, and coloured with Copic markers.

These butterflies were originally intended for a Monochrome Monday card, but then I was at a loss for the background. It happens.

The leaves and the two smaller butterflies were mounted flat to the base with my tape runner, and the larger is popped up with foam tape.

To finish off the card, I added a scattering of purple sequins, not because they were just laying around, but because every card needs a little bit of shine.

I hope you like today's card and are inspired to use some of your forgotten odds and ends. If you haven't already, please follow me on the right side bar, over on Facebook and on YouTube. Drop me a line in the comments section below and let me know what you think.

Friday, 30 March 2018

Mixed Haul | It's a Long One; There's So Much FUN Stuff


Hi everyone, thank you for stopping by. I hope you're having a great day!

Today I have a mixed haul video with a bunch of different stuff! Let me tell you, I cannot wait to start playing with all these new and fun things. This is a scheduled post, as I'm actually at work while this is going up! YAY for technology!!


Watch in HD on YouTube!

Check out the video above to see all the fun new goodies, as well as a few "first tries" for: 
  • Tombow Dual Brush Markers (there will be a review coming soon!)
  • My first try and reaction to Ken Oliver Colour Burst Watercolours - OMG!! When you see the video, I think you'll be just as excited as I am!
  • Opening and first try of the Nuvo Glimmer Paste
There are so many new things here, you'll just have to watch the video on YouTube, to see what's coming!!

I hope you enjoyed today's haul video! If you haven't already, please follow me on the right side bar, over on Facebook and on my YouTube Channel! Drop me a line in the comments section below and let me know what you think! And don't forget to subscribe!!!

Thursday, 22 March 2018

Fairy Shaker Birthday | ft. Lawn Fawn "Fairy Friends"


Hi everyone, thank you for stopping by. I hope you're having a great day.

Today I have a fun shaker card that I made for my little daughter's friend's birthday. I wanted this card to be bright and fun because once again it's cold and yucky here in Calgary. We get these waves of nice weather and then it goes back to dreary and lemme tell ya, I'm pretty done with this. The warm weather is nice and it starts to melt then it freezes completely and everything is just an ice rink. Not fun.


Or you can watch in HD over on YouTube!

Check out the video above for the full tutorial on how I made this shaker, as well as all the Copics used and how I just couldn't stop embellishing it at the end. Honestly, I just couldn't stop myself!


I hope you like today's card and are inspired to create something of your own. If you haven't already, please follow me on the right side bar, over on Facebook and now on YouTube! Drop me a line in the comments section below and let me know what you think!


Saturday, 10 February 2018

Floral Thoughts Series | Watercolour Birthday ft. Clearly Besotted "Fresh Flowers" and Zig Clean Color Real Brush Markers


Hi everyone, thank you for stopping by. I hope you're having a great day.

Today, I wanted to share a birthday card that I had created for my Grandmother. She loves florals, so I had no option but to choose Clearly Besotted. Their floral collection is like nothing I have ever seen before. The detailed designs lend a sense of realism, while still giving us all the space we need to colour using any medium we like.

She also loves watercolour, so I opted to use the Zig Clean Color Real Brush Markers as my medium for today.


To begin, I stamped this floral image from Clearly Besotted's "Fresh Flowers" with Antique Linen Distress Ink on Strathmore 140lb cold press watercolour paper. I chose to use Antique Linen for my stamping because I wanted to do a "no line" watercolour. Distress Inks will react with water and the lines will fade away when you apply the watercolour to an area. I suggest using the MISTI or another stamping tool because of the texture of the paper, you'll want to get a good impression.

I then used my Zig Clean Color Real Brush Markers, applying the colour only where I wanted the darkest areas to be then using clean water to pull the colour out towards the edges of each petal. It's important not to work in areas that are right next to each other so they don't bleed together.

Once the image was completely dry, I used my white gel pen to add highlights to the ends of the little stems (?) in the centre of each flower.

My greeting, from CTMH "Cursive Birthday" set is stamped with CTMH Gypsy pigment ink. I added a scattering of coordinating sequins across the panel and adhered the watercolour piece to a slightly larger piece of purple cardstock. Then I mounted the whole lot to the front of a standard A2 sized card base.

I hope you like today's card and are inspired to create something of your own. If you haven't already, please follow me on the right side bar or over on Facebook, so you don't miss any future posts. Drop me a line in the comments section below and let me know what you think.

Tuesday, 30 January 2018

Mixing Mediums | Happy Birthday ft. Clearly Besotted "Sunshine & Smiles"


Hi everyone, thank you for stopping by. I hope you're having a great day.

By now, it should be no surprise that I love to colour. I have a bunch of different mediums over on my Product Review page and I would encourage you to try as many as possible. Having options means you can do whatever you're in the mood for; and that's a wonderful feeling.


To begin, I stamped this flower (I'm not sure what it is) from Clearly Besotted's "Sunshine & Smiles" set with Antique Linen Distress Ink on Strathmore 140lb cold press watercolour paper. I chose to use this Distress ink because I absolutely love the look of no-line watercolouring, and the Antique Linen is perfect for that.

I then used a mix of Distress inks and my Zig Clean Color Real Brush Markers to colour the image in. With both mediums I used a small #2 round watercolour paint brush with clean water to get the colours moving. You can certainly use a water brush, but I prefer the control I get with a regular paint brush.

Once the panel was completely dry, I stamped the greeting from CTMH "Cursive Birthday" set with Goldenrod Pigment ink by CTMH. Because of the texture of the paper and the finicky nature of pigment ink, I stamped this with the MISTI.

I then adhered a panel to a piece of coordinating cardstock that I had in my stash and mounted the whole lot to the front of a standard A2 sized card base.

To finish off the card, I adhered a scattering of yellow sequins across the panel. Typically, I would have used my glitter pens over the petals, but I didn't want the ink to reactivate with the moisture.

I hope you like today's card and are inspired to create something of your own. If you haven't already, please follow me on the right side bar or over on Facebook, so you don't miss any future posts. Drop me a line in the comments section below and let me know what you think.

Monday, 15 January 2018

Monochrome Monday Series | ft. Stampin' Up "Birthday Blooms"


Hi everyone, thank you for stopping by. I hope you're having a great day.

So maybe it isn't a true monochrome because of the green, but then does gray really count as a colour? I'm counting it. This one is pretty straightforward, so I'll fill in with a little bit of an update.

If you've been reading over the past couple weeks, you'll know that things have not been awesome. My impression as it stands is that things are getting better. But then I thought things were getting better before and boy was I wrong.

It's a slow and incredibly hard road right now and honestly I have no idea what will happen at the end of it. There are still moments where everything is raw and painful but they're more manageable, they don't hurt less and it's always hovering right at the back of my mind, every now and then they'll resurface and it's hard to breathe.

Card making and art has been a fantastic distraction so at least I'm not running out of things to blog. I would like to thank everyone who has been reading along and all the private well wishes you've sent. They mean the world to me.


To begin, I stamped the large blossom from Stampin' Up "Birthday Blooms" with Memento Tuxedo Black ink on 110lb Copic-friendly cardstock. I wanted to go incredibly pale with this one, so I stuck with the lightest of the cool grays and only a touch of green.

I adhered the panel to a slightly larger piece of grey cardstock and then mounted the whole lot to the front of a standard A2 sized card base.

To finish off the card I used some Glossy Accents by Ranger to the centre of the flower and some iridescent sequins across the panel.

I hope you like today's card and are inspired to create something of your own. If you haven't already, please follow me on the right side bar or over on Facebook, so you don't miss any future posts. Drop me a line in the comments section below and let me know what you think.

Friday, 29 December 2017

Floral Thoughts Series | Cheer Up ft Clearly Besotted "Sunshine & Smiles"


Hi everyone, thank you for stopping by. I hope you're having a great day.

Now that Christmas is over, and we've had our white winter wonderland, I'm pretty done with winter. I'm done with the snow and the cold and the biting wind. If you look outside it doesn't look that bad, it looks crisp and clean - then you open the door and you're blasted with sub-zero temperatures that just make you want to curl up in bed with hot tea and a book.

In the hopes of spreading some warmth, today I have a bright card that I'm hoping will cheer us all up as we trudge through yet another week of temperatures in the -25C (-13F) range and snow halfway to our knees.


To begin, I prepped a piece of Strathmore 140lb cold press watercolour paper with my powder tool and stamped the sunflower (or maybe a daisy) image from Clearly Besotted's "Sunshine & Smiles" set with VersaMark ink and heat embossed it with detail white embossing powder.

I used the Zig Clean Color Real Brush markers to add colour to the image; starting where I wanted my darkest shadows to be, then using my water brush to pull the colour out towards the ends of the petals and the leaves.

Working in relatively large sections, I wet the paper around the image then dropped in colour, pulling it to the edges of the paper to create a soft blue background.

Once the panel was completely dry, I stamped the greeting from the same set using CTMH Archival ink. I chose archival ink as it is waterproof and won't run if the paper is still a bit damp. If I were a patient person, I probably would have done the greeting in a mid-grey or even an ochre. But I don't have those in archival ink.

I used super strong two-way tape to adhered the panel to the front of a standard A2 sized card base. Then, to finish off the card, I added a scattering of yellow sequins across the piece.

I hope you like today's card and are inspired to create something of your own. If you haven't already, please follow me on the right side bar or over on Facebook, so you don't miss any future posts. Drop me a line in the comments section below and let me know what you think.

This card is for:

Simon Says Stamp Wednesday Challenge
Anything Goes

Wednesday, 29 November 2017

Inlaid Anniversary | ft. Stampin' Up "Rose Wonder" Dies


Hi everyone, thank you for stopping by. I hope you're having a great day.

Today I thought I would share a super fun technique where you use both the positive and the negative space of the die cuts to create a beautiful inlay design. I chose this die set because of all the pieces to work with, it's very much like a puzzle and I found it to be quite soothing to put together.

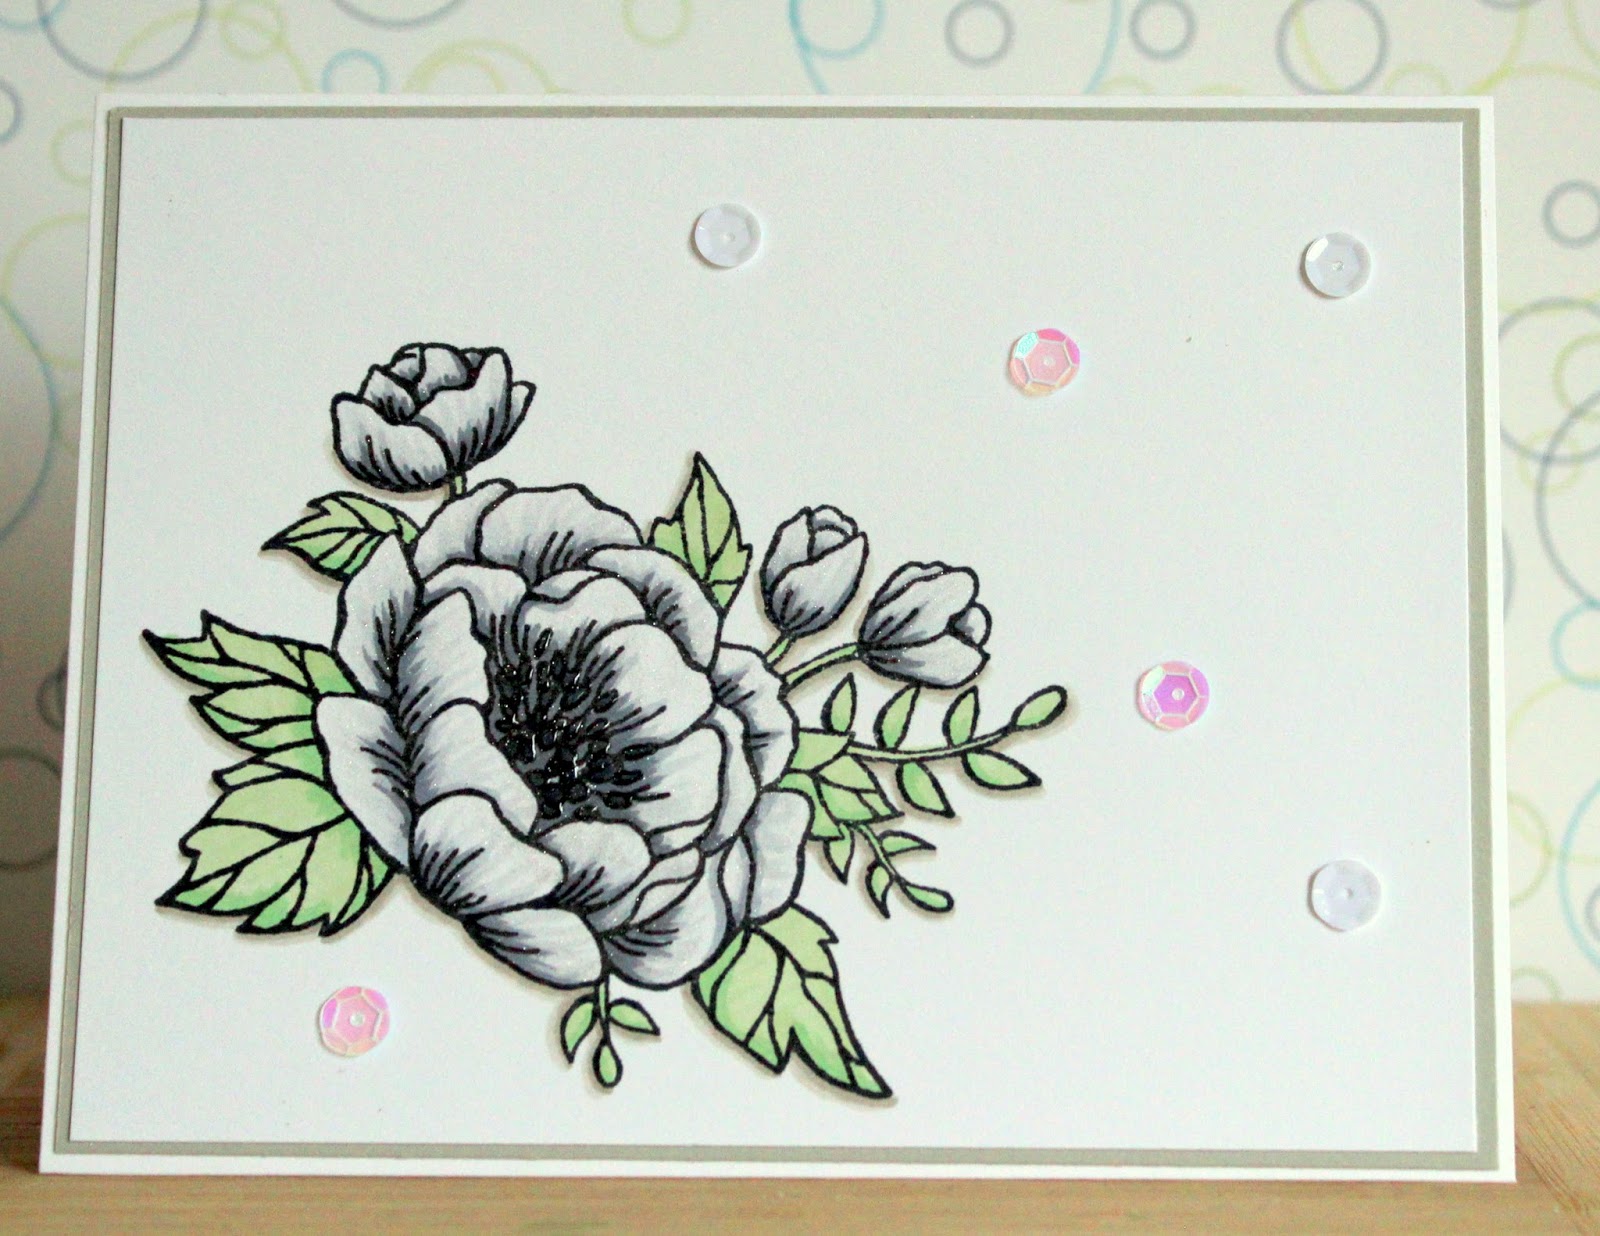
While I created this card with Anniversary in mind, it can easily be used as a shower card, a birthday card, a love card; and it doesn't have to be glitter paper, but really who doesn't want a card that sparkles like crazy in the light??


To begin, I used the large rose die cut from Stampin' Up's "Rose Wonder" set and die cut the flower from three different pieces of glitter cardstock.

I first cut down my panel from the medium pink then die cut the rose to get my base and I adhered the positive panel to a piece of cardstock that was cut down to be the same size.

I then cut the flower again from the darkest piece of glitter cardstock to get my outline. Finally I cut the flower from my lightest piece of glitter cardstock to get all the little pieces to inlay. If you have a package of Stick-It, this would be the time to use it. I did not have any so I went old school and used glue.

Much like a puzzle, I found it most efficient to work with the pieces that were obvious first, then made my way down through the smaller pieces. If you are lucky enough to have the paper stick in your die, it is even easier. I was not so lucky.

Because I didn't have Stick-It at the time, I covered my hidden background panel with wide two-way tape and worked slowly and carefully. The tape is quite strong so once it's down, it's down.

I prepped a strip of vellum with my powder tool and heat embossed the greeting from CTMH "Finding the Words" with white embossing powder and wrapped it around my panel to hide all of the adhesive.

I then mounted the completed panel to the front of a standard A2 sized card base. To finish off the card (because three types of glitter paper just doesn't sparkle enough) I adhered a few sequins across the panel using Aleene's Glass and Bead Adhesive.

Also, because I created this piece from three different card stocks, I can ultimately create three different cards! YAY!!

I hope you like today's card and are inspired to create something of your own. If you haven't already, please follow me on the right side bar or over on Facebook, so you don't miss any future posts. Drop me a line in the comments section below and let me know what you think.

Thursday, 7 September 2017

Hello Halloween Series | Clearly Besotted "It's Good to be Bad"


Hi everyone, thank you for stopping by. I hope you are having a great day.

Though it may seem early, and the weather is still very warm (where I am, it's been a crazy hot summer. Like gross hot) I thought I would kick off my Halloween Series this year a bit early, because really, it's never too early for Halloween! It's like the perfect holiday. The warm, cozy smells, and the crisp air, the coloured leaves, the monsters peeking out of their summertime hiding places. It's just a wonderful time of year.


To begin, I stamped the cauldron from Clearly Besotted's "It's Good to be Bad" stamp set in Memento Tuxedo Black ink on 110lb Copic-friendly cardstock. I then masked that off and stamped the greeting and the old witch also masking her off.

I then took some Twisted Citron Distress ink and sponged a halo around the images. Once that was dry, I removed the masks and coloured the images in with Copic markers. I wanted everything to be black, but not the same black.

 I was able to use all of my different grays for this one. I used the cool grays for her skin, hair and the cauldron; warm grays for the shadows so it didn't look like they were just floating in the middle of nothing, and my neutral grays for her cloak.

I coloured the ooze with a single orange and then used Glossy Accents by Ranger over top to give it a liquid look. I had to get some sparkle so I used my Clear Wink of Stella pen over the metal of the cauldron.

I mounted the panel on a piece of coordinating orange cardstock and adhered it all to the front of a standard A2 sized card base. Finally, I added a scattering of purple sequins just to make sure that all of the Halloween colours were there!

I hope you like today's card and are inspired to create something of your own. If you haven't already, please follow me over on the right side bar. You can also follow me over on Facebook. Toss me a line in the comments section below and let me know what you think.

This card is for:
Addicted to Stamps and More

Crafting from the Heart
Crafting from the Heart Badge


Thursday, 31 August 2017

Berry Great Birthday | ft. Clearly Besotted "Feeling Fruity"


Hi everyone, thank you for stopping by. I hope you are having a great day!

When I got my hands on this stamp set, I couldn't wait to use it. I had to use all the images!

ALL. OF. THEM!!!

Well, except one. I needed a space for the greeting. LOL, my choice for exclusion was based on colour balance, I wanted your eye to roam around the card, and if I had used the blackberry, I thought it would pull the eye too much and leave the card out of balance. I guess I could have coloured him in as a raspberry, but that didn't even occur to me until afterwards. Probably because I like blackberries better.


To begin, I lined up eight of the nine adorable little mice from Clearly Besotted's "Feeling Fruity" in my MISTI - I wanted to make sure they were all straight and I didn't want to risk them not getting a good impression. I stamped them with Memento Tuxedo Black ink on 110lb Copic-friendly cardstock.

I then coloured all of the images with Copic markers. I used some very light warm grey markers to create a soft shadow under each of images. I didn't want them to appear to be floating in the middle of nothing.

I then used my clear Wink of Stella to add a bit of shimmer to all of the fruity parts. The greeting is stamped from Clearly Besotted's "Go Wild" and the word "berry" from "Feeling Fruity", also in Memento ink.

I absolutely love the consistency Clearly Besotted uses for their fonts. Looking at this, no one would ever know that they didn't come from the same set. It adds a whole lot of versatility to the stamp sets when you can pick and choose your sentiment from everything you've got. So a big THANK YOU to Clearly Besotted for that!

I adhered my fruity panel to a piece of red cardstock and then mounted the whole lot on to a standard A2 sized card base.

To finish off the card, I added a few shimmering sequins. If I were to redo this card, I think I would have put the sequins around the greeting in the middle instead of between the little mice.

I hope you like today's card and are inspired to create something of your own. If you haven't already, please follow me over on the right side bar. If you are viewing this via mobile device, please scroll to the bottom and click "View web version" first. You can also follow me over on Facebook. Toss me a line in the comments section below and let me know what you think!

This card is for:
Simon Says Stamp Wednesday Challenge

Friday, 28 July 2017

Late for Mother's Day | ft. Wplus9 "Beautiful Bouquets: Dahlias"


Hi everyone, thank you for stopping by. I hope you are having a great day.

As I mentioned in a previous post, I was going through a lull when Mother's day and Father's day rolled around, so today I have a card that I had given to my mom for Mother's day way back in May. Seems so long ago, now.


To begin, I stamped the image from Wplus9 using Memento Tuxedo Black ink on 110lb Copic-friendly cardstock. I turned the panel around and then stamped it again. I wasn't concerned about the overlap because it was going to be covered by the cross piece.

I then coloured the image using Copic markers. I wanted something very delicate, so I started at the base of each petal with a very light pink, then pulled it up with an even lighter shade. While it looks like the entire petal is coloured, the ends are actually left completely white, this lends a softness to each petal. I used very light greens for the leaves.

For the cross piece, I stamped the letters using CTMH's "Framework Alphabet" and used the same pinks to create an ombre look. I matted the cross piece with some gold glitter paper and adhered that directly on to the main panel. I had considered popping this up on foam tape, but in the end I decided to just have it flush against the panel.

Finally, I added a scattering of iridescent sequins and adhered the panel to a standard A2 sized card base.

I hope you like today's card and are inspired to create something of your own. If you haven't all ready, please follow me over on the right sidebar. If you are viewing this via mobile device, scroll to the bottom and tap "View Web Version" first. You can also follow me over on Facebook. Toss me a line in the comments section below and let me know what you think.

Sunday, 9 July 2017

Watercolour Dreams | ft. Lawn Fawn's "Dream"


Hi everyone, thank you for stopping by. I hope you are having a great day.

Today's card came about while I was digging through my stash looking for inspiration. Isn't that the way of it? There's always something at the bottom of the stash that you haven't used in a while that just suddenly strikes you.

Going with the "Dream" theme of the stamp set, I wanted a very soft piece that was like the dream itself.


To begin, I prepped a piece of 140lb watercolour paper with my powder tool, and stamped the feather images from Lawn Fawn's "Dream" stamp set using VersaMark ink and heat embossing with detail white powder.

I then created an whimsical pink background using Distress Inks - Spun Sugar, Tattered Rose and Worn Lipstick. For the feathers, I wet the paper first then dropped in colour from Tumbled Glass and Salty Ocean.

I stamped the greeting with CTMH Archival ink using the MISTI. I love the MISTI for stamping on watercolour paper because of the texture. If it doesn't stamp cleanly the first time, just ink it up and stamp again.

To finish it off, I added a few sequins across the piece and adhered them using Aleene's Glass and Bead Adhesive. Once everything was dry I mounted the panel on a standard A2 sized card base.

I hope you like today's card and are inspired to create something of your own. Don't forget to follow me over on the right sidebar so you don't miss out on any future posts. Toss me a line in the comments section below and let me know what you think.

Friday, 15 January 2016

Delicate Birthday in Purples


Hi everyone, thank you so much for stopping by. I hope you are all having a great day.

Today's card was made by request for my Mother-in-law, who has been a wonderful source of encouragement in my card making journey. Her support and that of my friends and family is something that I can't express enough gratitude for.


For the flower, I took a couple colours of distress markers and coloured directly on the stamp, then I stamped it down, shifted the image and stamped it again. I sponged the background using a very light hand with antique linen. The greeting was gold embossed and die cut then raised up with foam tape. I added 1/4" satin ribbon and 6mm orchid sequins as accents. The matte is a deep purple to complement the other shades within the card.

This card is for the Time Out Challenge #47. I only recently stumbled across this challenge while looking at some of the beautiful cards posted in an MFT challenge. The artists behind these cards are so incredibly talented and I feel so honoured to have my cards featured next to theirs.

Grab Our Badge!

Thank you again for stopping by, I hope you all have a wonderfully crafty day.

Monday, 4 January 2016

Stinkin' Cute Shaker


Okay, so this doesn't really count as a card, but it's so "stinkin' cute" I just couldn't resist.

Oh, right and WELCOME TO VALENTINE'S DAY 2016 SERIES!

I created this with the Ready, Set, Snow die cuts from Lawn Fawn and the Stinkin' Cute skunk. I will warn you now; I love this little guy. I promise you can expect to see him in many future posts. 

I used distress inks to colour the background as well as the shaker frame and I popped up the front on a piece of fun foam that I die cut. I'm going to have to play around with the glue because this did not stick together as well as I would have hoped. Strange that it never happened on any of my other shakers, just this one. 


Copic coloured (adorable) skunk in heart sequin shaker with heat embossed greeting. 

Tuesday, 1 December 2015

Winter and Holiday Card Series 2015 - Card 20


I have another two-way shaker today, this one featuring snowmen. I loved this card so much I made three variations of it in different Christmas colour themes. 

The first two also have snowflakes stamped directly onto the acetate in white StazOn ink. StazOn is the ideal ink for stamping on acetate as it will dry and not smear. Dye and pigment inks will not work because they are unable to absorb into the plastic as they would with paper. The trouble (I find) with the StazOn white ink is that the pad needs to be refilled prior to each use. For that reason I tend to avoid it, however I feel it was a little extra something that this card benefited from.


Two-way green and red shaker with coordinating snowmen, accent ribbon and embossed greeting.


Here is the same card in red and gold.


And again in blue and silver 

Winter and Holiday Card Series 2015 - Card 19


After weeks of making blue and silver themed snowflake cards, it was really nice to just sit and play. I got this stamp set last year, but never really had an opportunity to use it.

While going through my stash, I came across it and just had to open it up. I knew I wanted to create banners with the little guys wishing Happy Holidays, it quickly came together, somehow it's always a quick thing when the focus and the greeting are the same.

The tone on tone background was made with an "ugly sweater" boarder stamp. The longer the card sat, the more the ink faded into the paper creating a very subtle background paper.


Tone on tone "ugly sweater" background with raised die cut gingerbread man banners on gold thread with gold embossed greeting and 4mm sequin accents.