Showing posts with label Embossing Paste. Show all posts

Thursday, 5 April 2018

Alcohol Ink Window with Embossed Butterflies | ft. Simon Says Stamp April 2018 Card Kit


Hi everyone, thank you for stopping by. I hope you're having a great day.

So this is the second post/video for today because I really just couldn't wait. I had planned on posting this tomorrow, but that was just soooo far away and I'm really excited about it.


I recommend watching in HD over on YouTube!

There are a couple of new things that I've never before in this card. First off, I created an alcohol ink window for the front of the card, then second I used the Mother of Pearl Structure Gel by Daler Rowney on a second piece of acetate. I had no idea if either of these things would work, but I'm sure glad I turned the camera on just in case. I'm beyond happy about how this card turned out.

Check out the video above to see how this card was put together!


The structure gel dried a little more transparent than I had anticipated, but it still turned out super pretty!


I did not do anything on the inside of this card because I didn't even know what type of card it was going to be. I'm sure when the time comes I'll be inspired.

I hope you like today's card (and video) and are inspired to create something of your own. If you haven't already, please follow me on the right side bar, over on Facebook and on YouTube! Drop me a line in the comments section below and let me know what you think.

Friday, 12 January 2018

Hello Baby Girl | ft. Clearly Besotted "Wild Thing"


Hi everyone, thank you for stopping by. I hope you're having a great day.

I was going through old files just cleaning out old stuff that will never make it here, and came across this one. I had made an entire set of these a couple years back and somehow it never ended up being posted. So today I'm going to share this super sweet baby card - also the closest I have have ever come to "mixed media".


To begin, I stamped the giraffe from Clearly Besotted's "Wild Thing" with Memento Tuxedo Black ink on 110lb Copic-friendly cardstock and coloured her in with Copic markers. I fussy cut her out and popped her up on some foam tape and set her aside.

To create the background, I mixed some Victorian Velvet Distress ink with some homemade embossing paste (DIY post coming soon), using a palette knife to work the paste through a dotted stencil on the left side of my panel.

Once that was completely dry, I adhered the scripty hello from Lawn Fawn and stamped the "baby" from Lawn Fawn's "Critters Down Under" set with Memento Ink.

I had some leafy die cuts from another project and arranged them over the dry embossing paste. Finally I mounted my giraffe over top.

I hope you like today's card and are inspired to create something of your own. If you haven't already, please follow me on the right side bar or over on Facebook, so you don't miss any future posts. Drop me a line in the comments section below and let me know what you think.

Thursday, 16 November 2017

Happy Holidays Series | Foxy Winter ft. Lawn Fawn "Into the Woods"


Hi everyone, thank you for stopping by. I hope you're having a great day.

I've mentioned previously that it was Lawn Fawn that started me out making cards. Not directly, of course, I'm sure they have no idea who I am. But it was a tiny fox on Pinterest and that was the beginning for me.

This little fox was the start of an amazing journey into paper-crafting and it has boomed for me since then. Lawn Fawn remains my number one stash item, and you may have noticed from the cards in this year's Holiday Series that they are generally my first choice when it comes to crafting.

And we all have this sweet little fox to thank.


To begin, I stamped the fox from Lawn Fawn's "Into the Woods" stamp set with Memento Tuxedo Black ink on 110lb Copic-friendly cardstock. I then masked him off and stamped the wood log using CTMH's Saddle ink.

I masked off the log and used Broken China Distress ink to create a halo around him. I then mixed Mother of Pearl Structure Paste with Tumbled Glass Distress ink to create a shimmering soft blue. I laid down my snowflake stencil by Hot Off the Press and put my paste through that.

Any time you are using embossing paste always be sure to clean your tools quickly. I use warm soapy water and a stiff nail brush to ensure I get it all out of the stencil, then hang the stencil to dry.

I removed the masks and coloured my fox with Copic markers. Once the structure paste had dried a bit, I prepped the top corner with my powder tool and stamped the greeting from CTMH's "Sending Smiles" with VersaMark embossing ink and heat embossed with silver powder.

I set the panel aside to dry completely and sponged Broken China Distress Oxide Ink around the edges of my standard A2 sized card base. Once the ink had dried I adhered the panel to the front.

I hope you like today's card and are inspired to create something of your own. If you haven't already, please follow me on the right side bar or over on Facebook, so you don't miss any future posts. Drop me a line in the comments section below and let me know what you think.

This card is for:
Lawn Fawnatics Challange

Simon Says Stamp Wednesday Challenge

2 Crafty Critter Crazies

Merry Monday Christmas Challenge
Copy our badge for your blog.

Wednesday, 18 October 2017

Floral Thoughts Series | ft. Prismacolor Watercolour Pencils


Hi everyone, thank you for stopping by. I hope you're having a great day.

Before I jump into Christmas, I thought I would share a card that has been sitting around my craft room for a while. We're descending rapidly into deep fall, yesterday it was t-shirt weather, today I sent my kids off to school in their winter jackets. That's life on the prairies. I'm sure tomorrow will be nice again, but today I wanted to extend the feeling of summer.


To begin, I stamped this floral image from Hero Arts (I don't remember the name of the stamp) on to 110lb white cardstock using CTMH Archival ink. I then used my Prismacolor watercolour pencils to shade in the areas where I wanted the most shadows and used clean water to pull the colour out.

When using water on regular cardstock - the trick is to make sure it is dry before adding more water. Luckily these pencils are fantastic for laying down layers and they blend so beautifully. If too much water is applied the paper will become gummy and your project will be ruined.

While that was drying I used some shimmering embossing paste through a stencil to create my background panel.

Once both panels were completely dry, I cut the floral image in half and used some super sticky two-way tape to adhere it to the embossed panel. I mounted those to a piece of silver shimmering cardstock from Recollections, leaving only the tiniest border and tied some yellow twine around them.

I then adhered those to the front of a standard A2 sized card base, and to finish it off I added a few enamel dots across the front.

I hope you like today's card and are inspired to create something of your own. If you haven't already, please follow me on the right side bar or over on Facebook, so you don't miss out on any future posts. Drop me a line in the comments section below and let me know what you think.

Sunday, 8 October 2017

Product Review Series | Tonic Nuvo Embellishment Mousse


Hi everyone, thank you for stopping by. I hope you're having a great day.

I wasn't originally sure if today's review was going to be today's review. I try to mix it up and keep you all on your toes, and last week I reviewed the Daler Rowney Medium Texture Paste, and the week before that was the Mother of Pearl Structure Gel, so I was a little hesitant to toss in another paste - I mean how much paste can we all need?

Apparently I need a whole lot of it - because I have a few others in my craft room as well as this one and the ones that have already been reviewed. But I promise I'll do something different before I pull out any of those.

For the purposes of this review - I'm going to be referring to this as an embossing/texture paste because it can be used as such. However, that is not entirely accurate. This product can be used in more ways and doesn't really deserve to be lumped in with other pastes.

For my examples I will be using a 65lb dark green cardstock as well as 110lb white cardstock.


There are a couple things that make this different than the other embossing/texture pastes that I have seen/used:

  • 24 amazing colours - up until now we've been mixing our own
  • Relatively inexpensive 
  • Thicker than other pastes - which allows for it to be used in other ways
  • Smooth, silky texture


I have a beautiful frosted blue - which is why I'm using it on so many of my Christmas designs, when I start posting them, I'll be sure to link back here so you can see how it turns out.

  • The product is incredibly thick - much like a mousse (imagine that)
  • It is water based and if the product gets too dry a spritz (just one!) water can reactivate the product

I
This product can be applied in a variety of ways - making it more versatile than other pastes:

  • I use the round blending foams from Tim Holtz to sponge the product on
  • It can be brushed on using a firm brush
  • It can be spread - alone or through a stencil
  • It can be watered down and spritzed or painted on a project
As this product will dry out, I keep my blending sponge in a small sealed craft baggy adhered to the bottom. That way I don't have to throw it out each time or wash it at the end of each project. (I also store my blending sponges for the full sized Distress ink pads this way as well.)


In the example above I have used the blending foam to just add it into place (top) and then I used the edge of a scalloped circle to show how it works over the edge of a stencil. I chose to use this dark green paper to show how opaque this product is. My mousse is an incredibly light blue and it can cover the dark green of this paper with ease.


In this example, I wanted to show just how light of a shade it was when used on a white cardstock. 

Couple of Observations:
  • Incredibly metallic
  • Dries super fast - so if you are using a stencil make sure you can wipe it or wash it very quickly
  • Some warping during application but it dries flat
  • Blends very smooth when applied using a sponge
  • Low odor
  • Retains paper texture (seen in example with green paper) when applied in a thin layer
  • Doesn't seem to be colour names on the packaging 
Overall, this is an incredible product. Again, it is not something that will replace other pastes in my collection but it is an amazing addition. The cost vs. quality is fantastic. I love that it comes in so many colours and sooner or later I'll definitely be getting more. I love the metallic shine; very much a step up from other metallic pastes that I've seen.

So, if you are looking to try something new or are looking for a delightful metallic shine for your projects I'm definitely going to point you in this direction. I highly recommend this to anyone looking for something to add a little flare - because it works in so many ways this is a product that can be right for anyone.


I hope you enjoyed today's review, if you haven't already, please follow me on the right side bar or over on Facebook. If you have any questions about this product or a suggestion for a future review, please drop me a line in the comments section below. I would love to hear hear from you.

*disclaimer: I am not sent products to review nor am I paid to review them. I review the products that I use, that I find interesting, and that I have purchased with my own money. I am given no incentive or reward to create reviews, all reviews are based on my personal experience and are my opinions only.

Sunday, 1 October 2017

Product Review Series | Daler Rowney Medium Texture Paste


Hi everyone, thank you for stopping by. I hope you're having a great day.

So last week, I reviewed the Mother of Pearl Structure Gel by Daler Rowney. I liked it so much that I was able to get my hands on the Medium Texture Paste. In many ways these products work the same way.

Typically I work with 110lb Copic-friendly cardstock in white and a portion of this review will be on that paper, but because this paste is white the rest of the review will be on a piece of 65lb Recollections dark green cardstock.


Like the Mother of Pearl Structure gel we talked about last week, this tube is giant. 8.4 US fluid ounces of awesome. And for the same low price of $5.97!! I still can't believe it.

Pros:

  • Giant squeeze bottle
  • No worries about product drying out
  • No worries about dried product falling in and mixing with the good stuff
  • Clear Bottle - I can see how much is in there
Cons:

  • Can't put excess back in the tube the way you can with a jar
  • Seems that this only comes in white


This paste spreads like icing. It is amazingly smooth. I wasn't really expecting that because it looks a little cakey - almost like caulking in a tub (I don't know what that stuff is called), the stuff that painters use to fill in the holes in the walls. But it was incredibly smooth and it stayed exactly where I wanted it to.


For this paste, I mixed it with some Distress Ink to see how well it picked up the colour. I smooshed my mini pad of Carved Pumpkin on to my non-stick craft mat and mixed a bit together with my palette knife; as you can see in the picture above it picked up the colour beautifully. I have not yet tried to mix this with other mediums, but I suspect it will work just as nicely.

I generally only use my Distress inks for mixing whether it be the mini pads or directly from the reinkers depending on how concentrated I want the colour. However, when the texture paste is this inexpensive I certainly will not feel bad about experimenting with it.


Finally, I put this through a stencil. Whether coloured or not, this is typically the most common way for me to use texture paste/structure gel on a project. I feel that this product went through incredibly well, it kept the form and didn't slip under at all.

Couple of Observations:

  • Incredibly smooth to spread
  • Dries matte
  • Low odor
  • Super fast drying time - by the time I was done with the stencil example, the first smear test had already dried to the touch
  • Uncoloured product dries slightly transparent when spread thinly over darker cardstock
  • Very inexpensive
Overall, I am beyond pleased with this product. Once my other tubs of matte paste are gone, I won't be replacing them. I'll definitely be switching to this as my go-to for matte embossing paste. Even though I'm not able to return excess to the container, the cost for this is so low that a little waste is not something that will bother me at all.

I'm looking forward to seeing what else Daler Rowney has available that I can use in my work. I'm also very interested to see how well this paste mixes with other mediums. 


I hope you enjoyed today's review. If you haven't already, please follow me on the right side bar or over on Facebook. If you have any further questions about this product of a suggestion for a future review, please drop me a line in the comments section below. I would love to hear from you.

*disclaimer: I am not sent products to review, nor am I paid to review them. I review the products that I use, that I find interesting and that I buy with my own money. I receive no incentive or reward to compare or review products. All reviews are based on my experience with them and are my opinion only.

Sunday, 24 September 2017

Product Review Series | Daler Rowney Simply Acrylic Mother of Pearl Structure Paste


Hi everyone, thank you for stopping by. I hope you're having a great day.

It took a little while to put this one together, not because I had such a hard time with the product, but because in order for me to really show you the product, I had to use a black background, but when I actually use the product I'll be using it on white.

So for the purposes of today's review, the product will be tested on 65lb Recollections black cardstock. In the future when I use this product on an actual project it will most likely be on white.


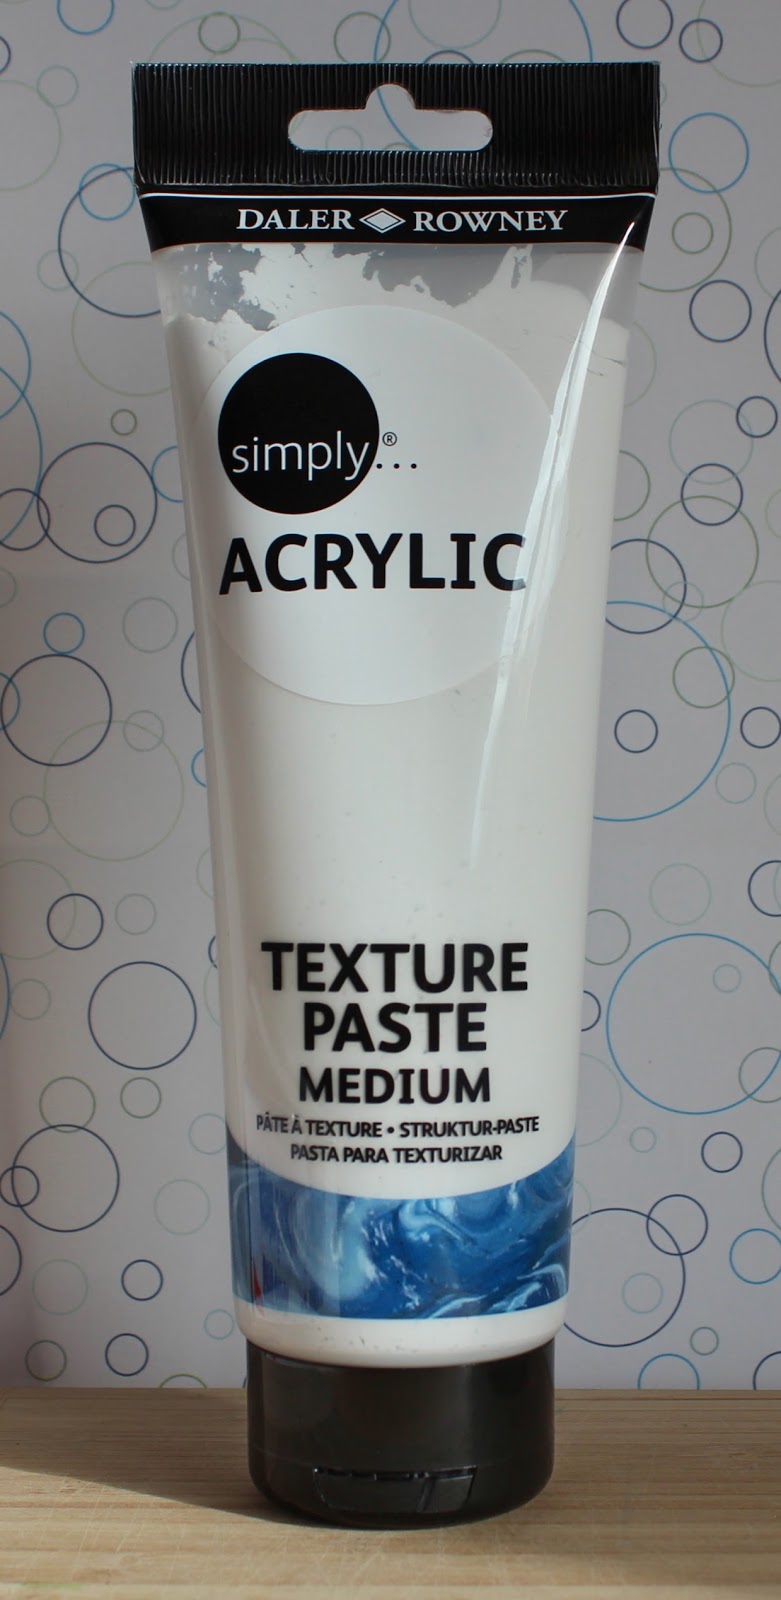
I'm going to just start out with saying, this bottle is giant. 8.4 US fl. oz, or 250ml. That's an insane amount of product to put in one tube. I got this at my local Wal-Mart. I paid $5.97!!! They were practically begging me to buy it.

I've never heard of the product before, but since I'm always on the look out for new and inexpensive things to use on my cards, I thought "Literally, the worst thing that happens here, is I lose $6.00." That's like skipping a latte, let's all be honest.

Firstly, the fact that this is in a squeezey bottle is just amazing!
Pros:

  • Not worried about drying out
  • No more dry product cracking and falling into the good stuff
  • No more scrambling to get the lid on between applications because we don't want our precious pastes to get hard and therefore crappy to use.

Cons:

  • Can't really put excess back in the tube - it's really a use it or lose it situation. 

This gel, is just that; it really reminds me of a gel or a hand lotion. It's smooth and creamy and spreads beautifully, and you don't have to wait until it dries to get that shine. It is amazing. 

As you can see in the picture above, I have used the back of my palette knife to spread just a bit across a black page. I originally tried it on the white - because I want to show you how I would normally use the product - but there just wasn't enough contrast. 

It didn't matter if my flash was on or off, the shine on this stuff is incredible.


I looooooove using embossing pastes through stencils. I love the look and the texture and the little something extra that it brings to a card.

This stuff did not fail me. Like all other embossing pastes - your results are going to depend on your stencil. For this review - I used an incredibly basic stencil. 

Couple of Observations:
  • Spreads like silk
  • This particular product is quite thin, so it may seep under a stencil edge if the stencil isn't secured or is very delicate - here is an example of this paste over a shimmering background (why I had to do this review with black) but also how the edges of the stencil are not as defined.
  • The product is a bit tacky when it seems dry. It wasn't until the next day that these little dots were completely dry.
  • Very low odor. YAY!
  • Clean up was the same as other embossing pastes - move fast, use warm water, a bit of gentle soap and an old toothbrush
Overall, I really like this product. Because of the Mother of Pearl finish, I didn't bother mixing this with colours as I typically would to coordinate with my project. I would use this for those times where I want something a bit transparent and incredibly shimmery. For the price, you certainly can't go wrong. Even if it is a bit different and you have to "waste" some product on practice runs, at this price, who even cares? I've paid nearly triple that price for half the product in a little jar that ended up drying out because the lid didn't have a good seal on it.

The only real downside that I have found using this product is the drying time. This isn't something you can just toss on a card or a project and work over in the next hour. It literally took overnight for me to feel confident that this stuff was fully dry and that was a thin stencil. Maybe if you find a background you really like, make a few of them at once and then use them later.

In the end, there is absolutely no loss when trying this product. Maybe you like it, maybe you don't. I'm not going to toss my other products in the trash because this is the be all and end all of structure gels, but once they are gone I'll certainly have less motivation to replace them. For me, this product is what I'm looking for in a shimmering gel. I'll just have to plan accordingly.

Also, They have a white medium texture paste - looks thicker and I cannot wait to try that one out! It's been sitting on my desk, calling my name. So maybe we'll see that one next week.


I hope you like today's review. If you haven't already, please follow me on the right side bar. You can also follow me over on Facebook. If you have any further questions about this product or have a suggestion for a future review, please toss me a line in the comments section below and let me know, I'd love to hear from you.

*disclaimer: I am not sent products to review, nor am I paid to review them. I review the products that I find interesting and that I have purchased with my own money, my hope is to provide you with information based on my experience. I am not given incentive, payment or reward. All reviews are based on my experience and are my opinion only.

Tuesday, 12 September 2017

Sparkling Wedding | ft. Daler Rowney Mother of Pearl Structure Gel


Hi everyone, thank you for stopping by. I hope you're having a great day.

Today I thought I would share another wedding card (lots lately, right?) that I created for a friend. She had like four weddings back to back. Not her own, obviously, but for friends.

Since it was a wedding card, and I don't really know the people I thought something a little more traditional would be appropriate instead of all the cutesy critters.


To begin, I prepped a piece of shimmering cardstock with my powder tool and heat embossed the banner piece and greeting using silver embossing powder. I then cut around that and popped it up on foam tape.

I then used the damask stencil over another piece of shimmering paper with the Mother of Pearl Structure Gel by Daler Rowney. I've used this gel a couple times before, and I promise there will be a review. I then set the panel aside to dry and quickly washed up my tools.

Once the panel was dry, I adhered it to a piece of glitter cardstock and then wrapped a length of 1/8" satin ribbon around the top, and adhered the whole panel to a standard A2 sized card base.

I then used a length of 5/8" white satin ribbon to create a bow and placed that on the top. To finish off the card I added a scattering of iridescent sequins across the card.

I hope you like today's card and are inspired to create something of your own. If you haven't already, please follow me on the right side bar. You can also follow me over on Facebook. Toss me a line in the comments section below and let me know what you think.

Tuesday, 22 August 2017

Wedding Wishes | Stenciling with Shimmer Paste


Hi everyone, thank you for stopping by. I hope you are having a great day.

Today I thought I would share something other than a birthday card. It's been a crazy stretch for birthdays and and cute critters, and I thought I'd mix it up a bit. At the same time, I wanted to share the first look at a new (to me) product that I stumbled across. I'm pretty pleased with the results of this structure paste as this is an incredibly detailed stencil and definitely not the easiest test.


To begin, I cut down a piece of 110lb cardstock and prepped it with my powder tool. I stamped the accent frame and the greeting from Stampin' Up's "Rose Wonder" in VersaMark and heat embossed it using ultra fine silver embossing powder.

I then masked the area off, and secured the panel to my non-stick craft mat, I then placed my Damask stencil over top and secured that in place using some painters tape. I wanted to create a tone on tone look with a bit of texture so I used my Mother of Pearl Simply Acrylic structure paste by Daler-Rowney and spread that evenly over the top. This is a new product for me and once I play with it a bit more I'll have a product review for you.

As with all structure and embossing pastes, it is very important that you clean your tools and stencils as soon as possible. While it will come off after it dries, it is far easier to do this while it is still fresh. I removed the stencil and mask and set the panel aside and cleaned up all the tools. I like to use warm water with some baby soap and a extra soft toothbrush to get into all the little nooks and crannies.

Once the panel was dry, I adhered it to a piece of silver glitter paper for a nice sparkling boarder. I then added a 1.8" satin ribbon to the left and a scattering of iridescent sequins. Finally I adhered the whole piece to a standard A2 sized card base.

I hope you like today's card and are inspired to create something of your own. If you haven't already, please follow me over on the right side bar so you don't miss any future posts. If you are viewing this via mobile device, scroll to the bottom and click "View web version" first, you can also follow me over on Facebook. Toss me a line in the comments section below and let me know what you think.


Friday, 9 September 2016

Flashback Friday | Hello Teacher


Hi everyone, thank you for stopping by. I hope you are having a great day.

I know I said I was all done the Back to School series, but I have just one more. I created this card some time ago, and had prepared to give it to my daughter's teacher last year, but then her teacher turned out to be a Mr. and not a Ms, so it didn't really work.

I held on to the card and was able to give it to her teacher this year and just wanted to include it because I love the techniques and it worked for this time of year. So today will be a #flashbackfriday card.

Is that a thing? Posting a card that was created a long time ago? If not, it is now!


The image is coloured with Copics and fussy cut out. I popped her up on foam tape and used glossy accents on her glasses to make them look like glasses.

The background is tinted embossing paste through a stencil. My daughter goes to a French Immersion school, so the greeting was appropriate.

I hope you like today's (last year's) card and are inspired to create something of your own.

Saturday, 4 June 2016

Hello Baby Boy | ft. Clearly Besotted "Wild Thing"


Hi everyone, thank you for stopping by. I hope you are having a great day.

While I have a bunch more cards lined up for my Floral Thoughts mini series, I thought I would take a little break and share a baby card I created using Clearly Besotted's Wild Thing stamp set.

This set is just too sweet for words, great sentiments and puny sayings, but what I love most are the adorable little critters. There are four animals in the set and each seems to have their own personality, which makes it great for any type of critter card you happen to be creating.

For this particular card, I chose to use the lion in blues for a baby boy.


To begin, I stamped the lion on Copic friendly paper using Memento Tuxedo Black ink. I then coloured him in with Copic markers and fussy cut him out.

For the background panel, I started by using embossing paste through a dot stencil and setting that aside to dry. I make my own embossing paste, and I'll have a post about that later, to get the colour I just add a touch of Distress reinker ink.

I used a leaf die to cut out two fronds from Bristol paper that I had sponged with Mowed Lawn Distress ink. And used the bird punch from Stampin' Up to punch the vellum leaves. The Hello die is from Lawn Fawn's scripty Hello.

Once everything was dry, I used Ranger Multi Medium Matte to place the different leaf pieces together and right down onto the panel. I used the same adhesive to adhere the Hello die cut. I popped the lion up on foam tape to make him stand out and to ensure that he stuck to all the different layers under him.

While it didn't pick up on the camera, I used glossy accents on his nose to make it shiny.

I hope you like today's card and are inspired to create something of your own.

This card is for:
Fusion Challenge: Something Blue

Friday, 6 November 2015

Winter and Holiday Card Series 2015 - Card 4


This card has a raised and embossed shimmery snowfall background with raised greeting focus. Sparkling "Joy" over silver embossed large snowflake, with silver accent strip and colour matching twine for added interest. The above in scarlet and below in blue.


Winter and Holiday Card Series 2015 - Card 2

I'm sure it is becoming very clear that I adore Snowflakes. They are featured on nearly all my winter/Christmas cards. There is something about their beauty and delicacy that appeals to me. Each one is unique just as people are.


Raised and embossed shimmering snowflakes add a perfect backdrop for a bold and sparkling Merry Christmas greeting. The above card has the greeting in deep red, below the greeting is in blue.